Academy 1/35 M4A2 Sherman
| KIT #: | 13203 |
| PRICE: | $39.00 |
| DECALS: | Guess so |
| REVIEWER: | Jack Bruno |
| NOTES: |
Bunch of aftermarket added |
| HISTORY |
 One night I was completely wired and could not sleep...........as
always, I get most of my inspiration from modeling web sites. I started
looking at one and saw this neat looking Pacific Sherman all decked out with
bells and lap dances. So, I had the Academy M4A2 Sherman with the Wading
Stacks (I built one before) and decided it was time to build another
.......but this time with more flare!!!!
One night I was completely wired and could not sleep...........as
always, I get most of my inspiration from modeling web sites. I started
looking at one and saw this neat looking Pacific Sherman all decked out with
bells and lap dances. So, I had the Academy M4A2 Sherman with the Wading
Stacks (I built one before) and decided it was time to build another
.......but this time with more flare!!!!| THE KIT |
No information provided.
| CONSTRUCTION |
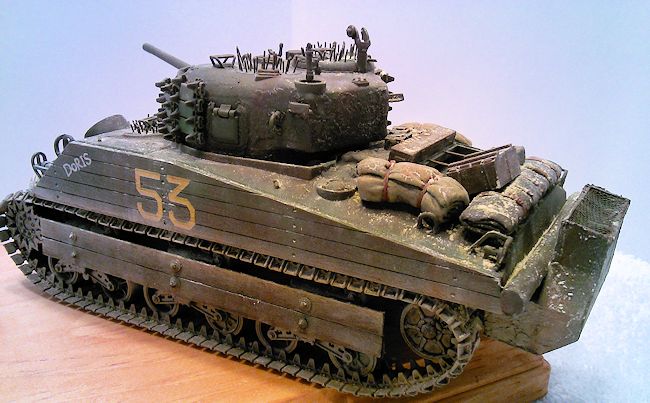 one in the morning while the movie, "Murphy's War" came on.......I
had started the suspension and soon after I had finished sanding the seams
off the road wheels, I was done for the night. The next day the bogie
stations were finished and mounting them to the hull was a snap. Now,
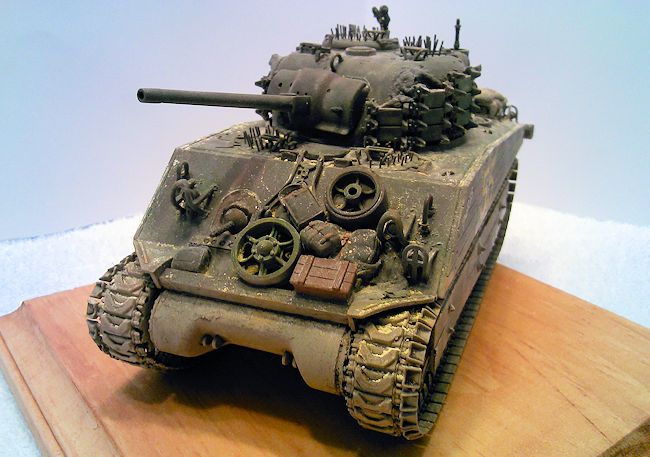
consult your pictures because the Academy kit does give you spoked or solid
road wheels......being the goof that I am I mixed them up. This was to be a
vehicle that did it's share of combat fighting and I wanted it to look like
it had a few trips to the depot! I've dated girls that took that trip but
that's another Internet nightmare...
one in the morning while the movie, "Murphy's War" came on.......I
had started the suspension and soon after I had finished sanding the seams
off the road wheels, I was done for the night. The next day the bogie
stations were finished and mounting them to the hull was a snap. Now,
consult your pictures because the Academy kit does give you spoked or solid
road wheels......being the goof that I am I mixed them up. This was to be a
vehicle that did it's share of combat fighting and I wanted it to look like
it had a few trips to the depot! I've dated girls that took that trip but
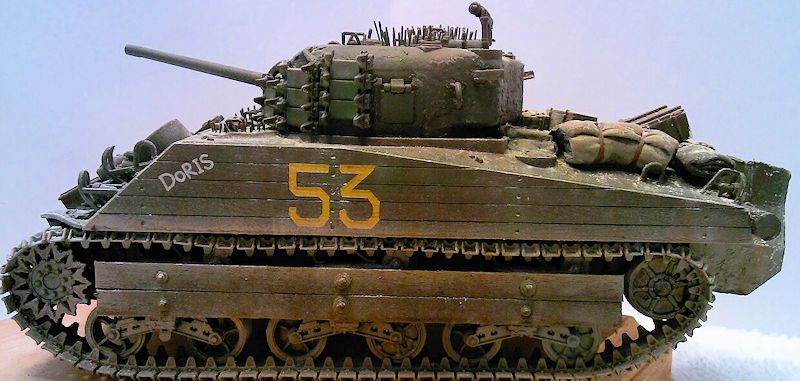
that's another Internet nightmare... Hull sides. Gotta love razor
saws!!! This really started to look somewhat evil and I decided to only
mount the Wading Stack mounts and not the whole thing. Added sprue weld
beads and netting were used here. The Turret was then build as per
instructions and the only deviation was I cut up DS Track from a Dragon
Sherman to be used for the welded on Track Armor for the turret. Be careful
when gluing this because if you go too low the track will bump right on the
hull.....so measure carefully. Extra casting was used with green putty
too. Then I cut up small gauge wire and super glued them into the pre cut
holes using a new sharp point tweezers. (actually, i stole it from the ex's
medicine chest, but it's still new, right???) After all was said and done,
off to the Paint Shop.
Hull sides. Gotta love razor
saws!!! This really started to look somewhat evil and I decided to only
mount the Wading Stack mounts and not the whole thing. Added sprue weld
beads and netting were used here. The Turret was then build as per
instructions and the only deviation was I cut up DS Track from a Dragon
Sherman to be used for the welded on Track Armor for the turret. Be careful
when gluing this because if you go too low the track will bump right on the
hull.....so measure carefully. Extra casting was used with green putty
too. Then I cut up small gauge wire and super glued them into the pre cut
holes using a new sharp point tweezers. (actually, i stole it from the ex's
medicine chest, but it's still new, right???) After all was said and done,
off to the Paint Shop.| COLORS & MARKINGS |
 here.....i did not like the decals but I had no other appropriate
US markings. They came off too light and off register, but it only added to
it's charm. After the decals dried I applied Future over them with a brush
and began to oil wash the tank. This is the point when all of your work
comes together........but your not done yet......The Oil wash was messed
with my brush until I got the desired look. Then some dry-brushing using a
few wide to lil wide brushed and some oil paint just to blend in. Mig
Pigments were added and when I thought enough was enough, I stopped. I did
sprinkle some MIG "sand" pigment for a little beach residue on the tank just
for color.
here.....i did not like the decals but I had no other appropriate
US markings. They came off too light and off register, but it only added to
it's charm. After the decals dried I applied Future over them with a brush
and began to oil wash the tank. This is the point when all of your work
comes together........but your not done yet......The Oil wash was messed
with my brush until I got the desired look. Then some dry-brushing using a
few wide to lil wide brushed and some oil paint just to blend in. Mig
Pigments were added and when I thought enough was enough, I stopped. I did
sprinkle some MIG "sand" pigment for a little beach residue on the tank just
for color.April 2014
If you would like your product reviewed fairly and fairly quickly, please contact the editor or see other details in the Note to Contributors.