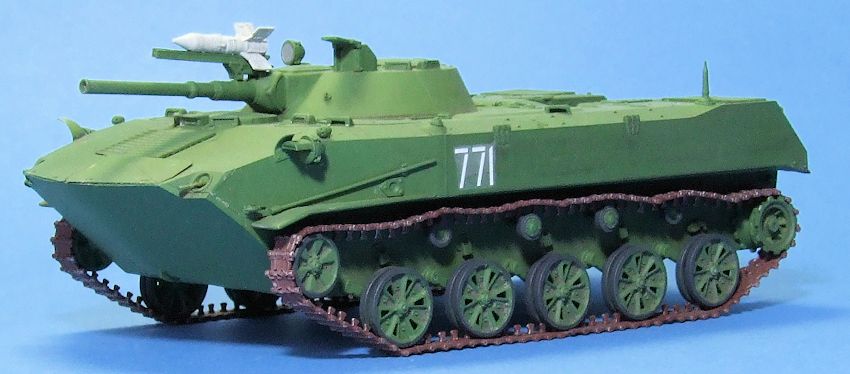
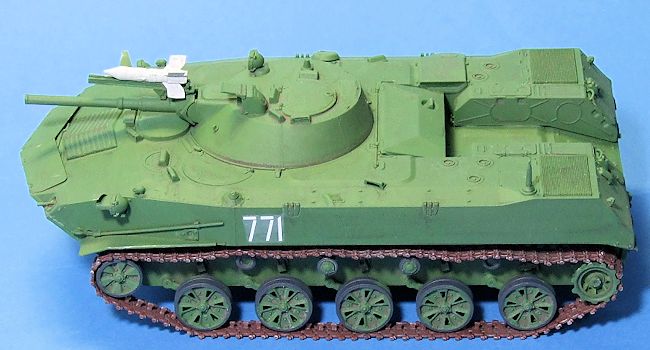
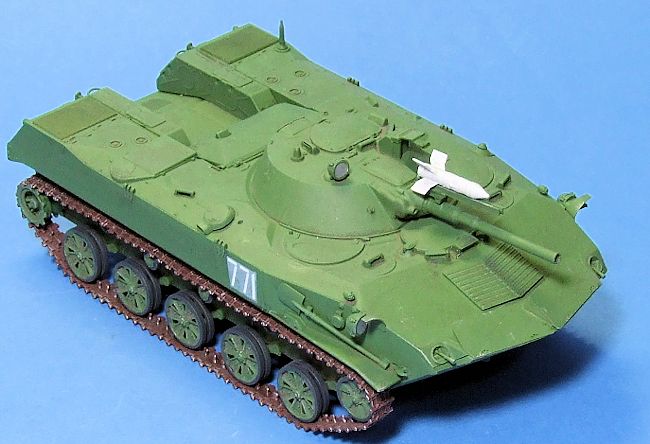
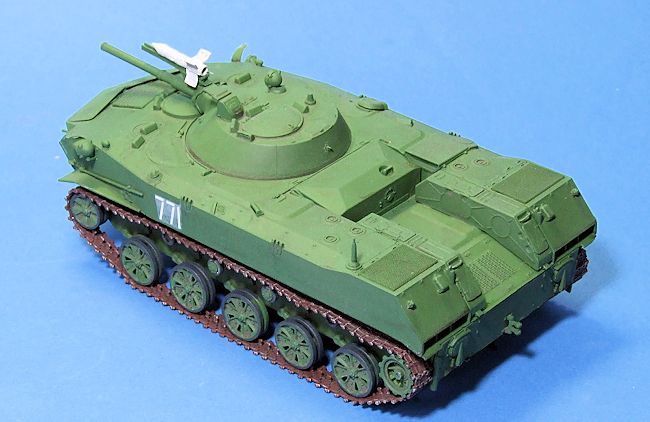
Panda 1/35 BMD-1
| KIT #: | PH 35004 |
| PRICE: | $25.99 SRP |
| DECALS: | One option |
| REVIEWER: | Dale Rannals |
| NOTES: | New tool kit |
| HISTORY |
The BMD-1 is a fast, lightly armored amphibious vehicle. It can be paradropped
from military cargo aircraft. Development of this armored vehicle commenced in
1965. It entered service with the Soviet airborne troops in 1969. At the time of
its introduction it was unique vehicle with many innovations.
First seen in 1973, the BMD-1 is a very lightly armored vehicle. It has a welded
aluminum armor hull. The hull is bulky to render the vehicle amphibious. Hull of
the vehicle is reinforced to withstand landings. It seems that front arc
provides protection against 12.7-mm rounds. All-round protection is against
small 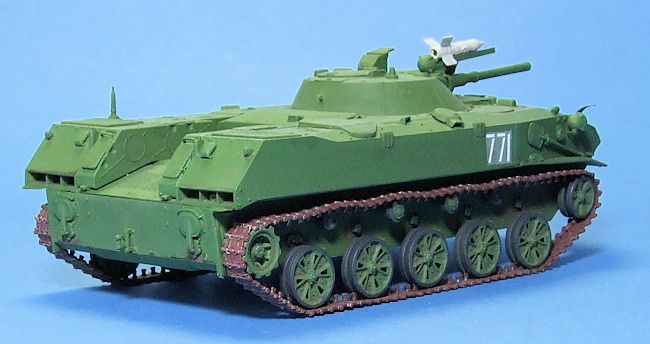 arms fire and artillery shell splinters. This ACV is fitted with automatic
fire suppression and NBC protection systems.
arms fire and artillery shell splinters. This ACV is fitted with automatic
fire suppression and NBC protection systems.
The BMD-1 is capable of supporting airborne troops during the early phases of
airborne operations. For this role the main emphasis is on direct fire support,
so the BMD-1 is fitted with the same weapons as used on the BMP-1 infantry
fighting vehicle in an essentially similar turret. A one-man turret is armed
with a magazine-fed 73-mm smoothbore gun. A semi-automatic loader was removed in
order to save weights so the gun is loaded manually by the gunner.
There is a coaxial 7.62-mm machine gun while two more 7.62-mm MGs are fixed for
firing from the front hull. A 30-mm automatic grenade launcher on a ground
mounting is also carried as standard. The 9M14M Malyutka (AT-3 Sagger) ATGW
launching rail was also provided on initial production vehicles.
| THE KIT |
The kit contains around 540 pieces and comes in two shades of green plastic
green plastic. Kind of strange, most of the sprues are one color, but there is a
sprue slightly lighter in color.
Track sprues (which contain a bit over 370 of the total parts count) are in a
tan color.
 Instructions are well done. A very nice three view full color drawing with
Grunze Sanyo color call-outs is included.
Decals are for four quite non-descript overall green vehicles.
Instructions are well done. A very nice three view full color drawing with
Grunze Sanyo color call-outs is included.
Decals are for four quite non-descript overall green vehicles.
The kit contains some incredibly small parts, a few so small that the sprue
attachment point (which is also very small) is actually little bigger than the
part itself.
This kit could easily be a weekend build.
Not parts intensive, simple and few decals, and one color overall.
It could be a weekend kit, but it isn't.
Enter: the tracks.
Panda
went for realism and molded individual track links, but also added in individual
track link guides to glue on.
This
throws an otherwise easy kit into the realms of "why on earth am I doing this?"
I can see the inclusion of these tracks for the accuracy-above-all-else
crowd, but for the rest of us mere mortals, throw in some link-and-length or
even rubber band tracks please.
Some Dragon DS style glue-able tracks would be great.
| CONSTRUCTION |
Construction started with me
staring at the tiny track links and even tinier track guides, wondering how
I was going to do this.
Hhhmmm.....
I moved those sprue to the back of the workbench and that thought to
 back of my mind.
I will deal
with that later.
The rest of
the kit went together well.
This kit reminds me of Bronco kits for the number of incredibly small parts,
though the nod must go to Bronco for fidelity of detail. While some of these
small parts found their way onto the kit, others went flying into space ....
lost forever ... while trying to put them on.
Still others remained attached to the sprue .... either due to being
out of sight on the finished kit, or just not worth the effort of trying.
My youngest son probably got tired of me calling him into the room to
"check out how small this part is!!"
Anyway, the major pieces of the hull and turret went together well
and without issues.
Soon it was
taking shape and I was focusing on the small details.
back of my mind.
I will deal
with that later.
The rest of
the kit went together well.
This kit reminds me of Bronco kits for the number of incredibly small parts,
though the nod must go to Bronco for fidelity of detail. While some of these
small parts found their way onto the kit, others went flying into space ....
lost forever ... while trying to put them on.
Still others remained attached to the sprue .... either due to being
out of sight on the finished kit, or just not worth the effort of trying.
My youngest son probably got tired of me calling him into the room to
"check out how small this part is!!"
Anyway, the major pieces of the hull and turret went together well
and without issues.
Soon it was
taking shape and I was focusing on the small details.
Attachment points for these small details are necessarily small, consisting of
little more than a shallow dimple, if anything at all.
Unfortunately, attachment points for some of the larger pieces are
similarly scarce.
The side lights,
parts fairly large for this kit, are basically just glued onto the side surface
of the hull.
At this point I started thinking about those tracks again.
I cut a few links and guides off the sprue to play around with them.
One thing I noticed is that the attachment point for these were extremely
small and cut very cleanly.
This is
a good thing as it meant very little cleanup of very small parts.
The other thing I noticed is I could barely see what I was doing with
these track guides.
Unlike a good
whiskey, these eyes aren't getting any better with age.
My little "helping hands" magnifying glass helped, but it was clumsy.
Definitely needed to find another way.
I thought about buying an Optivisor-type headset for a few years,
thinking it might help these situations out.
Well, it was time.
I soon
had one on the way.
 I put together and attached the road wheels and top rollers.
The parts fit here is rather poor.
There isn't any explanation as to why the top rollers are of
different lengths or their placement … it is up to you to figure things out.
The drive and idler sprockets I left off to facilitate assembling the
tracks.
These would be added to the
vehicle at the same time as the tracks.
I started the track assembly by separating the tracks from the sprue and
collecting them all in a small container.
Once the Optivisor arrived I did the same thing for the tiny track
guides, storing them in another container.
I spent the next, well, few months gluing guides onto links.
Once I finished this up I made an assembly jig from a small spare piece
of laminate wood flooring with some Popsicle sticks glued on.
This worked great in helping line things up.
Again, a few months were spent assembling track sections.
I made up sections of 10 links or so, then assembles the sections
together.
Once I got comfortable
with this, I started on the curved parts.
Tracks would be assembled and glued, then set aside for about 10 minutes.
That gives the glue time to set up but not fully harden.
I took the sections and wrapped them around the drive and idler sprockets
and left to dry.
I did the same
sort of thing to the top section of tracks.
A rather long (for this kit anyway) section was assembled and then laid
atop the top guide rollers.
I
inserted cotton swap tips between the tank body and the tracks to get the sag I
wanted.
Once dry it was removed.
Then the moment of truth came.
Time to assemble all the different sections and hopefully make it look
presentable, or at least passable. Amazingly, it all went together a lot
smoother than I had anticipated.
I put together and attached the road wheels and top rollers.
The parts fit here is rather poor.
There isn't any explanation as to why the top rollers are of
different lengths or their placement … it is up to you to figure things out.
The drive and idler sprockets I left off to facilitate assembling the
tracks.
These would be added to the
vehicle at the same time as the tracks.
I started the track assembly by separating the tracks from the sprue and
collecting them all in a small container.
Once the Optivisor arrived I did the same thing for the tiny track
guides, storing them in another container.
I spent the next, well, few months gluing guides onto links.
Once I finished this up I made an assembly jig from a small spare piece
of laminate wood flooring with some Popsicle sticks glued on.
This worked great in helping line things up.
Again, a few months were spent assembling track sections.
I made up sections of 10 links or so, then assembles the sections
together.
Once I got comfortable
with this, I started on the curved parts.
Tracks would be assembled and glued, then set aside for about 10 minutes.
That gives the glue time to set up but not fully harden.
I took the sections and wrapped them around the drive and idler sprockets
and left to dry.
I did the same
sort of thing to the top section of tracks.
A rather long (for this kit anyway) section was assembled and then laid
atop the top guide rollers.
I
inserted cotton swap tips between the tank body and the tracks to get the sag I
wanted.
Once dry it was removed.
Then the moment of truth came.
Time to assemble all the different sections and hopefully make it look
presentable, or at least passable. Amazingly, it all went together a lot
smoother than I had anticipated.
| COLORS & MARKINGS |
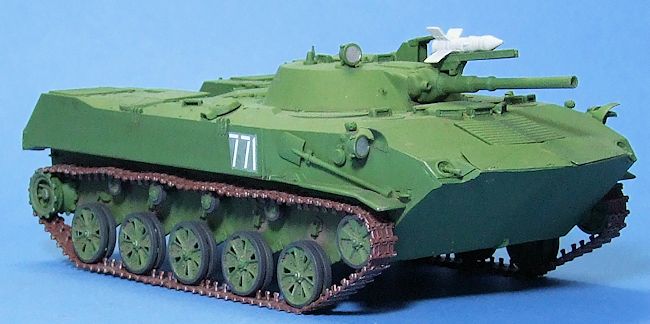 Once I had a complete hull and turret, painting was pretty straightforward.
Overall green was the color of choice, in this case Testors Model Master Dark
Green 34102 lightened a bit with white.
Once this was dry I went over everything with a thin black oil wash to
pop out some details and give it depth.
Other than this, I kept weathering to a minimum.
The decals were minimalistic (only two) and were hassle-free. A flat coat
overall finished things up.
The
tracks I painted a rust brown/red color I had mixed up; on these I slathered a
thicker black oil wash and then dry brushed it all with Testors Steel.
The missile call out was white.
I went with light ghost gray to give it a dirtier look, and applied a
thin black wash for depth.
Once I had a complete hull and turret, painting was pretty straightforward.
Overall green was the color of choice, in this case Testors Model Master Dark
Green 34102 lightened a bit with white.
Once this was dry I went over everything with a thin black oil wash to
pop out some details and give it depth.
Other than this, I kept weathering to a minimum.
The decals were minimalistic (only two) and were hassle-free. A flat coat
overall finished things up.
The
tracks I painted a rust brown/red color I had mixed up; on these I slathered a
thicker black oil wash and then dry brushed it all with Testors Steel.
The missile call out was white.
I went with light ghost gray to give it a dirtier look, and applied a
thin black wash for depth.
| CONCLUSIONS |
This is a very nice kit of an interesting and not-often-seen type.
Nice parts, good detail.
But
I think for most the deal-killer will be the tracks.
If there was a simpler track option in the box, I believe they would sell
better.
Some will enjoy the detail
these offer, but I think most will pass. That's
too bad because it really is a nice kit.
| REFERENCES |
http://www.military-today.com/apc/bmd1.htm
April 2015
Thanks to Panda Hobbies for the review kit and your editor for providing it to me to build. Get yours today at your local retailer or have them order it for you.
If you would like your product reviewed fairly and fairly quickly, please contact the editor or see other details in the Note to Contributors.