Trumpeter 1/35 RF-8/GAZ-98
| KIT #: | 02322 |
| PRICE: | $10.00 SRP |
| DECALS: | One option |
| REVIEWER: | Ray Mehlberger |
| NOTES: |
| HISTORY |
The RF-8, or GAZ-98, was an aerosan used by the Soviet Union during the Winter War and the Second World War. The GAZ-98K was a version with a more powerful GAZ Shevetsov M-11 five-cylinder air-cooled 110-hp radial aviation engine in place of the standard automotive engine.
| THE KIT |
One side panel of the box gives a short history of the vehicle in English and Chinese. Next to this is an illustration of the RF-8 as shown from above along with a illustration of the PE fret in the kit which holds 2 ring and bead type sights for the machine gun. However, it must be said here that this sight is wrong for the type of machine gun and was not used in my build of the kit therefore. Relegated to the spares box.
The other side panel has a side profile of the RF-8 showing the only markings on
it that are provided on the kit’s decal sheet. Consisting of a large red star
above a Soviet slogan on the sides and a smaller red star that goes on the bow
plate. Anybody know what that Russian slogan says???
 The kit contains 76 light gray parts on 6 trees, a clear plastic sheet with 2
die-cut parts on it, the PE fret with 2 parts on it, the decal sheet and the
instructions. There is a loose sheet in the kit that has a full color 5-view
illustration of the RF-8 in the single marking provided on the decal sheet.
Colors are listed for Mr. Hobby,Vallego, Model Master, Tamiya and Humbrol hobby
paint brands. There are just 4 colors listed, so an easy paint job for the
vehicle.
The kit contains 76 light gray parts on 6 trees, a clear plastic sheet with 2
die-cut parts on it, the PE fret with 2 parts on it, the decal sheet and the
instructions. There is a loose sheet in the kit that has a full color 5-view
illustration of the RF-8 in the single marking provided on the decal sheet.
Colors are listed for Mr. Hobby,Vallego, Model Master, Tamiya and Humbrol hobby
paint brands. There are just 4 colors listed, so an easy paint job for the
vehicle.
All the parts are in sealed cello bags. The decal sheet has its own cello bag as
does the decal sheet too. The decal sheet also has a cloudy sheet on its face to
protect it from scratching. Very good packaging!
The first 7 steps in the instructions are for the vehicle and the 8 step is for
assembly of the 2 crewmen. These crewmen consist of separate lower bodies, upper
torsos, ear flaps, arms, heads and hats. One of them (the driver figure) has a
pair of goggles to put on the front of his hat. However, someone who shall
remain nameless lost the goggles into his shag rug and the plastic eating
monster that lives in there will not return it…sigh.
| CONSTRUCTION |
Step one is assembly of the engine. It consists of 14 individual parts: the 2
block halves, the engine head and oil pan, distributor and starter, fan,
flywheel and exhaust pipes. Quite detailed. The only thing that could be added
would maybe be some spark plug wires. This was painted overall steel color with
a black wash.
I found the sprue attachment points on these parts, and later with parts of the
rest of the kit to be rather thick.
Step 2 is assembly of the vehicle’s sides, floor and two engine supports. The
RF-8 had flush screw assembly and NOT the hundreds of raised rivets molded on
these kit parts. So, yours truly diligently sanded them all off.
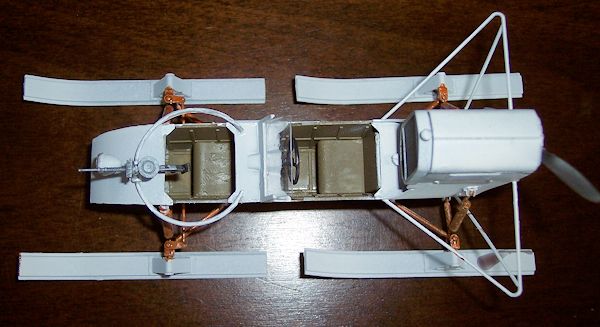
 In step 3 I painted the inside of the hull in Tamiya acrylic khaki as well as
the 2 crew seats. I then glued the seats into the hull and the front and rear
upper hull plates. The engine was glued onto the two bearers. The gas fill cap
was glued to the rear upper hull plate. I found that leaving some of the sprue
attached to this tiny part for a handling handle was a great way of holding it
better for placement. The small piece of sprue was cut off of it after it dried
good and hard.
In step 3 I painted the inside of the hull in Tamiya acrylic khaki as well as
the 2 crew seats. I then glued the seats into the hull and the front and rear
upper hull plates. The engine was glued onto the two bearers. The gas fill cap
was glued to the rear upper hull plate. I found that leaving some of the sprue
attached to this tiny part for a handling handle was a great way of holding it
better for placement. The small piece of sprue was cut off of it after it dried
good and hard.
In part B of step 3 I separately painted these parts first. The dash was painted
a grimy black. The upper small panel it glues to was spray painted white with
some Testors brand white flat aerosol can paint. The windshield frame also got
sprayed white and then the clear windshield was cut out of the clear sheet .It
must be cut, because the die cutting did not go clear enough through to be able
to just punch it out. The headlight lens on this sheet does not punch out
either. I used a lens from my spares box that was more concave and looks better.
The one in the kit is flat as a pankake. The headlight lens housing and it’
bracket were glued to the nose after painting them white. The windshield was
glued to the frame with Testors clear parts glue. The dashboard and steering
wheel were painted flat black and glued together.
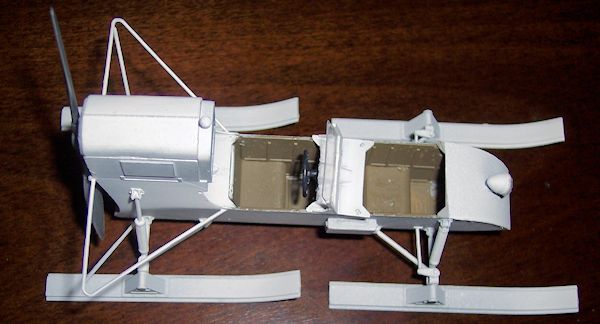
Step 4 is adding the windshield/dashboard assembly to the hull assembly.
However, I did this after I glued on the suspension arms and painting the hull
and them white with the aerosol can. The top of the engine compartment got
sprayed white too and then added. This part was a lousy fit and I had to saw off
the top of the engine to get it to sit down further. It is still a lousy fit.
The inverted U-shaped bracket was added to the back of the engine compartment
and painted white first. The propeller was painted Testors buffable steel and
then rubbed with some silver Rub-N-Buff paste out of its tube.
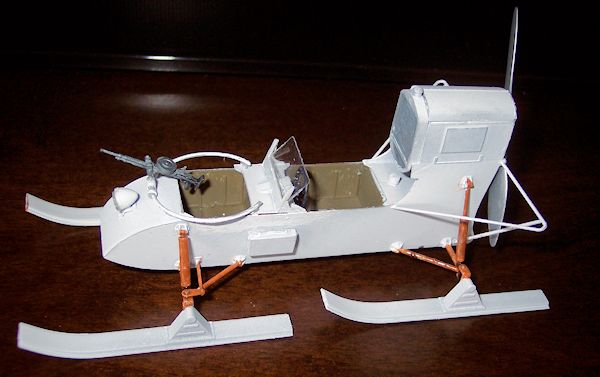 In step 6 I painted the machine gun’s ring mount white and glued it on with
superglue. The machine gun, its bracket and ammo drum were glued together and
the whole was painted the Testors steel and then washed with flat black paint.
It’s shoulder stock and pistol grip got painted solid black. This was then glued
to the ring mount. All the skis were assembled and painted at this time. The
consisted of 3 parts each: the front and rear sections of the triangular mounts
and the skis. All these were painted the Testors spray can white after done. And
glued to the support arms and springs.
In step 6 I painted the machine gun’s ring mount white and glued it on with
superglue. The machine gun, its bracket and ammo drum were glued together and
the whole was painted the Testors steel and then washed with flat black paint.
It’s shoulder stock and pistol grip got painted solid black. This was then glued
to the ring mount. All the skis were assembled and painted at this time. The
consisted of 3 parts each: the front and rear sections of the triangular mounts
and the skis. All these were painted the Testors spray can white after done. And
glued to the support arms and springs.
Step 7 was assembly of 2 of the 4 skis.
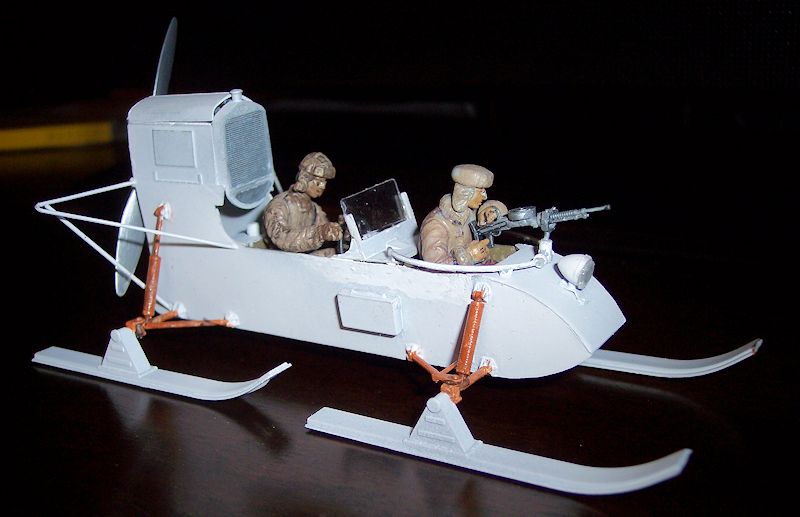
Step 8 is assembly of the two figures. I painted these guys in various shades of
brown, rather than the khaki suggested. I thought that color would be too
dark….as it is dark on the seats and I have pictures of these uniforms in the
lighter browns in a couple of my books. Faces were painted flesh. The two
figures were then glued into the vehicle with super glue.
| CONCLUSIONS |
This was a quick build. Done in just 2 or 3 nights of work. I may just leave it
blank, with no markings. As I see wartime photos of it a few times on the web
that show no markings at all. I intend to drag it to a contest or two now.
Although, it isn’t the greatest build I ever did and may not even place, but I
am sufficiently happy with the results.
This kit was very inexpensive at only 11 bucks. It is nice to get a bargain in
this day and age when most AFV kit prices are through the roof. Highly
recommended. Kit was courtesy of my wallet.
Trumpeter also makes a larger, fully armored aerosan kit too. It is the
NKL-26 reviewed
right here.
April 2013
If you would like your product reviewed fairly and fairly quickly, please contact the editor or see other details in the Note to Contributors.