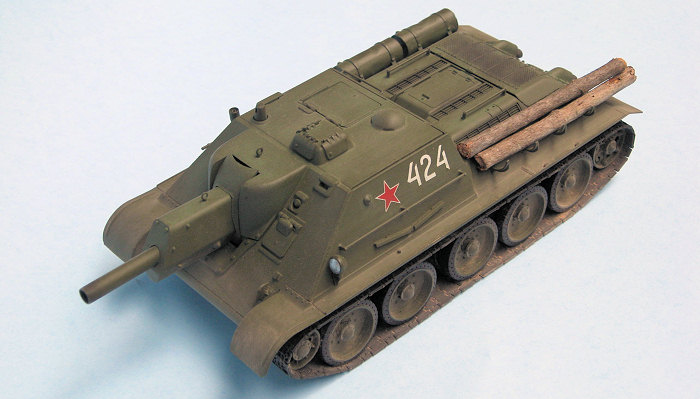
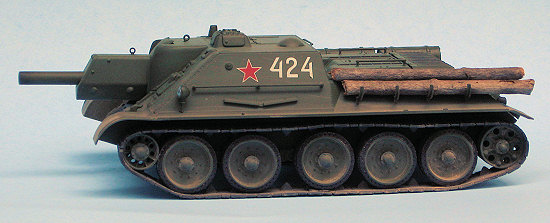
Tamiya 1/35 SU-122 SPG
| KIT #: | 35093 |
| PRICE: | $ |
| DECALS: | Four options |
| REVIEWER: | Ryan Koschatzky |
| NOTES: |
| HISTORY |
This was stolen from Scott‘s preview and copied here to give the article more fluff so you don‘t have to follow a link to get it: Based on the T-34/76 chassis, the SU-122 entered production in late 1942. The 122mm M-30 gun could pierce 100mm armor at a distance of 1 kilometer, not bad by current standards and enough to wreak havoc with any enemy tank that got in its way. It was relatively fast with a top speed of 55 kph in perfect conditions, but rarely are conditions perfect in the field! The biggest draw-back of this and other self-propelled guns is that there was little actual azimuthal variation allowed once the gun was in position. Regardless of this, it was quite successful and over 600 were built during the war.
| CONSTRUCTION |
 As with all the tanks I build I
break it down into smaller projects: Gun/Upper Hull, Lower Hull, and Tracks. I
started with the most impressive part, the Gun. It was simple enough and fell
together with no fuss. It needed a little sanding to get rid of the seams. I was
a little concerned about the mantle hook, as it is small and just sits there
waiting to get broken off. On the flip side with a Dragon T-34 kit I cut off the
sprue a similar hook and quickly lost it to the carpet monster. What's a guy to
do?
As with all the tanks I build I
break it down into smaller projects: Gun/Upper Hull, Lower Hull, and Tracks. I
started with the most impressive part, the Gun. It was simple enough and fell
together with no fuss. It needed a little sanding to get rid of the seams. I was
a little concerned about the mantle hook, as it is small and just sits there
waiting to get broken off. On the flip side with a Dragon T-34 kit I cut off the
sprue a similar hook and quickly lost it to the carpet monster. What's a guy to
do?
I next moved on to the Upper hull. I glued the mantle (E2) to the front slope
(D7). I added the Scope (D1). When I went to test fit part (E15), I found I had
to notch out the upper hull too make it fit. I chose for the drivers hatch (D2)
to be closed, as there is no interior. I also closed (E16). I wasn't sure if I
would build the Tank commander and put him in the hatch so I just taped it shut
for now. Next was the radio antenna holder (A17). I left off the antenna as I
read some where that the Russians didn't also have the radios installed. Ok so I
am lazy and did want to make one, but the story works for me. I added the extra
pieces (D10, D5, D13 and saw bracket holder D4). Added the breach block (E3) and
travel lock (E10) to attach the gun later. The last part was the railing, which
is where I ran into some issues. I was short one railing (E21). I used one (E21)
on the left side and (E22) for the right side. Tamiya had some dimples on the
sides for where I guess the rail should tie in but the part don't line up. Since
(E22) was used on the side, I used one of the extra handrails for the rear of
the upper hull. I think (D10) was a hatch of some kind so I put the railing on
the other side.
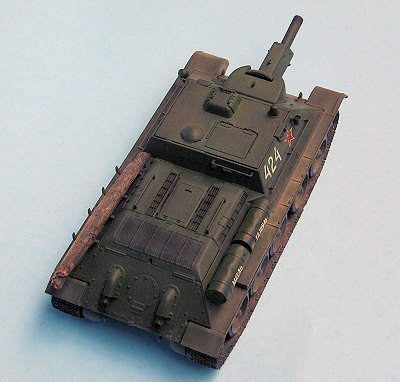
 The next area I worked on was
the rear hull. I added the air vents (A3 and A4). I had to use filler on both,
(A3) on the front and (A4) rear and both on the bottom edges. The rails (E20)
where added, followed by the engine cover (A11) and the left side tank supports
(D9). I built two fuel tanks and set them side for later.
The next area I worked on was
the rear hull. I added the air vents (A3 and A4). I had to use filler on both,
(A3) on the front and (A4) rear and both on the bottom edges. The rails (E20)
where added, followed by the engine cover (A11) and the left side tank supports
(D9). I built two fuel tanks and set them side for later.
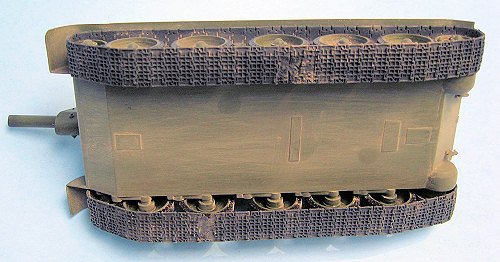
Next to last subassembly was the lower hull. I cut out some sheet styrene to the
cover the old motor holes on the bottom and sides. The rear transmission covers
(D14) were added. I attached the upper and lower hulls next. Lots of putty and
sanding was needed around the rear transmission covers and lower hull to make it
smooth.
Track and roadwheels is the last area. While still on the sprue I painted the
road wheels Dark Green (FS 34079), then cut them out and used a black marker for
the rubber. The idler wheel and drive sprocket where assembled and then I used a
silver pencil to touch up the wear areas.
| COLORS & MARKINGS |
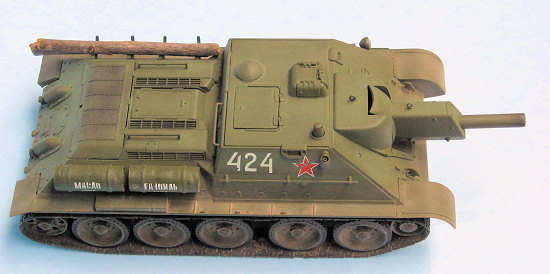 Once assembled the whole tank
was painted dark green (FS 34079). The exhaust pipes were painted Burnt Umber.
Once dry I attached the fuel tanks and exhaust pipes. The tracks were painted
flat black with gunmetal pigments added once dry. I heated up a blade and melted
the tracks together. Next I added Archer Dry Transfers for the IS-2 (AR35151)
for the "424", red star and writing on the fuel tanks. Since the fuel tanks are
not smooth with "damage" already added to them the transfers didn't work very
well for me, but it gives it a nice used look. I didn't start out that way with
the left side red star. I was putting it on and lost the sheet, which somehow
found its way into the gun mantle. It was ripped while I removed it. So some may
say that it gives character to them model. I cut up a twig from the yard and
used it to make tree stumps. It was not my idea, I had seen it on a Hyperscale
gallery photo and went with it. The headlight was painted Dark Green and then
silver with future on top.
Once assembled the whole tank
was painted dark green (FS 34079). The exhaust pipes were painted Burnt Umber.
Once dry I attached the fuel tanks and exhaust pipes. The tracks were painted
flat black with gunmetal pigments added once dry. I heated up a blade and melted
the tracks together. Next I added Archer Dry Transfers for the IS-2 (AR35151)
for the "424", red star and writing on the fuel tanks. Since the fuel tanks are
not smooth with "damage" already added to them the transfers didn't work very
well for me, but it gives it a nice used look. I didn't start out that way with
the left side red star. I was putting it on and lost the sheet, which somehow
found its way into the gun mantle. It was ripped while I removed it. So some may
say that it gives character to them model. I cut up a twig from the yard and
used it to make tree stumps. It was not my idea, I had seen it on a Hyperscale
gallery photo and went with it. The headlight was painted Dark Green and then
silver with future on top.
| FINAL CONSTRUCTION |
Adding the track I found that I had left off (A21). This made the idler wheel pull back to the road wheel. Doh! Too late now. A dusting of some green, brown and dark tan pigments was used to weather the tank.
| CONCLUSIONS |
 I had
fun with the kit. It is not too far off from the wunderkits of today as far as
fit goes. A PE set for the air intakes and engine cover would do this kit
wonders. Fraser Gray has some nice photos with this done as well as some engine
covers to help hide the emptiness of the kit. You could also put some card on
the bottom of the upper hull. I didn‘t do this as a test fit with the tank
covered most of this up. Unless your SPG is upside down no one will see it. I
believe this is the only 1/35 SU-122 kit out on the market, so good or bad she
is one you ‘redancing with. There is a new 1/48 kit also by Tamiya that looks
just a lot nicer. UM has a kit in 1/72 scale for us small-scale guys.
I had
fun with the kit. It is not too far off from the wunderkits of today as far as
fit goes. A PE set for the air intakes and engine cover would do this kit
wonders. Fraser Gray has some nice photos with this done as well as some engine
covers to help hide the emptiness of the kit. You could also put some card on
the bottom of the upper hull. I didn‘t do this as a test fit with the tank
covered most of this up. Unless your SPG is upside down no one will see it. I
believe this is the only 1/35 SU-122 kit out on the market, so good or bad she
is one you ‘redancing with. There is a new 1/48 kit also by Tamiya that looks
just a lot nicer. UM has a kit in 1/72 scale for us small-scale guys.
| REFERENCES |
Finescale Modeler Oct 01, Improving an assault gun by Fraser Gray
Finescale Modeler Nov 03, Build a tank this weekend by Lawrence Hansen
July 2007
If you would like your product reviewed fairly and fairly quickly, please contact the editor or see other details in the Note to Contributors.