Vision 1/35 BA-64B
| KIT #: | VM 35001 |
| PRICE: | $29.90 |
| DECALS: | Six options |
| REVIEWER: | Bill Koppos |
| NOTES: | Where's the Motor? |
| HISTORY |
 Production of this little beast started
in July of 1941 by the GAZ factory which by coincidence made 4-wheel utility
vehicle chassis. A faceted armored body was added topped by a turret armed
with a single drum-fed DT machine gun, and had 360 degree traverse and high
elevation capability. Armor thickness ranged from 4 to 15mm. The narrow
chassis with it's added armor was top heavy and prone to overturning, so
when a wider wheelbase GAZ was introduced the armor was added to this for a
BA-64B which is the subject of this model.
Production of this little beast started
in July of 1941 by the GAZ factory which by coincidence made 4-wheel utility
vehicle chassis. A faceted armored body was added topped by a turret armed
with a single drum-fed DT machine gun, and had 360 degree traverse and high
elevation capability. Armor thickness ranged from 4 to 15mm. The narrow
chassis with it's added armor was top heavy and prone to overturning, so
when a wider wheelbase GAZ was introduced the armor was added to this for a
BA-64B which is the subject of this model.| THE KIT |
| CONSTRUCTION |
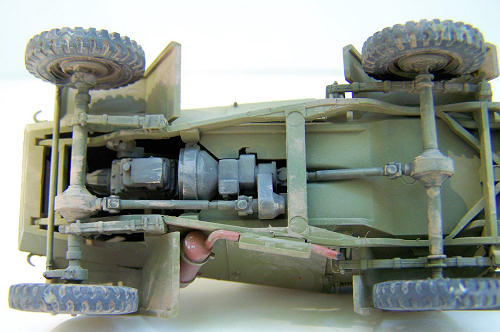 We start with chassis, springs, transmission and axles. Hmmm
transmission-brings to mind an engine. Where's the engine? The factory
forgot something. I test fitted the body parts and saw there would be a big
void underneath. Talk about a curbside! Again my packrat mentality came to
the rescue. When I built the Italieri L-6 tank I did not use the interior or
it's engine. Here was motive power at my fingertips. Some styrene bits and
glue later, I dropped the motor in, adding an exhaust manifold and a cooling
fan. Custom!
We start with chassis, springs, transmission and axles. Hmmm
transmission-brings to mind an engine. Where's the engine? The factory
forgot something. I test fitted the body parts and saw there would be a big
void underneath. Talk about a curbside! Again my packrat mentality came to
the rescue. When I built the Italieri L-6 tank I did not use the interior or
it's engine. Here was motive power at my fingertips. Some styrene bits and
glue later, I dropped the motor in, adding an exhaust manifold and a cooling
fan. Custom! | COLORS & MARKINGS |
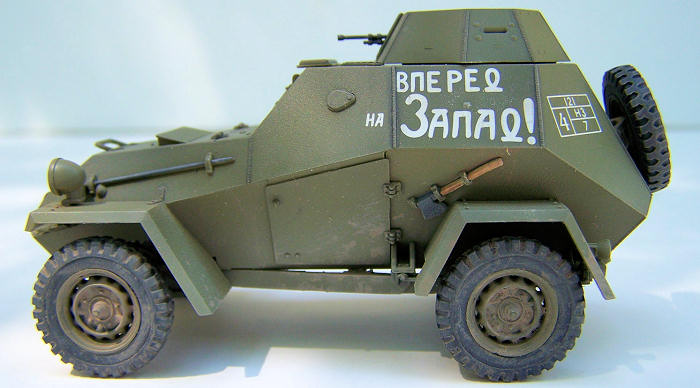
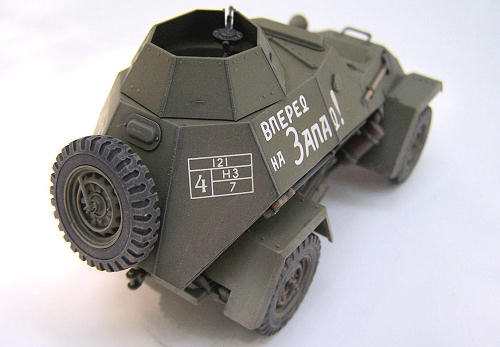
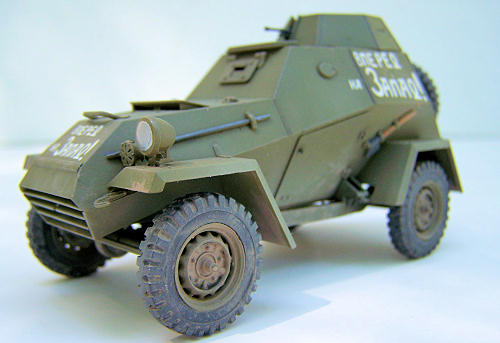
 The instructions suggest Russian Green or Olive Drab as a body color. Olive
Drab? Why not? Lend Lease paint perhaps. All sprayed paints are Model Master
Enamels. I began by stuffing the open turret with tissue. First applied was
a coat of RLM dark gray to the unders and all the nooks and crannies. Then
the OD was applied overall, followed by a mix of OD lightened with yellow on
the centers of the larger ares for contrast. Don't forget the wheels!
Sticking them on toothpicks is an easy way to hold them. The tires were put
onto a piece of rolled-up masking tape and sprayed with an RLM66/flat black
mix.
The instructions suggest Russian Green or Olive Drab as a body color. Olive
Drab? Why not? Lend Lease paint perhaps. All sprayed paints are Model Master
Enamels. I began by stuffing the open turret with tissue. First applied was
a coat of RLM dark gray to the unders and all the nooks and crannies. Then
the OD was applied overall, followed by a mix of OD lightened with yellow on
the centers of the larger ares for contrast. Don't forget the wheels!
Sticking them on toothpicks is an easy way to hold them. The tires were put
onto a piece of rolled-up masking tape and sprayed with an RLM66/flat black
mix.| FINAL CONSTRUCTION |
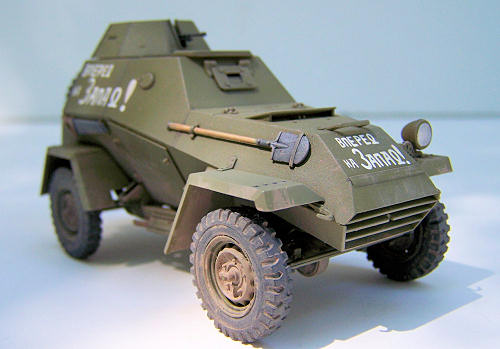
 The tires and wheels put together, trying to put them on the axles reveals
the axle pins to be too small in diameter. To the ends I applied some CA
glue and accelerator until they were built up enough so the wheels fit
snugly. Before applying glue to the wheels make sure of the alignment. All 4
tires were on the "ground" evenly, with no wobble. The little scooter was
armed by painting the DT gun Steel/black with wooden grip, and a drum
magazine put in place.
The tires and wheels put together, trying to put them on the axles reveals
the axle pins to be too small in diameter. To the ends I applied some CA
glue and accelerator until they were built up enough so the wheels fit
snugly. Before applying glue to the wheels make sure of the alignment. All 4
tires were on the "ground" evenly, with no wobble. The little scooter was
armed by painting the DT gun Steel/black with wooden grip, and a drum
magazine put in place. | CONCLUSIONS |
| REFERENCES |
August 2010
If you would like your product reviewed fairly and quickly, please contact me or see other details in the Note to Contributors.