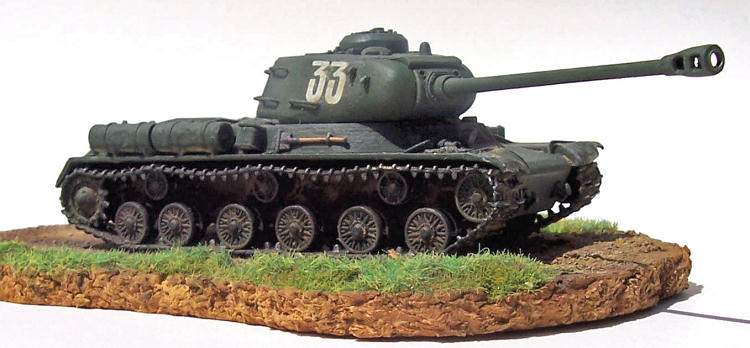
Italeri 1/72 IS-2
| KIT #: | ? |
| PRICE: | $ |
| DECALS: | Three options |
| REVIEWER: | Mark Davies |
| NOTES: |
| HISTORY |
I have always
had a fondness for slightly cumbersome looking tanks, so I felt the IS-2 would
be a good choice for my second tank after a 36 year break from AFV modelling.
The IS tanks led on
form the previous KV series, The “IS” for Joseph Stalin being adopted in place
of “KV” because
Marshal
Kliment Voroshilov for whom the KV series were named had fallen
out of favor. The
IS-2 featured superior armour protection over their frontal arc for slightly
less overall weight
compared to the last of the KV’s, along with a much more effective main armament
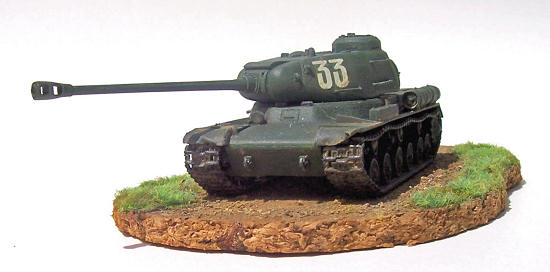
 I was interested
in the fact that the 122mm gun fitted to the IS-2 was quite a leap in up calibre
from previous sized guns used by all major participants in WW2. I also wondered
why it was superseded in later Soviet MBT’s by a 100 mm gun, so I did a bit of
reading on the subject.
I was interested
in the fact that the 122mm gun fitted to the IS-2 was quite a leap in up calibre
from previous sized guns used by all major participants in WW2. I also wondered
why it was superseded in later Soviet MBT’s by a 100 mm gun, so I did a bit of
reading on the subject.
The IS-2 was
intended as a breakthrough tank and there were some advantages to having the
AS-19 122 mm gun over the BS-3 100 mm gun, despite the BS-3 having a superior
amour penetration capability. The first was that the AS-19 was readily available
in larger quantities than the BS-3, and was capable of defeating German Tigers
and Panthers at normal battle ranges. Its advantage over the 100mm BS-3 was its
lager HE round provided an enhanced and quite devastating capability for dealing
with soft targets in the breakthrough role. The downside was the size of the
two-part ammunition leading to only 28 rounds being carried and a slow rate of
fire of about two rounds per minute
Later improved IS-2s (the model 1944), had a faster-loading version of the gun known as the D25-T, this had a double-baffle muzzle-brake and better fire-control. Ammunition limitations aside, the IS-2 was an impressive and capable design that brought a general parity with the best of German armour on the Eastern front, and for its time was well ahead of what the western allies had.
| THE KIT |
The Italeri kit
includes two kits. One is the detailed multi-part version you would expect, and
the other is simplified construction offering for war-games use. This second kit
still features some nice enough detail but has only 10 parts because the wheels
and tracks and moulded as complete units and several other things are
simplified. The box advises that the kit is ALZ ZER war-games
 approved (whatever
that means!). As it happens I sold my 10-part kit on an online auction for about
a third of the purchase cost of the 2-kit boxing. I understand that this is a
true Italeri kit, and not a re-release from Esci moulds.
approved (whatever
that means!). As it happens I sold my 10-part kit on an online auction for about
a third of the purchase cost of the 2-kit boxing. I understand that this is a
true Italeri kit, and not a re-release from Esci moulds.
The detailed kit
certainly looks like an IS-2 to me, but I’m no expert. Most detail is crisp and
the surface suggests cast metal where appropriate. Whether or not the cast
finish should be rougher, or the kit should have more crude welds that
characterise Soviet armour I can’t say. I mention this as I see in some articles
that builders of 1/35 Soviet AFV kits often feel the need to enhance or
emphasise these aspects in the larger scale; so it might apply to this smaller
model as well.
External tools
and gun crutch are moulded separately, as are the driving light, horn and tow
hooks. The turret
grab handles are fairly finely moulded, but would still need to have a minute
mould line removed on each. Tracks are moulded in styrene consisting of varying
lengths and some individual links to cope with going round the drive sprockets
and idlers. There seems to be a slight compromise in the detail on the inner
sides of the track, but I feel it looks ok.
Instructions are clearly laid out and decals for three options are provided. The box is typical Italeri end-opening type with artwork and colour schemes on front and rear respectively.
| CONSTRUCTION |
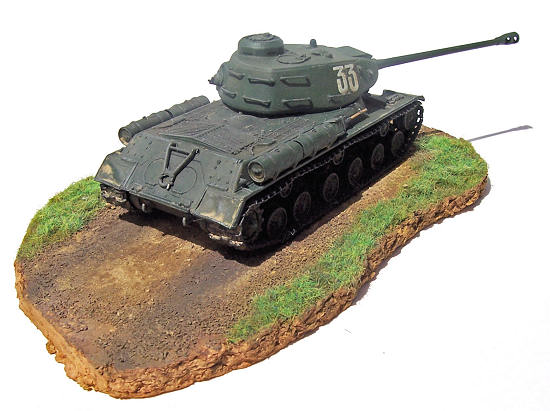
This is the
first kit where I have used styrene tracks. I found this system to be quite
good, and I bowed the fixed length track sections to represent the
characteristic sag between return rollers. In fact the quantity of track as
provided seems to be suited to an unrealistic taught set-up, so I used up some
spare links intended to be mounted on the hull front to compensate for the gaps
created by intentionally sagging the track. I feel it could have done with some
more spare links to get a bit more droop. I assembled the wheels and tracks in
situ on the hull which made later painting a little tricky. On reflection I
could have probably assembled the track with the wheels, sprockets, idlers and
return rollers only pushed onto their axles, enabling the entire finished track
assembly to be removed form the hull for painting. However I suspect this could
be tricky to accomplish.
 The turret
assembly is very straight forward. It seemed far less work to make a plastic
card jig and bend some up from fuse-wire grab-handles than clean up the plastic
ones. I do feel it would have been nice to have some crew figurers to add some
“life” to the finished model, but I guess you can’t have everything.
The turret
assembly is very straight forward. It seemed far less work to make a plastic
card jig and bend some up from fuse-wire grab-handles than clean up the plastic
ones. I do feel it would have been nice to have some crew figurers to add some
“life” to the finished model, but I guess you can’t have everything.
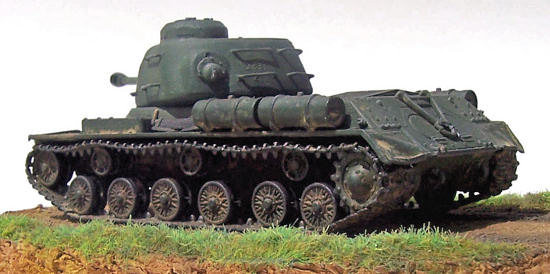
Wire handrails
aside; modifications were made to the front and rear track guards which in
photos of IS-2’s frequently appear bent, battered and torn. I made mine using
lead foil from a wine bottle.
I also “bashed” up the
external fuel tanks with my Dremel, but I may have over-done this. The horn and
head lamp were drilled out, and some clear 5-minute epoxy was added to lamp to
represent the glass lens.
No recovery
hawsers are provided, although these seem often to have been looped across the
very rear of the hull. I considered making some from twisted fuse-wire, but as
this was intended to be a quick relaxing distraction from building 1/72 aircraft
I couldn’t be bothered trying to make the two looped ends to each hawser.
| COLORS & MARKINGS |
I’m unsure as to
the correct green for Soviet AFV’s of the late war period. I’m sure that mine is
wrong. It started out lighter and more green than the images su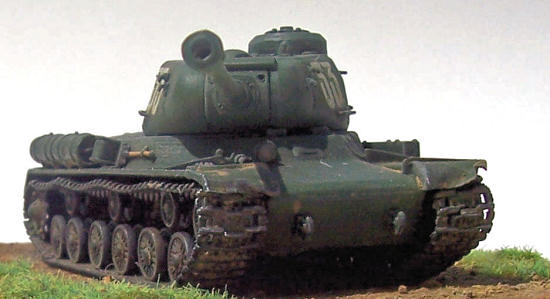 ggest, but
playing around with oil paints over the Gunze acrylic base gradually changed the
model’s tone and hue more than I envisaged. I was not too concerned as this
build was for fun and experience. However I would welcome advice on Soviet
greens and colours in general (please feel free to email me at if you can
help). The
Italeri decals were fine to use, and I added some black-painted decal strip to
represent the vision slits and periscope glass.
ggest, but
playing around with oil paints over the Gunze acrylic base gradually changed the
model’s tone and hue more than I envisaged. I was not too concerned as this
build was for fun and experience. However I would welcome advice on Soviet
greens and colours in general (please feel free to email me at if you can
help). The
Italeri decals were fine to use, and I added some black-painted decal strip to
represent the vision slits and periscope glass.
| CONCLUSIONS |
All in all the kit builds in a very straightforward way, and I thoroughly enjoyed it. I’m looking forward to building my Italeri ISU-122 and ISU-152 that have, not surprisingly, much in common with this kit.
December 2008
Copyright ModelingMadness.com If you would like your product reviewed fairly and quickly, please
contact
the editor or see other details in the
Note to
Contributors.