On the heels of the ACADEMY Isherman that I built a while back, I had
intentions of going to the 2008 Phantom Pflashers Contest where they had a
Category titled: ADVERSARIES. Well, we all know how intentions go, and I
came down with, of all things, Bells Palsy!!!! Well, didn't make the Show,
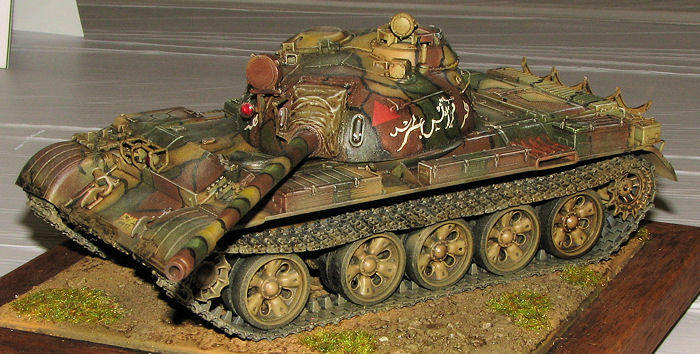
but I still got the Subject of this review done.....A Syrian T-55 from the
Yom Kippur War.
In October of 1973 the World was turned upside down with the
invasion, on two fronts, of Israel. In the West, Egyptian Forces crossed the
Suez Canal and put up the now infamous SAM Umbrella which negated Israeli
Air Power. All across the Western Front the Armored Divisions of Egypt
swiftly grabbed the land that was occupied since 1967 during the Six Day
War. On the Eastern Front, Syrian Forces poured into the Golan Heights only
to be stopped by refurnished and up gunned Centurions and Sherman's. New to
the Battlefield were Russian made T-62 Tanks and the Armored Workhorse of
the newly refurbished Arab Armies, the T-55 Tank. This kit represents a Tank
in the Syrian Army that took part in the fighting for the Golan Heights.
The combined Battles fought during this time were the largest single
confrontations of Armor since the Battle of Kursk in 1943. Enjoy!!!!
 The TAMIYA T-55 Tank is one of those kits, like a Bf109 or a Sherman Tank,
that you cannot just build one example of. It remains one of the Worlds most
produced and exported AFV's in History. TAMIYA did not only do it justice,
but engineered it so several versions (5) can be made from the one
kit.......and that's not counting the several updates from resin
manufacturers. The first thing that I did was go back to the archives and
to do some picking around. I found the instruction sheet from an old ESCI
kit and that camo scheme just hooked me.
The TAMIYA T-55 Tank is one of those kits, like a Bf109 or a Sherman Tank,
that you cannot just build one example of. It remains one of the Worlds most
produced and exported AFV's in History. TAMIYA did not only do it justice,
but engineered it so several versions (5) can be made from the one
kit.......and that's not counting the several updates from resin
manufacturers. The first thing that I did was go back to the archives and
to do some picking around. I found the instruction sheet from an old ESCI
kit and that camo scheme just hooked me.
There are Five Sprues Total plus a section of Black Mesh for screening and a
set of Track. As I said in the Introduction, there are Five Versions,
along with those Parts, in order to make some different Vehicles, such as
Anti-Aircraft Machine Guns, Ammunition box placement, different style
cupola, plus Storage box placement (Czech Army) . Decals are included for 5
Tanks, two from the Soviet Union , two from Poland and a Czech Unit. In the
Aftermarket sector there are several more options such as two OUTSTANDING
Conversions for an Israeli Ti-67 and another for a Iraqi T-55 with add on
armor. Also, turned gun barrels are readily available as with Photo-Etched.
In addition to these goodies, there are dry transfers and numbers to reflect
a Country of your choice.
The first thing that I did was go back to the archives and do some picking
around. I found the instruction sheet from an old ESCI kit and that camo
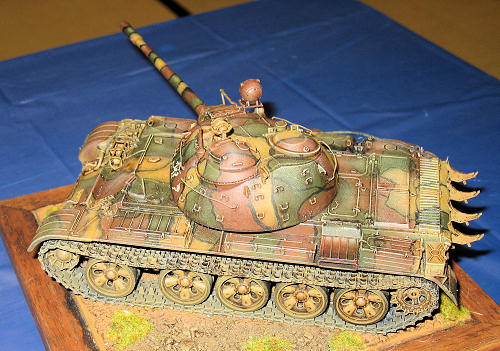
scheme just hooked me. I started the TAMIYA T-55 by messing with the
turret....going with the instructions......but adding putty casting and wire
grab handles. When I was satisfied with "THE LOOK" I moved on to sanding
the road wheels and getting the lower hull in order as per instructions.
Everything was going well, but I
 did pick up the OSPREY Book on BUILDING THE
T-55 TANK which I found invaluable because of the wire gas lines that you
MUST add to the Hull Fuel Cells. After all, the gas just doesn't jump into
the tank!!! You may also take note that during your research you have to
add a few electrical leads with wire for the front lights too.
did pick up the OSPREY Book on BUILDING THE
T-55 TANK which I found invaluable because of the wire gas lines that you
MUST add to the Hull Fuel Cells. After all, the gas just doesn't jump into
the tank!!! You may also take note that during your research you have to
add a few electrical leads with wire for the front lights too.
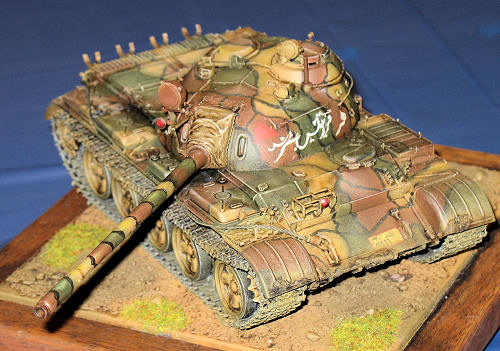
At this time during the construction I opted to leave off the outside/rear
fuel drums. They made a real nice fire if hit and proximity to fuel was not
a problem for this engagement. I must tell you that clean up of mold seams
was minimum, but as long as you take care of the building basics, you'll be
fine. Now, with the chasis and turret done...........I decided to go with
the FRUIL TRACKS (ATL 01). The Metal used for these tracks on the real
deal does not rust, so.....a nice dark gray coat and oil wash was all I
needed to do to bring the tracks into shape.
Next was drilling a few small holes and bending solder wire into
shape for the fuel cell leads from the three outside cells to the tank. This
was a snap because of the great reference out there and planning ahead.
During this time you have to think about MV lenses and the size's. I wish I
could tell you, but I'm an idiot.
By now you all know my basic religion is FLAT
BLACK. Following this a stated to give the vehicle an coat of a few
Greens. After it dried I cut out a cardboard pattern and started my Red
Brown and Dark Yellow patches. At this point, don't wo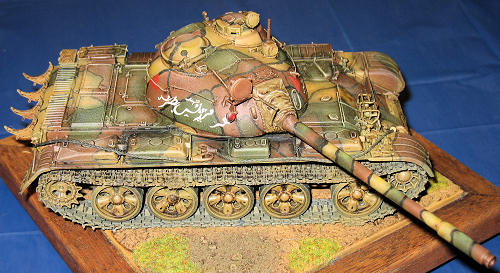 rry about the over
spray OR being perfect....it just doesn't matter and you ARE a MODELER!!!!
When the Turtle Shell Camo was done, I started to spray lighter shades of
the three colors within the patches. After this was my version of pleasure,
I started to free hand (stop it) a Black outline around the colors. I then
painted the canvas mantlet cover Khaki. This was the most fun I had since
Senior Prom and I must say it came out well. Before I gave it a shot of
FUTURE for the oil wash, I used a leftover dry transfer from VERLINDEN with
markings for a Syrian T-34/85 on the turret and a yellow number plate for
the fenders.. Very appropriate, I thought.
rry about the over
spray OR being perfect....it just doesn't matter and you ARE a MODELER!!!!
When the Turtle Shell Camo was done, I started to spray lighter shades of
the three colors within the patches. After this was my version of pleasure,
I started to free hand (stop it) a Black outline around the colors. I then
painted the canvas mantlet cover Khaki. This was the most fun I had since
Senior Prom and I must say it came out well. Before I gave it a shot of
FUTURE for the oil wash, I used a leftover dry transfer from VERLINDEN with
markings for a Syrian T-34/85 on the turret and a yellow number plate for
the fenders.. Very appropriate, I thought.
When the fun part was done I FUTURED it and
started a few progressive Oil Washes with Dick Van Dyke Brown, from
WINSDOR-NEWTON. I removed most of the film with Q-Tips and a Cotton pair of
panties, blue....HAINES. My personal favorite :)
I needed a little something extra so I went with
picture frame wire for the tow cables and clear red paint for the MV
lenses. I mixed up some CELLUCLAY with white glue and added some dirt/mud
where I wanted it and with the left overs I covered a base that I retrieved
from the Bush that Moses found burning.............don't worry, I made that
up but the guyz from IPMS/SPASAM swallowed the whole story. After some
ground work that involved cat litter and stones, I painted the base and mud
on the Tank the same color and oil washed it . A little dry brushing here
and there had it crying. A bit of static grass gave it a little color and
pizzazz...........and your done :) Please note.......My intention was to
showcase the cool scheme, so I intentionally did not load up the Tank with
an abundance of bedrolls, crates and boxes. Besides, according to the pics,
they just did not have them because the fight itself was close to home.
Besides, today it might be better for invading armies to take the local
Walmart's over for quick supplies.
Well, I'm
happy to say this kit won Best Armor at the Region 3 Convention in
Huntsville, Alabama during 2008. I hope you enjoyed it and use your
imagination....Most of all, have fun!!!!!