| KIT: | Tamiya 1/34 T-34/76 |
| KIT #: | 35059 |
| PRICE: | $ |
| DECALS: | ? |
| REVIEWER: | Jack Bruno |
| NOTES: | Conversion using AEF set. |
| HISTORY |
Without a doubt, I believe that the T-34 was the most influential Tank in History. It's speed, punch, simplicity of production and sloping armor changed the way armored warfare was fought for three generations. This revolutionary Medium Tank took the Germans completely by surprise and scared the bejesus outta them, along with the two Heavy Tanks, KV I and KV 2. Without the T-34....well, who knows.
| THE KIT |
 A few years ago when I worked in a Hobby Shop for money
to support my plastic addiction, TAMIYA reissued the T34 and KV series of
tanks after being out of production for several years, forcing many of us to
pay collectors prices to build a decent Soviet Tank from W.W.II. To say the
least TAMIYA made my day. I hoarded a bunch of these kits and began to
purchase some AEF DESIGNS resin turrets to compliment the models and to add to
the soup so to speak. Among the several Turrets AEF had in production at that
time were the Laminate, Hard Edge, Soft Edge and CHTZ. (Chelyabinsk Tractor
Works) The T34/85 Turrets were just as plentiful. I must point out that this
hollow resin turret variant from AEF was before TAMIYA came out with their own
version. To my knowledge, and looking at the AEF website, these turrets are
no longer in production. If you happen to come across one on the Internet or
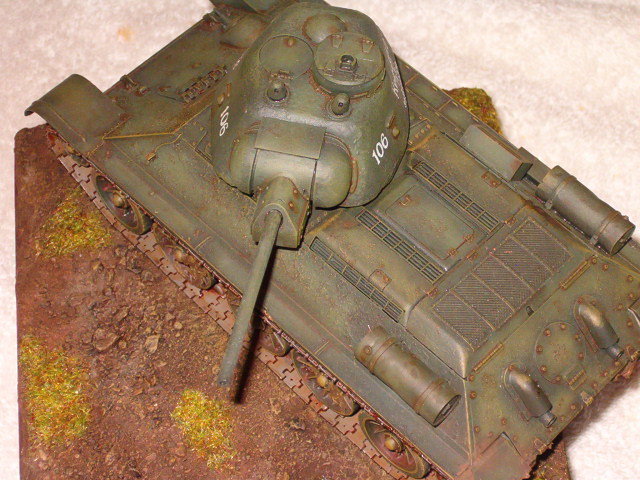
swap meet, pick it up. Skimming thru the MODELART Book, T-34 and KV Series, I
came across a modification to the CHTZ Factory Turret that featured a raised
Commanders copula and additional periscopes. Since I had the AEF Turret, I
decided to go to the spare parts box and do some cutting and welding and here
it is.
A few years ago when I worked in a Hobby Shop for money
to support my plastic addiction, TAMIYA reissued the T34 and KV series of
tanks after being out of production for several years, forcing many of us to
pay collectors prices to build a decent Soviet Tank from W.W.II. To say the
least TAMIYA made my day. I hoarded a bunch of these kits and began to
purchase some AEF DESIGNS resin turrets to compliment the models and to add to
the soup so to speak. Among the several Turrets AEF had in production at that
time were the Laminate, Hard Edge, Soft Edge and CHTZ. (Chelyabinsk Tractor
Works) The T34/85 Turrets were just as plentiful. I must point out that this
hollow resin turret variant from AEF was before TAMIYA came out with their own
version. To my knowledge, and looking at the AEF website, these turrets are
no longer in production. If you happen to come across one on the Internet or
swap meet, pick it up. Skimming thru the MODELART Book, T-34 and KV Series, I
came across a modification to the CHTZ Factory Turret that featured a raised
Commanders copula and additional periscopes. Since I had the AEF Turret, I
decided to go to the spare parts box and do some cutting and welding and here
it is. | CONSTRUCTION |
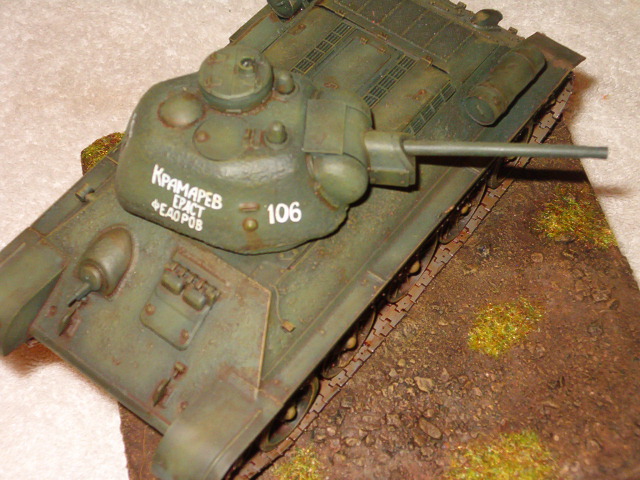
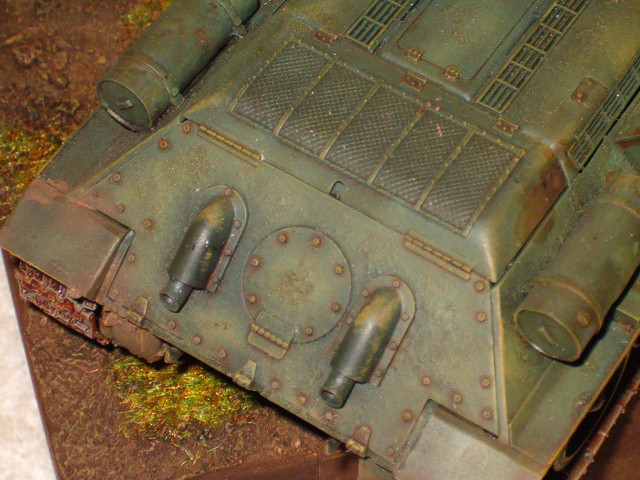
 The TAMIYA T-34/76 1943 (kit#35059) is the basis for the
conversion and was built straightforward except the towing eyelids that were
filled in the front. These were added on by the US at Aberdeen to tow them
around. I also filled the locating holes that were the grab handle placements
and the Motorization holes on the undersides as these kits were once
"toys." I took green putty and stippled the hull and turret to give that
rough texture look and it came out very well. I decided to leave off the grab
handles as my variant did not mount them. In the future I plan to do another
and this time I'll add them using wire as I do on all my Armor. I went for the
hard ride and mounted three solid steel wheels in the center and two rubber
rimmed in first and fifth position.
The TAMIYA T-34/76 1943 (kit#35059) is the basis for the
conversion and was built straightforward except the towing eyelids that were
filled in the front. These were added on by the US at Aberdeen to tow them
around. I also filled the locating holes that were the grab handle placements
and the Motorization holes on the undersides as these kits were once
"toys." I took green putty and stippled the hull and turret to give that
rough texture look and it came out very well. I decided to leave off the grab
handles as my variant did not mount them. In the future I plan to do another
and this time I'll add them using wire as I do on all my Armor. I went for the
hard ride and mounted three solid steel wheels in the center and two rubber
rimmed in first and fifth position.
| COLORS & MARKINGS |
| FINAL CONSTRUCTION |
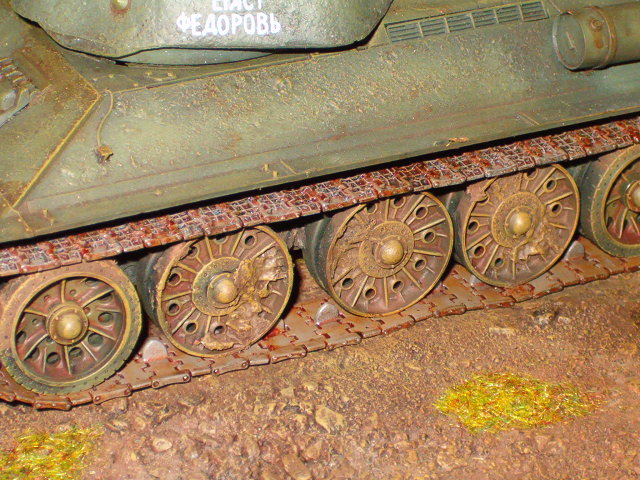 The kit was further enhanced by using the fine Fruil
Tracks. (ATL09) These are the waffle pattern and are kept together using the
wire pin method instead of the old crimp version. Believe it or not, after
three hours one night I had both sides done. Very fast to use and makes a
world of difference on your finished model. The tracks were painted in the
same fashion with a flat black base followed by gray. A nice wash of Winsdor-Newton
Burnt Sienna made everything okay in my world. These were mounted to the
chasis and given enough slack to give that Soviet Sag look that we all like so
much.
The kit was further enhanced by using the fine Fruil
Tracks. (ATL09) These are the waffle pattern and are kept together using the
wire pin method instead of the old crimp version. Believe it or not, after
three hours one night I had both sides done. Very fast to use and makes a
world of difference on your finished model. The tracks were painted in the
same fashion with a flat black base followed by gray. A nice wash of Winsdor-Newton
Burnt Sienna made everything okay in my world. These were mounted to the
chasis and given enough slack to give that Soviet Sag look that we all like so
much.| CONCLUSIONS |
October 2006
If you would like your product reviewed fairly and quickly by a site that has over 325,000 visitors a month, please contact me or see other details in the Note to Contributors.