Italeri 1/35 Autoblinda AB.41
| KIT #: | 6442 |
| PRICE: | $45.00 MSRP |
| DECALS: | Several options |
| REVIEWER: | Laurent Moitrot |
| NOTES: |
| HISTORY |
After the war in Ethiopia ( 1935-1936 ) and in Spain (which began in 1936) it appeared to the Italian army that the armoured cars they already had (Fiat – ansaldo tipo 611 and Ansaldo Lancia tipo 1 ZM) had to be replaced. The colonial Italian empire ( Abyssinia and Lybia ) was begging for a modern armored vehicle which could be used by the colonial police in this difficult landscape.
 The new vehicle appeared in 1939. The first prototype, the colonial one,
was showed to the Duce on May the 15th and the second one, the army car in
June 1939. They both had twin machine guns in the turret and a third one
in the hull, firing backwards. This was the AB40.
The new vehicle appeared in 1939. The first prototype, the colonial one,
was showed to the Duce on May the 15th and the second one, the army car in
June 1939. They both had twin machine guns in the turret and a third one
in the hull, firing backwards. This was the AB40.
The first production vehicles were ordered on march 18, 1940. It was asked that some of the cars would be equipped with a Breda 20 mm gun in the turret , replacing one of the lighter machine guns .
The war against France and England quickly showed that all the cars should be equipped with this heavier armament. The car was then called the AB 41. By May 1943, 557 cars were delivered.
In 1943 it was decided that an Ansaldo 47 mm semi automatic gun would be installed in a bigger redesigned turret and thicker armor. This was called the AB 43 model. Due to the fall of the fascist regime it never came to production.
Of course the Italeri model is the AB 41.
This car was considered as an excellent armored car. It had two driving wheels, one to drive backwards which is very convenient when you want to escape as fast as possible and there’s not enough room to turn around. It was fast and had a 400 km range on the road ( or 8 hours when used as a 4x4). Of course as it had to be produced very fast, some of the teething problems remained such as the lack of accessibillity to the engine, the main fuel tank not being armored, no firewall between the engine and the crew compartment and the steering being fragile. This was the fate of the Italian army to have to fight using gear that was either obsolete, of poor conception, or good but available in small quantities.
| THE KIT |
The kit was previewed by Scott Van Aken and there’s nothing I should add. It comes out of the box as a very fine kit. Highly detailed with very fine rivets. The car is covered with rivets so they have to be good !
| CONSTRUCTION |
I had in mind to build this model as it came fout of the box without any modifications.
The instructions are rather good and if you follow them step by step you don’t risk much.
The only concern being that I needed pictures of the vehicle to glue some of the parts the right way, for the instructions seemed a bit confusing at times.
One good point is that
there is an arrow molded on the chassis which shows you where the front is.
It may sound silly to you but as the underframe is perfectly symmetrical
ther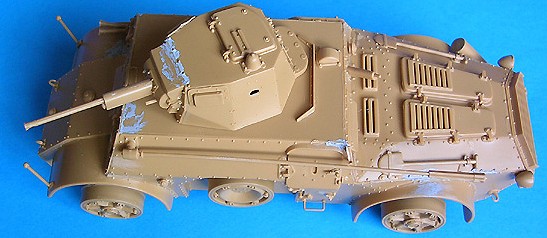 e’s a risk that you build it the wrong way ( parts 4a and 5a ). Also
be careful while gluing the wheels . Be sure they are on the same level.
Because of the way Italeri separates the various parts, a mistake is very
easy to do (I can tell as it happened to me …)
e’s a risk that you build it the wrong way ( parts 4a and 5a ). Also
be careful while gluing the wheels . Be sure they are on the same level.
Because of the way Italeri separates the various parts, a mistake is very
easy to do (I can tell as it happened to me …)
Building the hull was not the easiest thing to do. Despite the four rods which help you with the body sides, gluing each plate requires your attention. You can see from the pics that although I was carefull some joints needed to be filled with putty. This is serious stuff because you don’t want to ruin the beautiful rivet lines. The result is worth the pain.
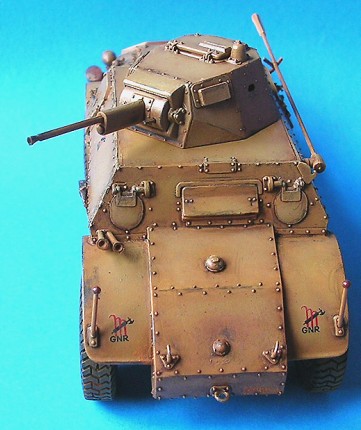
Concerning the turret, be careful with part #67b . I had to look at pictures of the car for that one . Be sure that it is aligned with the turret roof. Glue it « as high as possible ». (see pics for help)
Looking at pictures of
vehicles from different times of production I could notice some parts are
optionnal. For example, late production models had got jerrycans on the
front  fenders but lacked the two horns. Other vehicles only had one horn
and on those which had two they were not symmetrical ( so the way they
look on my model is not a mistake !). Some others had got jerrycans on the
side of the turrets … you decide !
fenders but lacked the two horns. Other vehicles only had one horn
and on those which had two they were not symmetrical ( so the way they
look on my model is not a mistake !). Some others had got jerrycans on the
side of the turrets … you decide !
On most of the pics I’ve seen parts 35b were closed to protect the main lights .
The interior of the car is empty, with the exception of the guns and the gunner’s seat. It seemed to me I’d better close every door to hide this emptyness. I guess some resin aftermarket parts will soon be available to fill this gap !
As I already said, my intention was to build it straight out of the box, without any modifications. Now if someone wants to go into detailing this model here are a few suggestions : as usual the tools cry for some details. The way they are fixed on the hull is a bit too simple as usual. The main hatch on the turret lacks two small handles . This doesn’t require any expensive photoetched parts. Sprue will do the job . I must confess that the only part of the kit I don’t like is the antenna. It looks weird and thick. Unfortunately I couldn’t find in my files a close up view of this part.
| COLORS & MARKINGS |
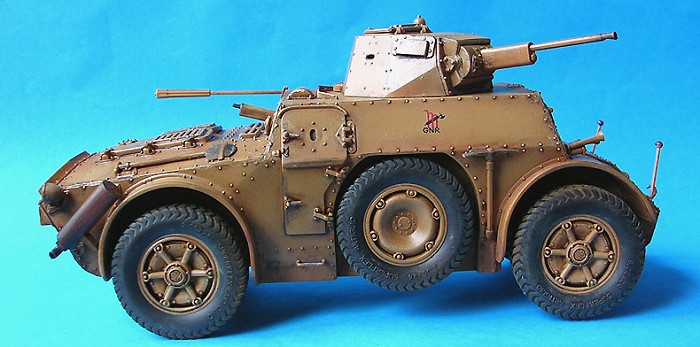
 I think this car is a
bit too small to be painted with a heavy camouflage so I chose the
vehicle from the « Republica Sociala Italiana » which is painted an
overall sand color. Because of the way I usually do the weathering I didn’t
really care about any « special italian sand » but used Gunze H66 sand
brown which is in fact the german RLM79 sand yellow. I then applied a very
heavy wash of a mix of turpentine and burnt umber oil paint. I like it
thick, some people don’t, and let it dry for a few hours. I then rub it
with my bare fingers and a piece of tissue to reach for the places which
are out of reach for my big clumzy fingers. Next step was after 24hours of
rest to drybrush the model. I used the gunze acrylic paint I used to paint
the car, mixed with some yellow oil paint to lighten it up a bit. I added
some white oil paint to this mix to add the last touch to this drybrushing.
I think this car is a
bit too small to be painted with a heavy camouflage so I chose the
vehicle from the « Republica Sociala Italiana » which is painted an
overall sand color. Because of the way I usually do the weathering I didn’t
really care about any « special italian sand » but used Gunze H66 sand
brown which is in fact the german RLM79 sand yellow. I then applied a very
heavy wash of a mix of turpentine and burnt umber oil paint. I like it
thick, some people don’t, and let it dry for a few hours. I then rub it
with my bare fingers and a piece of tissue to reach for the places which
are out of reach for my big clumzy fingers. Next step was after 24hours of
rest to drybrush the model. I used the gunze acrylic paint I used to paint
the car, mixed with some yellow oil paint to lighten it up a bit. I added
some white oil paint to this mix to add the last touch to this drybrushing.
It was then time for « filtering » which I did using ochre yellow (still oil paint) heavily diluted in some matt varnish. The last touch was to reproduce the bare metal using a pencil and to put some pastels on the wheels to simulate the dust.
| CONCLUSIONS |
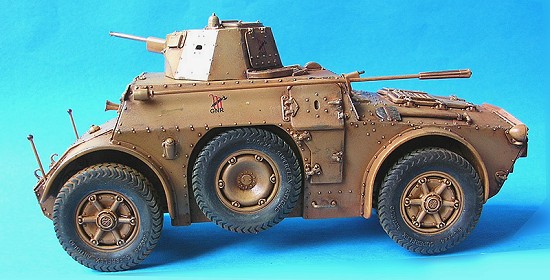
I really loved building this kit. As it comes it is one nice kit with the usual italeri idiosyncrasies which make it an easy but delicate model to build.
| REFERENCES |
An issue of « VMI international » (a French magazine ) from October 1986, which featured a nice 1/35 scale drawing and a few good pics .
Also a few pics gathered on the net at : http://www.wwiivehicles.com/italy/armored_cars/ab_40_ab_41_ab_43.html
September 2005
Copyright ModelingMadness.com
If you would like your product reviewed fairly and fairly quickly, please contact the editor or see other details in the Note to Contributors.