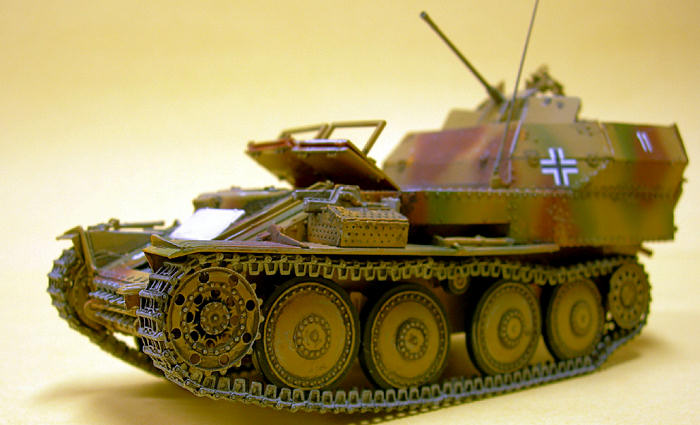
Dragon 1/35 Flakpanzer 38(t) Ausf L
| KIT #: | 6469 |
| PRICE: | $ |
| DECALS: | Two options |
| REVIEWER: | Blair Stewart |
| NOTES: | ISmart Kit |
| HISTORY |
Check the preview for a good historical summary and a quick look at what’s in the box.
| THE KIT |
 This is my
third Dragon Smart Kit, and I stand amazed once again. In fact, almost too
amazed: this was one of the hardest kits I’ve ever assembled. Start with over
540 parts, throw in the dreaded photoetch and individual link tracks (Dragon’s
“Magictracks”), and you have a case of advanced modeling syndrome just looking
for a place to happen (in fact, it took me several months to finally complete
this beast, and I had to slap the AMS out of myself).
This is my
third Dragon Smart Kit, and I stand amazed once again. In fact, almost too
amazed: this was one of the hardest kits I’ve ever assembled. Start with over
540 parts, throw in the dreaded photoetch and individual link tracks (Dragon’s
“Magictracks”), and you have a case of advanced modeling syndrome just looking
for a place to happen (in fact, it took me several months to finally complete
this beast, and I had to slap the AMS out of myself).
| CONSTRUCTION |
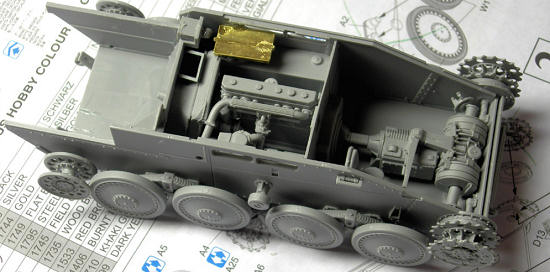 Per
the instructions, I started with the lower hull and suspension system. I also
assembled the road wheels and glued them to the lower hull. I then assembled the
transmission, the engine (26 pieces!) and the radiator.
Per
the instructions, I started with the lower hull and suspension system. I also
assembled the road wheels and glued them to the lower hull. I then assembled the
transmission, the engine (26 pieces!) and the radiator.
The next subassembly was the upper hull. There are quite a few parts on each
of these, so I tried to take my time and make sure that I didn’t miss anything.
I like to glue the tools on the tank and then hand-paint them later. Right off
the bat, the dreaded PE came into play. There are a myriad of latches,
tie downs, and boxes that are PE. I don’t have one of the PE bending tools, but
I would highly recommend one of these for this kit.
As an example of the PE complexity, each of the tie downs for the
tools 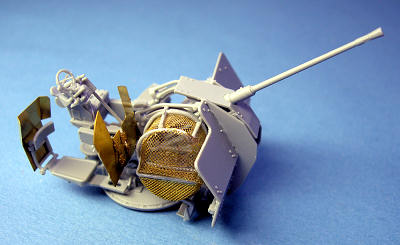
Step 13 is where I had the most trouble. I decided to build the kit with the
gun shields in the “up” position, but for some reason, I just could not get the
parts to line up correctly (perhaps due to mislabeling?).
No matter how I tried them, the angles just would not match up. After
several attempts, I decided the only alternative was to scratch-build my own
shields with the correct angles. So I made some templates and cut out the parts
from thin white plastic stock.
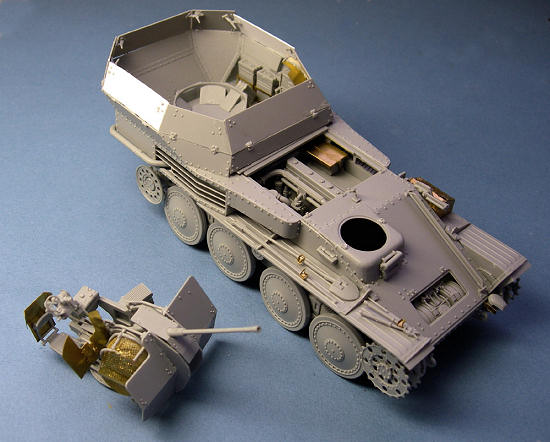 you get
all the pieces for Dragon’s 2CM FlaK 38, which is their kit No. 6288, along with
all the PE parts included in that kit. You have the option of using either PE
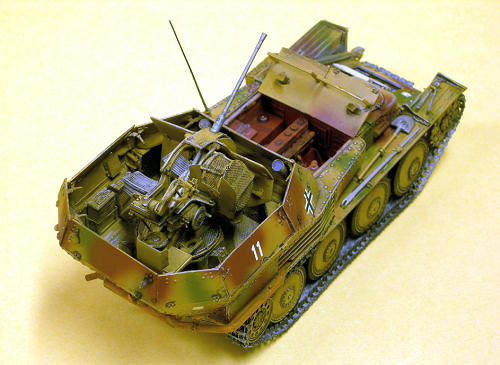
parts or plastic parts for the gun shield. The most difficult part of the gun
assembly, but to me, the most striking when assembled, is the spent shell “cage”
that was used to prevent ejected shells from flying all around the fighting
compartment. While this is a neat part of the kit, it takes some doing to get it
shaped correctly and mounted to its plastic frame.
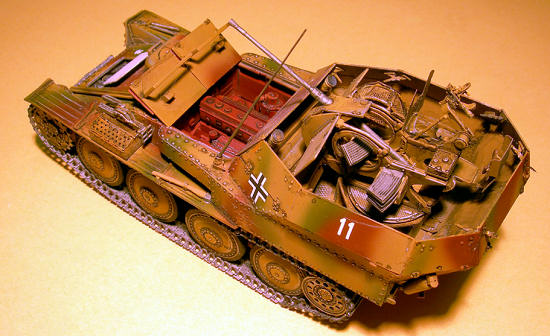
Another gun assembly option is the elevation angle: 0, 20, 40 or 60
degrees. Depending on which you choose, there are separate parts associated with
each elevation angle.
I opted for the 40-degree elevation angle.
you get
all the pieces for Dragon’s 2CM FlaK 38, which is their kit No. 6288, along with
all the PE parts included in that kit. You have the option of using either PE
parts or plastic parts for the gun shield. The most difficult part of the gun
assembly, but to me, the most striking when assembled, is the spent shell “cage”
that was used to prevent ejected shells from flying all around the fighting
compartment. While this is a neat part of the kit, it takes some doing to get it
shaped correctly and mounted to its plastic frame.
Another gun assembly option is the elevation angle: 0, 20, 40 or 60
degrees. Depending on which you choose, there are separate parts associated with
each elevation angle.
I opted for the 40-degree elevation angle.
| COLORS AND MARKINGS |
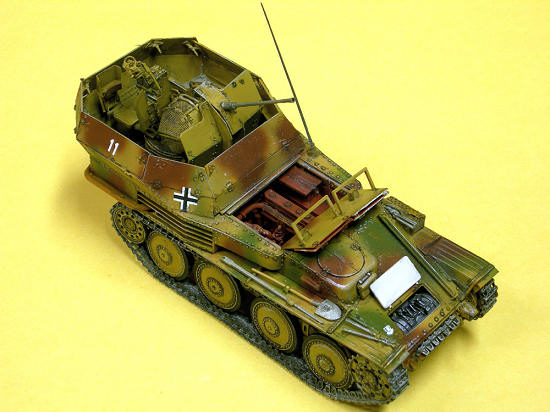
I started by painting the interior compartments. From articles I have been able
to read on the Internet, German armor engine compartments were painted red, so I
opted for Floquil’s hull red. After painting the compartment, I placed the
covers on it and
 then
painted the vehicle’s exterior. I sprayed the transmission compartment flat
white.
then
painted the vehicle’s exterior. I sprayed the transmission compartment flat
white.
For the exterior, I decided on a different paint scheme than the instructions
offered. I started with MM Sand Gelb as the overall base coat, and then painted
red brown and dark green splotches on the vehicle. I sprayed the tracks with
Testors Steel.
Next, I dry brushed the vehicle with Polly S Fantasy Goblin Flesh to
simulate rust (ever since Floquil stopped making their rust wash, I have found
it difficult to locate a paint that actually looks like real rust. This fantasy
paint is about as close as I have come lately). The final weathering was to take
a silver artist’s pencil and rub it on sharp edges where there normally would be
wear to simulate bare metal.
| CONCLUSIONS |
 This
is yet another great kit from Dragon. I highly recommend this kit to all armor
buffs, plus anybody that’s up for a modeling challenge!
This
is yet another great kit from Dragon. I highly recommend this kit to all armor
buffs, plus anybody that’s up for a modeling challenge!
September 2008
Copyright ModelingMadness.com
Thanks to your editor for the review kit.
If you would like your product reviewed fairly and quickly, please contact the editor or see other details in the Note to Contributors.