Dragon 1/35
Sd.Kfz.250/9 Neu 2cm Reconnaissance, Premium Edition
|
|
6316 |
|
PRICE: |
$53 MSRP |
|
DECALS: |
Five different vehicles |
|
REVIEWER: |
|
|
NOTES: |
An intricate, well detailed kit |
|
HISTORY |
The Sd.Kfz. 250
was a light armored halftrack, very similar in appearance to the larger
Sd.Kfz.251, designed by Hanomag. The 250 was built by DEMAG.
Compared to U.S.
halftracks, the Sd.Kfz. 250 series was less mobile, with unpowered front wheels.
However, its tracks made it far more mobile than the armored cars it replaced,
and it was a popular vehicle. Most variants were open-topped and had a single
access door in the rear.
 The
Sd.Kfz.250 was adopted in 1939 to supplement the standard halftrack. Production
delays meant the first 250 did not appear until mid-1941, which meant it was not
available to German forces during either the Polish or the French campaigns.
The
Sd.Kfz.250 was adopted in 1939 to supplement the standard halftrack. Production
delays meant the first 250 did not appear until mid-1941, which meant it was not
available to German forces during either the Polish or the French campaigns.
In 1939 German design agencies decided
that small armored halftracks would be useful to accompany tanks during an
attack. Smaller halftracks could fulfill a number of requirements for which a
larger vehicle wouldn't be needed, including headquarters, artillery forward
observer, radio, and scout vehicles. Demag, who designed the Sd.Kfz.10, the
smallest German halftrack then in service, was selected to develop the light
armored troop carrier (leichter gepanzert Mannschaft-Transportwagen) or Sd.Kfz.
250. To accomplish this, DEMAG took the D7 chassis of the Sd.Kfz.10 and
shortened it by one road wheel station, replaced the sheet steel hull replaced
with an armored hull and specially designed virtually every component for the
armored chassis D7p.
A Maybach 6-cylinder, water-cooled,
4.17-liter (254 cu in) HL 42 TRKM gasoline engine developing 100 horsepower
powered the Sd.Kfz. 250. The vehicle had a semi-automatic Maybach VG 102 128 H
transmission with seven forward and three reverse gears. The Sd.Kfz.250 had a
top speed of 76 km/h (47 mph), but the driver was cautioned not to exceed
65 km/h (40 mph).
The vehicle
employed both tracks and wheels for steering. The steering system was set up so
that shallow turns used only the wheels, but brakes would be applied to the
tracks the farther the driver turned the steering wheel. The drive sprocket had
rollers rather than the more common teeth. The rear suspension consisted of four
double road wheels mounted on swing arms that were sprung by torsion bars. An
idler wheel, mounted at the rear of the vehicle, controlled track tension. The
front wheels had transversely mounted leaf springs and shock absorbers, the only
ones on the vehicle, to dampen impacts.
The initial
design had an armored body made of multi-faceted plates, which gave good
protection against small arms fire, but made the design both expensive to
manufacture and quite cramped for the crew. DEMAG stopped production of this
early version in October 1943 after building 4,200 Sd.Kfz.250s, and began
replacing it with a second version (neu
art or "new version") that was greatly simplified to speed
up manufacture. In both variants, the armor was useful only for stopping
small-arms fire and
 small
artillery fragments. Heavy machine gun fire, anti-tank gunfire, or almost any
tank gun could penetrate the Sd.Kfz. 250 at long range.
small
artillery fragments. Heavy machine gun fire, anti-tank gunfire, or almost any
tank gun could penetrate the Sd.Kfz. 250 at long range.
The Sd.Kfz. 250
was unique among German half-track designs as it and its parent Sd.Kfz. 10 used
a hull rather than a frame.
The German army used the vehicle in a
wide variety of roles throughout World War II. The basic troop carrier version
served as an armored personnel carrier for reconnaissance units, where it
carried scout sections. This basic variant usually mounted one or two MG34
machine guns. Later variants carried 20mm, 37mm, and even 75mm guns to support
the more lightly armed versions.
Several
special-purpose variants appeared early in the war. The 250/3 and 250/5 were
command variants, both equipped with fewer seats and with long-range radio
equipment. Battalion and higher commanders used these vehicles as personal
command vehicles. The most famous was the 250/3 used by Erwin Rommel in the
North African campaign. Early versions had large 'bed-frame' antennas that were
easy to spot at long range, making them more vulnerable to artillery fire. In
later variants the Germans dispensed with this antenna and used a whip antenna
instead.
The Sd.Kfz.253
variant was fully enclosed, and was used by artillery forward observers to
accompany tank and mechanized infantry units.
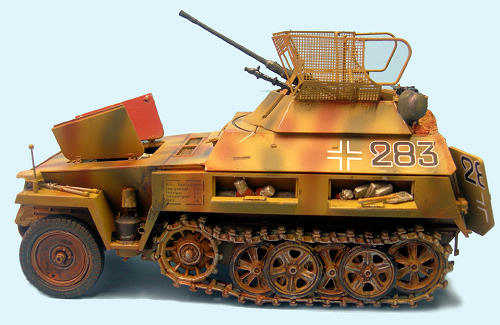
The 250/9
variant was a reconnaissance variant with a 2 cm KwK 38 auto cannon and a
coaxial MG34 or MG42 in a low, open topped turret that was identical to the
Sd.Kfz.222 armored car (early version) and the sdkfz-234/1 armored car (late
version). The 250/9 weighed 6.02 tons and carried a crew of three. The vehicle
had room internally for up to 100 rounds of 20mm ammunition for the KwK38 main
gun. The German Army ordered 30 of these 250 variants in March 1942.In the same
year three prototypes were sent to Russia to see if the vehicle’s cross-country
performance was better then that of the wheeled armored cars then in use. As a
result of these trials, the Germans discontinued production of the Sd.Kfz.222
and replaced it with the Sd.Kfz.250/9,which began mass-production in May 1943.
Early versions of the 250/9 used the complete turret assembly of the Sd.Kfz.222
and later the Hängelafette (swinging mount) 38.
|
THE
|
 Once
again, Dragon has produced a kit with an astonishing amount of detail and high
number of parts (420). There are also two sets of photo-etched parts to provide
added detail. The kit also includes the dreaded (for me) separate link tracks,
but since this is a small vehicle, this turns out not to be as bad a task as,
say, separate link tracks on a King Tiger.
Once
again, Dragon has produced a kit with an astonishing amount of detail and high
number of parts (420). There are also two sets of photo-etched parts to provide
added detail. The kit also includes the dreaded (for me) separate link tracks,
but since this is a small vehicle, this turns out not to be as bad a task as,
say, separate link tracks on a King Tiger.
For a detailed
look at what’s in the box, see
the preview. The instructions include 28 separate
steps, and one really needs to mark off each completed part and step to avoid
“construction destruction” (okay: maybe some of you younger folks don’t need to
do this, but I sure do!).
|
CONSTRUCTION |
Starting with the
lower hull, I assembled the swing arms and then glued together all of the double
road wheels. At this stage, the instructions recommend assembling the tracks,
but I opted to delay this until later. I then moved to assembling the front
suspension and the multi-piece front wheels (rather than use molded vinyl tires,
Dragon has opted for a five-part plastic tire that accurately simulates the
tire’s tread when glued together).
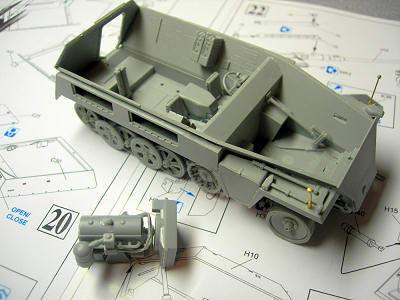 At this
stage, the instructions called for assembling the Maybach engine, which is
fairly well detailed for a 1/35 scale kit. I painted the engine Testor’s burnt
iron and set it aside for later installation in the engine compartment. I then
glued in the firewall and steering mechanism.
At this
stage, the instructions called for assembling the Maybach engine, which is
fairly well detailed for a 1/35 scale kit. I painted the engine Testor’s burnt
iron and set it aside for later installation in the engine compartment. I then
glued in the firewall and steering mechanism.
After installing
the dashboard, seats and transmission, I glued down the rear compartment’s
floor. At this stage, the instructions called for assembling numerous small PE
straps and carriages for internal equipment stowage. I started this process in
good faith, but then I realized that 95% of these would not be visible, even
with the top grenade screen fully open. Accordingly, as I often do with PE
parts, I took the coward’s way out and omitted these parts from the construction
process.
Next came the hull
sides, front fenders, and external side stowage boxes, which are constructed so
that one can open them to display internal equipment if desired. I then glued
proscribed pieces to the top hull deck. At this stage, I opted to display the
model with the hood open, so I cut the hood access panels in half with an Exacto
knife.
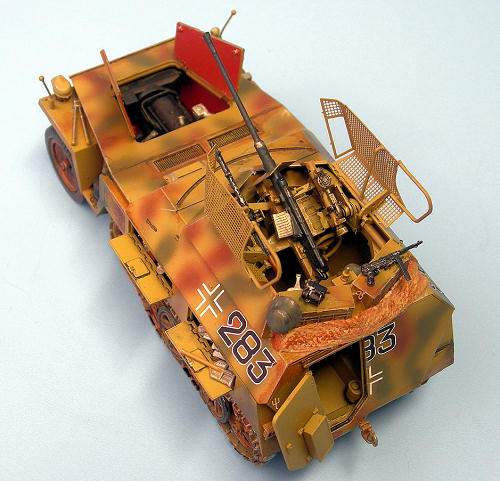
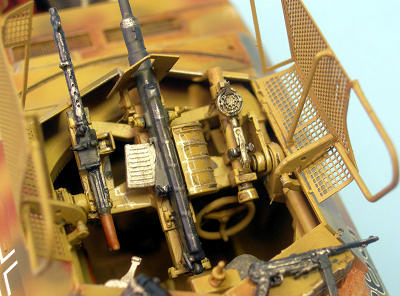 Construction
now moved to the very detailed 20mm cannon, coaxial machine gun and the gun
mount for both weapons. When completed and painted, this assembly provides a
striking centerpiece for the finished model. I glued the assembled gun mount
into the turret and then glued the turret to the hull’s topside. The kit
provides PE covers (part MA6) for the turret’s rear stowage boxes as well as a
PE gun shield (MA9).
Construction
now moved to the very detailed 20mm cannon, coaxial machine gun and the gun
mount for both weapons. When completed and painted, this assembly provides a
striking centerpiece for the finished model. I glued the assembled gun mount
into the turret and then glued the turret to the hull’s topside. The kit
provides PE covers (part MA6) for the turret’s rear stowage boxes as well as a
PE gun shield (MA9).
I opted to display
the grenade screen fully open, so per the instructions, I used superglue to
combine the PE screens and the plastic frame. I then glued the frames to the top
of the turret at the angle shown in the instructions.
Per my usual
approach for armor kits, I glued on all external equipment (e.g., shovels,
picks, jacks) that I would paint by hand at a later stage.
Finally, I began the process of assembling the
single link tracks. I made the tracks in two sections: one for the bottom links
and looping over the front drive sprocket, and one for the top links, looping
around the rear idler wheel.
|
COLORS &
MARKINGS |
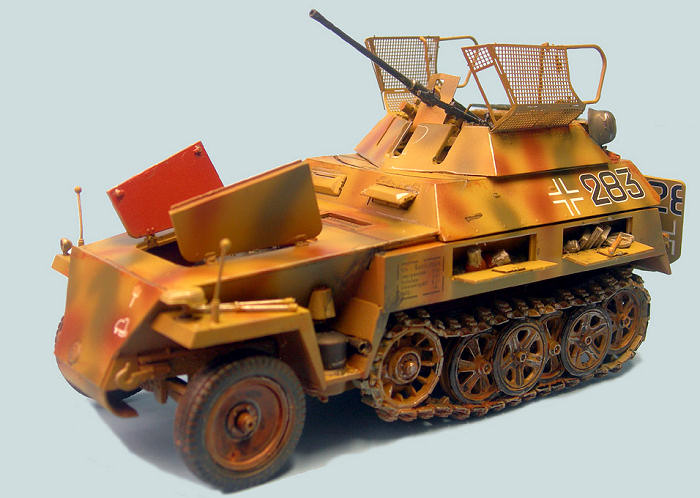
All five decal variants are for vehicles in the
standard mid-war camouflage scheme of yellow, reddish brown and green. Per my
previous construction of
Dragon's Elefant with Zimmerit,
I again decided to use
Adam Wilder's "Color Modulation"
painting technique.
I applied an
overall coat of Tamiya XF-64 Red Brown lightened with a few drops of XF-60 Dark
Yellow. Once this dried,
 I
airbrushed a coat of XF-60, making sure to limit the amount of this paint on the
darker, lower areas. I then added XF-55 Deck Tan to XF-60 to further lighten the
color, and tried to again limit the spray to the upper areas of the model. For
the final stage, I mixed X-2 White to that mixture, and then sprayed the upper
half of the model again.
I
airbrushed a coat of XF-60, making sure to limit the amount of this paint on the
darker, lower areas. I then added XF-55 Deck Tan to XF-60 to further lighten the
color, and tried to again limit the spray to the upper areas of the model. For
the final stage, I mixed X-2 White to that mixture, and then sprayed the upper
half of the model again.
The next phase
involved painting all of the smaller details (e.g., hatches, covers, vents,
grills) with lighter yellow and tan shades to make these details “pop.” For this
stage, I used inexpensive acrylic craft paints, purchased from a local crafts
store, and a relatively wide modeling brush to get smooth coats on the model.
One of the
difficulties with German armor is the lack of information about interior paint
colors. Fortunately, the internet is a fantastic source for modeling information
these days, and I was able to find both exterior and interior photos of a
meticulously restored Sd.Kfz.250. Given the
apparent attention to detail in this restoration, I figured the restorers had
thoroughly researched the vehicle and color schemes. The interior pictures show
that this restored vehicle’s interior paint matches the primary yellow color of
the outside, so that’s what I chose. The only exception was for the engine
compartment, which I opted to paint Floquil hull red (one can find many
references on the net that indicate this was a common paint scheme for engine
compartments, but who knows if DEMAG followed this scheme in its half tracks).
I then used oil
paints on the light and dark areas to provide additional gradation and further
break up the surface. I used a cardboard pallet to blend my oil paints as well
as to soak up the linseed oil in the paints so they will dry with a matte
finish. Once
 applied,
I blended these with a flat brush dipped in a small amount of thinner. (The
caution here is to not use too much thinner so that you avoid turning your
carefully applied oil paint into a wash). I also used this technique on the
shadows and darker areas of the model.
applied,
I blended these with a flat brush dipped in a small amount of thinner. (The
caution here is to not use too much thinner so that you avoid turning your
carefully applied oil paint into a wash). I also used this technique on the
shadows and darker areas of the model.
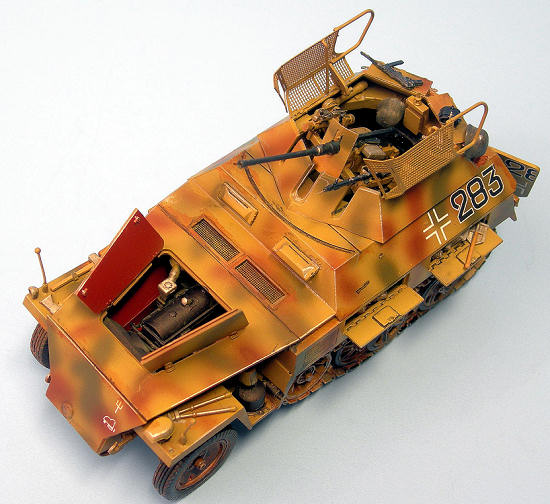
I then applied
splotches of dark red brown and dark green paint in a camo pattern that was
typical of many German armored vehicles. After the exterior was dry, I covered
the entire model with Testors Gloscote. Once dry, I applied a wash of black
acrylic hobby paint to highlight the vehicle’s details. I then applied the
decals using generous amounts of Solvaset. I used a reddish brown hobby paint
wash on the tracks to simulate mud and soil.
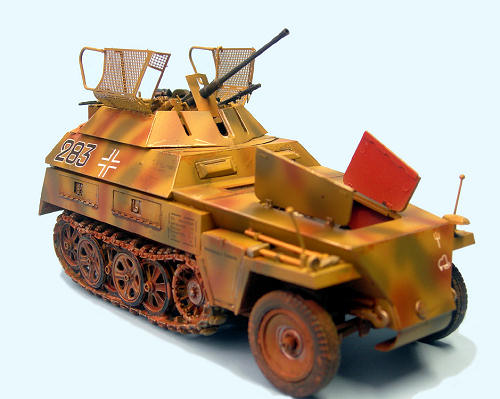
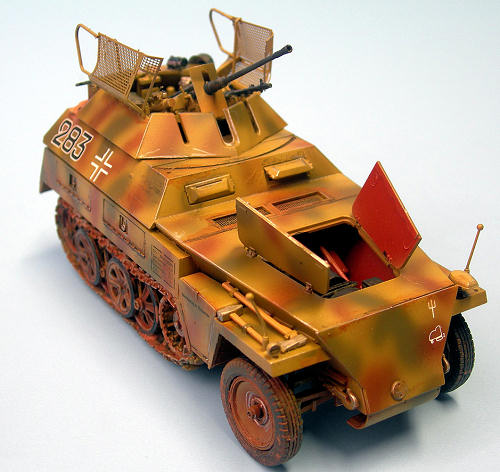
The final paint
process was to spray Testor’s Dulcote over the entire vehicle. I then took a
silver artist’s pencil to highlight wear spots where paint would be ground off
by everyday use.
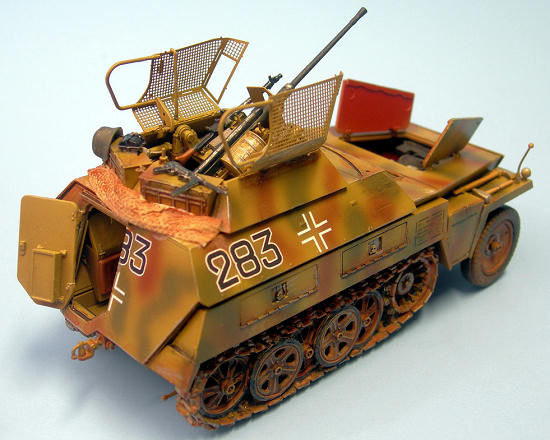
I painted
numerous pieces of German equipment and then glued these into the two open
stowage boxes on the vehicle’s side. I also placed a set of binoculars and an
MP40 on the rear deck of the turret. As a final touch, I soaked a piece of
Kleenex in diluted white glue, and then rolled up a cut length to make a tarp.
While this was still wet, I draped it around the back of the turret. When it was
dry, I painted it with acrylic paints and highlighted it with a darker shade. I
then painted all of the tools attached to the vehicle’s front fenders.
|
CONCLUSIONS |
This is a great kit with loads of detail. I continue to be amazed at how far armor models have come since the first armor kit I built in 1973. I highly recommend this to all armor enthusiasts, but be prepared to stay the course and glue a lot of parts together!
|
REFERENCES |
1.
 “Sd.Kfz.250,”
Wikipedia,
2009.
“Sd.Kfz.250,”
Wikipedia,
2009.
2.
“Sd.Kfz.250 Photo Reference,”
Military Modeling, 2009.