| KIT #: | 32568 |
| PRICE: | $34.00 SRP |
| DECALS: | Three options |
| REVIEWER: | Jonathan Prestidge |
| NOTES: |
| HISTORY |
From the kit
instructions: “During WWII, Germany produced many open-topped tank destroyers
using the chassis of obsolete tanks. Among these was the Marder III series,
which was based on the 38(t) tank made by the Czech company CKD (later BMM) and
developed to counter Russian T-34 and KV-1 tanks. Initial variants
 were armed
with the PaK 36(r), a modified Russian 7.62cm anti-tank gun, and served well in
Russia and North Africa. The German military then ordered BMM to develop a tank
destroyer based on the 38(t) tank that would be armed with the new PaK 40/3
7.5cm gun, resulting in the Marder III Ausf.H in autumn of 1942. The series then
culminated in the Ausf.M, which differed from the earlier Ausf.H by having its
engine moved to the center (“Mitte” in German, hence the M designation) and its
fighting compartment relocated to the rear. This design not only improved ease
of production and operation, but it also allowed the lower profile fighting
compartment to be surrounded by armor plates, thereby enhancing crew protection.
The PaK 40/3 could fire either armor-piercing or high-explosive shells, and 27
rounds were carried. Between May 1943 and May 1944, a total of 942 Ausf.M were
produced and they were the mainstay of tank destroyer units on all fronts.
Late-production versions built from the end of 1943 featured a welded steel
driver’s hood rather than a cast metal one, as well as different side engine
intake cover and exhaust layouts.”
were armed
with the PaK 36(r), a modified Russian 7.62cm anti-tank gun, and served well in
Russia and North Africa. The German military then ordered BMM to develop a tank
destroyer based on the 38(t) tank that would be armed with the new PaK 40/3
7.5cm gun, resulting in the Marder III Ausf.H in autumn of 1942. The series then
culminated in the Ausf.M, which differed from the earlier Ausf.H by having its
engine moved to the center (“Mitte” in German, hence the M designation) and its
fighting compartment relocated to the rear. This design not only improved ease
of production and operation, but it also allowed the lower profile fighting
compartment to be surrounded by armor plates, thereby enhancing crew protection.
The PaK 40/3 could fire either armor-piercing or high-explosive shells, and 27
rounds were carried. Between May 1943 and May 1944, a total of 942 Ausf.M were
produced and they were the mainstay of tank destroyer units on all fronts.
Late-production versions built from the end of 1943 featured a welded steel
driver’s hood rather than a cast metal one, as well as different side engine
intake cover and exhaust layouts.”
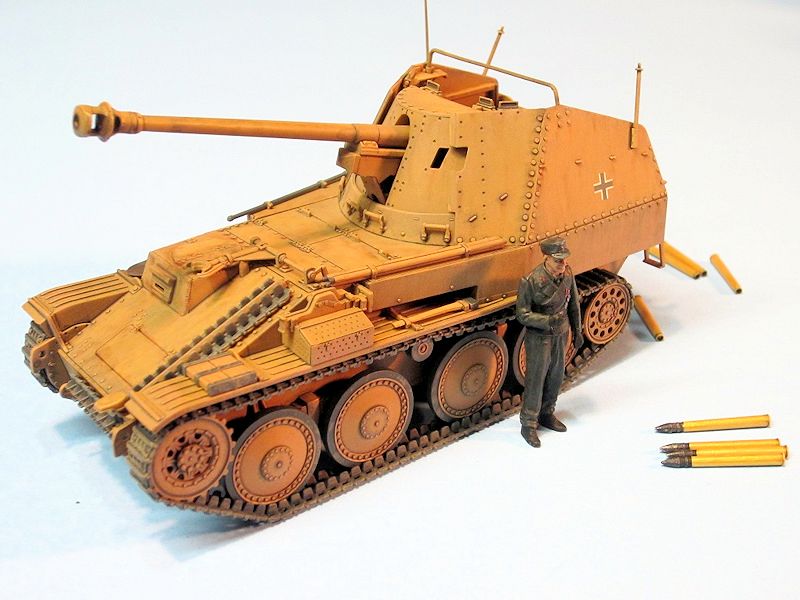
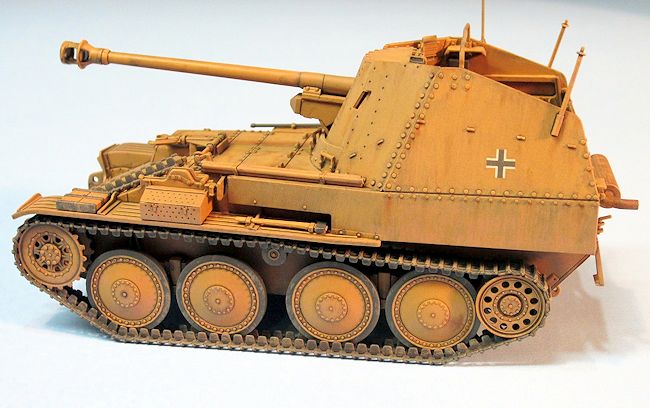
| THE KIT |
Tamiya’s
1/48th Marder III Ausf.M is kit No. 68 in their Military Miniatures
series. The instructions are well printed and easy to follow. The engineering of
the Tamiya Marder III is superb. This kit is has more petite
 detail parts than
some of the other kits in this line. The
kit is crisply molded in tan plastic and there is almost no flash on the kit
parts. A well molded, five piece commander figure is included. The kit decals
are thin, in register, and provide markings for three European tank destroyers.
There are metal chassis weights and nice link and length tracks with the longer
portions pre-formed, minimizing assembly time. Also included are eight rounds of
ammo for the main gun – four spent and four unspent.
detail parts than
some of the other kits in this line. The
kit is crisply molded in tan plastic and there is almost no flash on the kit
parts. A well molded, five piece commander figure is included. The kit decals
are thin, in register, and provide markings for three European tank destroyers.
There are metal chassis weights and nice link and length tracks with the longer
portions pre-formed, minimizing assembly time. Also included are eight rounds of
ammo for the main gun – four spent and four unspent.
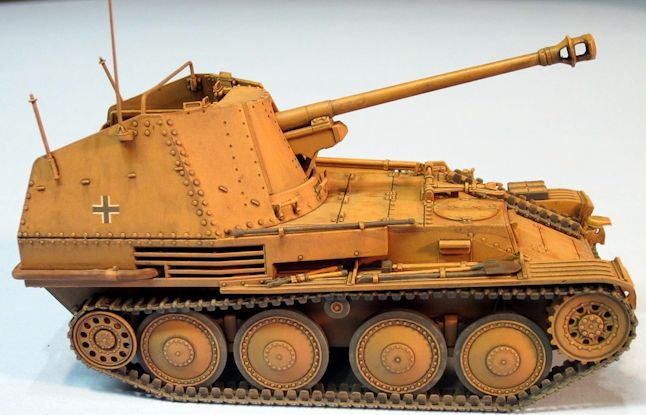
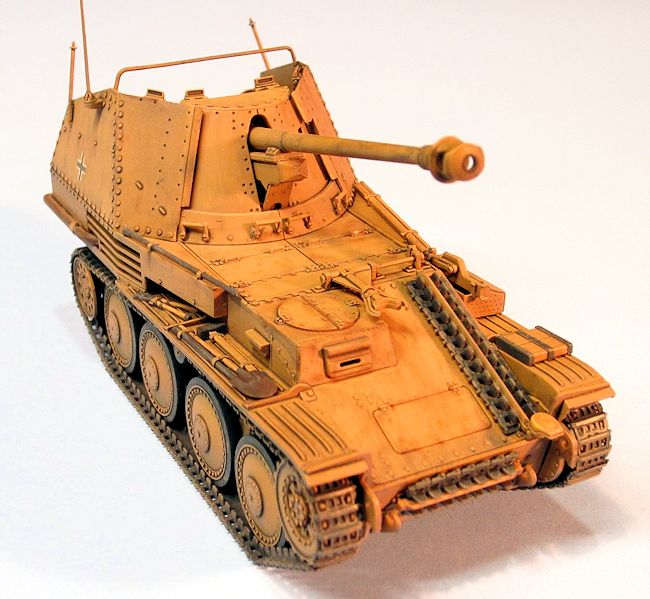
| CONSTRUCTION |
The open
nature of this tank destroyer meant that I had to carefully plan my painting,
weathering and construction. Since I had to paint and weather the interior prior
to assembly, I deviated quite a bit from the kit’s instruction sequence. I built
the kit in sub-assemblies: the chassis decking, the gun, and the armored sides
of the superstructure. I left the wheels and tracks off until after painting for
ease of weathering. The excellent fit of the parts, minimal cleanup, and
excellent engineering really made for a rewarding build. After about seven hours
of building, test fitting, and planning I had most of the parts cleaned up and
ready for paint.
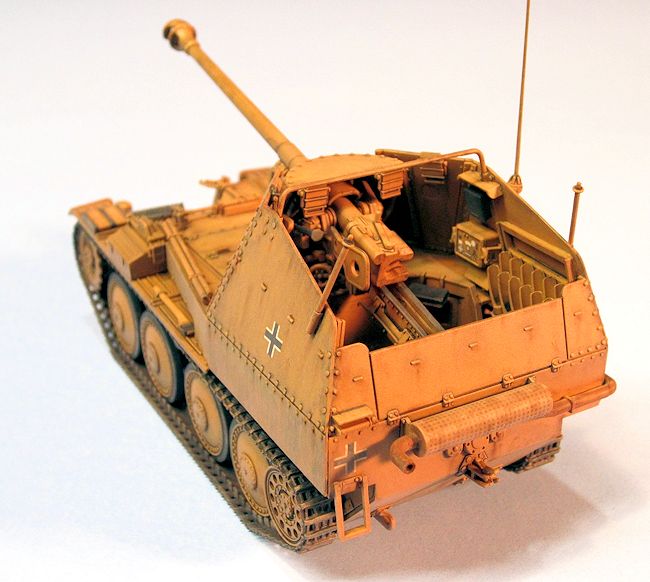
| COLORS & MARKINGS |
I started
the weathering process by applying a thin, black, soapy water filter/wash. I
went section by section, using a Q-tip to remove some of the wash and to streak
it unevenly. I then dry-brushed some thinned RLM 79
 to accent detail and further
vary tone.
to accent detail and further
vary tone.
| CONCLUSIONS |
May 2014 If you would like your product reviewed fairly and
fairly quickly, please
contact
the editor or see other details in the
Note to
Contributors.