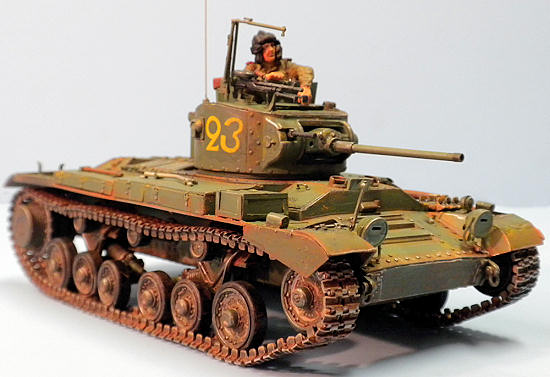
MiniArt 1/35 Valentine Mk IV "Red Army"
| KIT #: | 35092 |
| PRICE: |
$58.00 SRP |
| DECALS: | Six options |
| REVIEWER: | Blair Stewart |
| NOTES: |
Kit includes individual track links |
| HISTORY |
The
Vickers Valentine tank was
 During the war, the British supplied 2,394 of the British Valentine models via
Lend Lease to the
During the war, the British supplied 2,394 of the British Valentine models via
Lend Lease to the
The
Valentine first served in Operation Crusader in the North African desert, when
it began to replace the Matilda Tank. The British Army extensively used the
Valentine in the North African Campaign, where it earned a reputation as a
reliable and well-protected vehicle.
The
Valentine shared the common weakness of the British tanks of the period: its
2-pounder gun lacked high-explosive (anti-personnel) capability, and the gun
soon became outdated as an anti-tank weapon. The small turret and turret ring
made mounting larger guns a very difficult task. Although the British developed
versions with a 6-pounder gun and then with a 75 mm gun, by the time tanks
mounting these guns were available in significant numbers better tanks had
reached the battlefield. Another weakness was the small crew compartment and the
turret for only two men. A larger turret added room for a loader position in
some of the 2-pounder versions, but use of larger guns required removal of the
position.
By
1944 the Valentine had been almost completely replaced in front-line European
Theater units by the Churchill tank and the US-made
The
| THE KIT |
| CONSTRUCTION |
Next, I moved to the
well-rendered suspension system, which, for most armor kit assemblies, is the
most tedious process. The various components (i.e., road wheels, idlers,
suspension rigs, etc.) are repetitious and one just needs to plow thru these.
Once the suspension and
running gear were done, I proceeded with assembly of the driver’s compartment.
Here, I found a minor error in the instructions: parts B10 and B9 in the
instructions are really A10 and A9.
S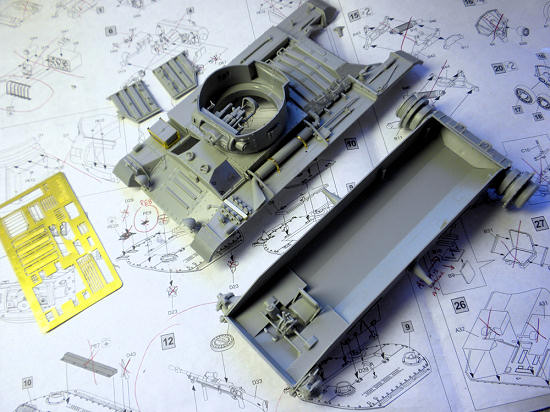 teps 31-36 involve assembly
of the lower hull and attaching all of the road wheels and idlers. Step 38 is
assembly of the individual track links – which I have grown to hate – and I also
put this off until I could muster the fortitude to attack them (there are 98
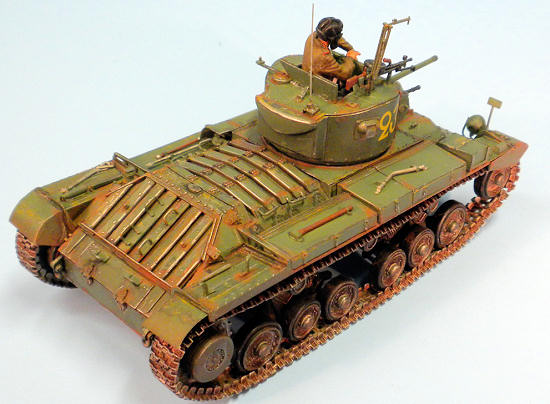
links per side). So, to divert myself, I moved to the hull top. Again, I found a
minor instructional error: parts C40 (four of them) are mislabeled, and should
really be B40. Again, exercise caution in handling of the small pieces,
especially the various grab handles located on the hull top. The kit includes a
nice set of tools, which I glued to the hull (I always opt to paint these by
hand after spray painting the tank). The final upper hull assembly involves
attaching the turret ring.
teps 31-36 involve assembly
of the lower hull and attaching all of the road wheels and idlers. Step 38 is
assembly of the individual track links – which I have grown to hate – and I also
put this off until I could muster the fortitude to attack them (there are 98
links per side). So, to divert myself, I moved to the hull top. Again, I found a
minor instructional error: parts C40 (four of them) are mislabeled, and should
really be B40. Again, exercise caution in handling of the small pieces,
especially the various grab handles located on the hull top. The kit includes a
nice set of tools, which I glued to the hull (I always opt to paint these by
hand after spray painting the tank). The final upper hull assembly involves
attaching the turret ring.
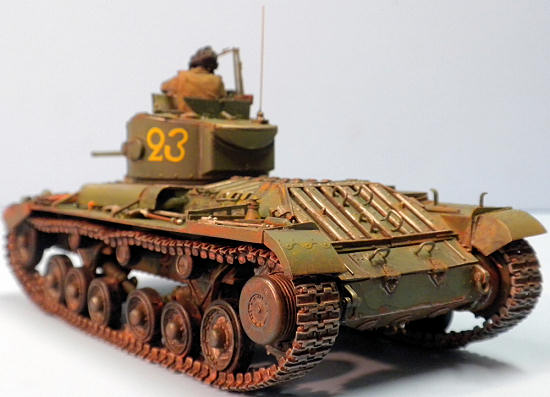
I painted the lower hull
(see below for colors) and, when dry, proceeded to assemble the much-dreaded
tracks. Call it fate or pre-ordained, but I had a ton of trouble with getting
the links together and making them appear somewhat “natural.” I don’t know if
this is due to my own stubbornness or whether the small size of the links
contributed to the process, but it was a “pain.” I hate to plug other companies’
products in the middle of a build review, but for my modeling abilities, Dragon
has come up with the best track solution in its “Dragon Styrene 100” (DS)
one-piece tracks. But for those who are into individual link tracks, I will say
that Miniart’s are very nicely done!
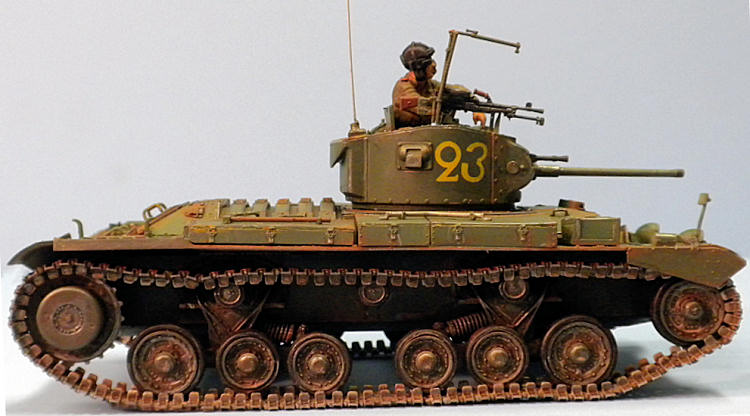
As a final touch, I cut a
length of steel guitar string and glued it with Crazy Glue to the turret to
replicate the radio antenna.
| COLORS & MARKINGS |
I opted to paint the entire tank with Testors Model Master (MM) Russian
Armor green. I chose to model a MK IV seen at Vilnius, Lithuania, in July
1944. The markings are simple: a number on each side of the turret.
Accordingly, I set the single
 decal on each side with a puddle of Future
(this works very well for “spot-setting” decals when one does not want to
gloss the entire model). I painted the road wheel rims with a black Sharpie
and the tracks with MM Steel. Once these components were dry, I proceeded to
the weathering stage.
decal on each side with a puddle of Future
(this works very well for “spot-setting” decals when one does not want to
gloss the entire model). I painted the road wheel rims with a black Sharpie
and the tracks with MM Steel. Once these components were dry, I proceeded to
the weathering stage.
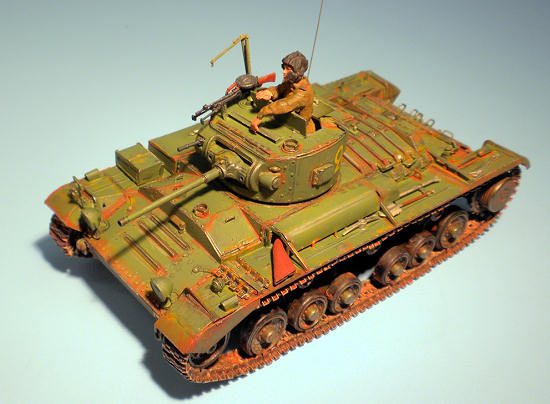
First, I applied to washes to the entire tank: the first, using a black
acrylic wash; and the second, using a burnt sienna wash (for both, I use
inexpensive acrylics that I purchase from local craft stores such as
Michaels or Hobby Lobby). Once
the washes dried, I dry brushed the burnt sienna acrylic onto the model to
simulate heavy rusting.
For a final weathering step, I took a No. 2 pencil and rubbed it on numerous
high spots to simulate fresh paint wear and to give the appearance of bare
metal. This can also be simulated using a silver pencil such as Prismacolor
Metallic Silver (also available at local craft stores).
For the figure, I used the tank commander figure from the enclosed MiniArt
crew set (a great bonus, I might add). I painted the figure using a variety
of MM paints, and then highlighted with a black acrylic wash.
| CONCLUSIONS |
| REFERENCES |
Thanks to your editor and www.dragonmodelsusa.com for the review kit. You should be able to find this at your local hobby shop. If not, have them order one for you.
If you would like your product reviewed fairly and fairly quickly, please contact the editor or see other details in the Note to Contributors.