| KIT #: | AF35S-02 |
| PRICE: | $30.00 |
| DECALS: | Five options |
| REVIEWER: | Dan Lee |
| NOTES: |
|
| HISTORY |
The Scorpion Light Tank came out of the British
Army's mid 60s Combat Vehicle Reconnaissance Tracked CVR(T) specification for a
family of vehicles that had Jaguar Gasoline engine, 1/2 an inch of aluminum
armor, high speed, were air portable (fit in a C-130 Hercules transport), able
to handle a variety of environments from desert to arctic and have the ground
pressure of a combat loaded infantryman. It was armed
 with a low
velocity 76mm gun with 40 rounds, a 7.62mm co-axil machine gun with 3000 rounds
and two multi barrelled smoke grenade launchers.
with a low
velocity 76mm gun with 40 rounds, a 7.62mm co-axil machine gun with 3000 rounds
and two multi barrelled smoke grenade launchers.
It has served in a wide variety of nations from the UK to Iran. In British service, two troops of Scorpions from the Blues and Royals Regiment fought in the Falklands due its low ground pressure which allowed it to handle the boggy conditions of the Islands. It also fought in Desert Storm with the RAF Regiment and 1st Dragoons. It also fought in extended combat conditions during the first Gulf War between Iran and Iraq and apparently did not fare well.
Many tanks were upgraded with a 90mm cannon and/or diesel engines. FYI, it is currently the fastest production armored vehicle. The Scorpion tank is still in service with a number of nations including Oman, Iran, Ireland, Nigeria and the Philippines while the actual tank was withdrawn from service by Britain in 1994, but many other variants that use the Scorpion chassis are still in service.
| THE KIT |
I have sometimes esoteric tastes when it comes to models. Due to the abundance of British encyclopedias and magazines I had access to as a kid in rural Ontario, I have developed a fondness for wonky engined British AFVs of many types. I would rather build a British tank before even considering a Tiger which explains why I have a Centurion, Male and Chieftain tank kits and no Tiger tanks in my model stash which makes me quite an odd duck armor modeller.
When I realized I had the opportunity to get a Scorpion model kit I leapt at the chance. I also could have picked up the quick link tracks, but passed thinking the rubber band tracks would be good enough.
The Scorpion is not a big tank and it shows in the
kit which consists for four olive green plastic sprues, a Photo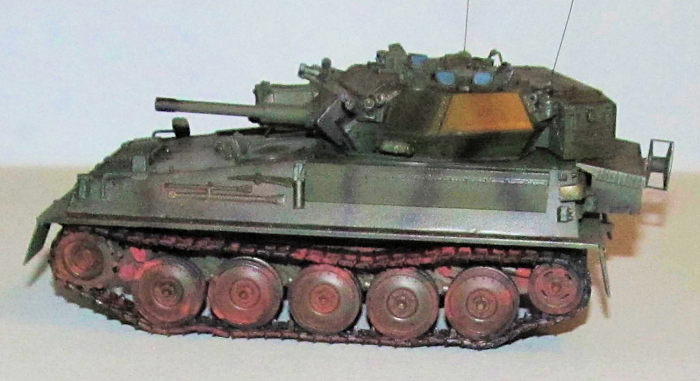 etched
brass fret containing several parts, an aluminum barrel and two aforementioned
rubber tracks. The detail is kind of rough compared to later AFV Club kits as it
was one of the AFV Club's earliest kits. However, it does have some fine surface
detail such as weld seams and the parts breakdown is pretty much standard for an
AFV Club kit. The seams are in places that are easy to fix or ignore such as top
and bottom halves of the turret. It has been noted that some of the detail is
thicker than it should be in 1/35 such as the metal trim around the chassis,
engine grills and mud flaps, but not as easy to fix based on the breakdown of
the parts.
etched
brass fret containing several parts, an aluminum barrel and two aforementioned
rubber tracks. The detail is kind of rough compared to later AFV Club kits as it
was one of the AFV Club's earliest kits. However, it does have some fine surface
detail such as weld seams and the parts breakdown is pretty much standard for an
AFV Club kit. The seams are in places that are easy to fix or ignore such as top
and bottom halves of the turret. It has been noted that some of the detail is
thicker than it should be in 1/35 such as the metal trim around the chassis,
engine grills and mud flaps, but not as easy to fix based on the breakdown of
the parts.
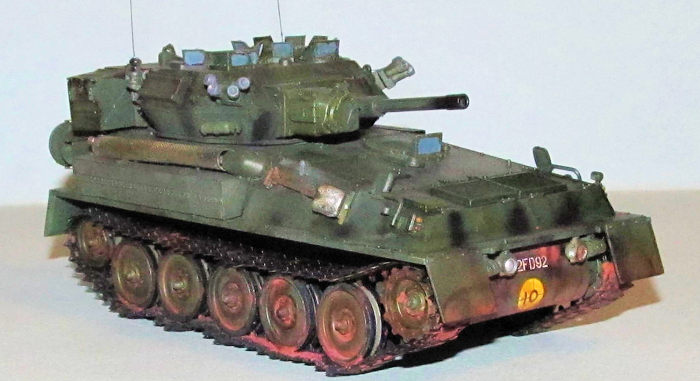
The wheels are not designed to rotate and the suspension is fixed which makes it hard to pose in a diorama and easy to build unlike later AFV Club kits that had spring suspensions. It contains markings for five different tanks including UK, UN, Belgian and Spanish markings. The color guide is non existent and you will need photos for the scheme you want.
| CONSTRUCTION |
 I followed
the construction steps (for the most part) in the instructions. Road wheel,
drive sprocket and idler parts were cleaned up, glued together and then painted.
I usually spray on the base color (in this case it was Tamiya IJN Dark Green)
and then hand paint the rubber wheels with a dark grey or flat black. Once
completed the various types of wheels were glued onto the hull after the hull
was painted.
I followed
the construction steps (for the most part) in the instructions. Road wheel,
drive sprocket and idler parts were cleaned up, glued together and then painted.
I usually spray on the base color (in this case it was Tamiya IJN Dark Green)
and then hand paint the rubber wheels with a dark grey or flat black. Once
completed the various types of wheels were glued onto the hull after the hull
was painted.
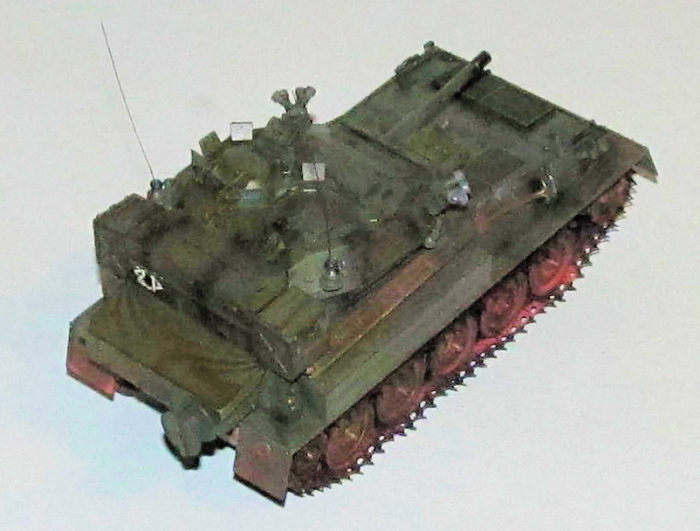
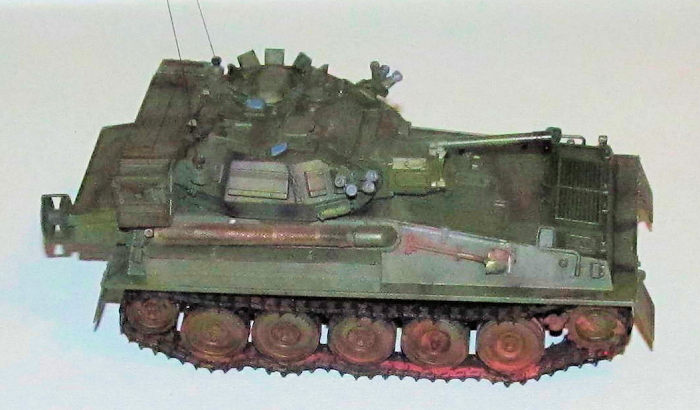
The turret was glued together and the aluminum 76mm barrel was held in place with CA glue. The various sensors, handles, periscopes and tools were added to the chassis. I left off the multi-barrel smoke grenade dischargers because I know they would be knocked off by my ham handed clumsy hands during handling.
The various PE bits were cut off and formed into the proper shapes. The muffler grill was wrapped around a screw driver to get the proper curve and shape.
| COLORS & MARKINGS |
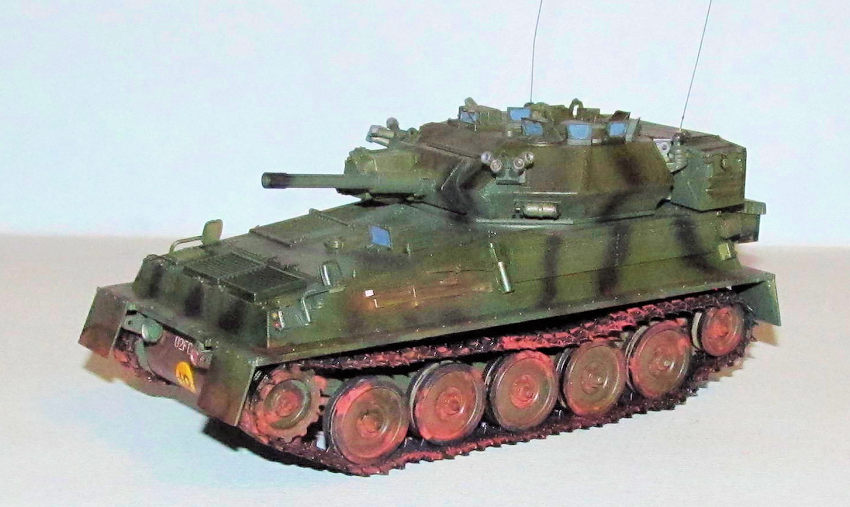
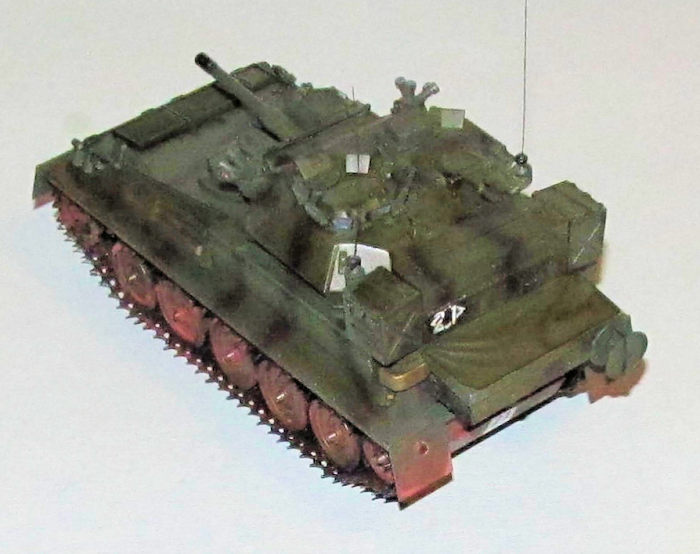
I didn't bother to pre shade the tank and just sprayed on IJN Dark Green. When it was dry, I sprayed on flat black stripes freehand and with low PSI to make it look like an operational tank from the Royal Hussars.
 The
various tools were hand painted using Tamiya XF-56 metallic grey and rust. I
hand painted the periscope optics with intermediate blue.
The
various tools were hand painted using Tamiya XF-56 metallic grey and rust. I
hand painted the periscope optics with intermediate blue.
Next I sprayed on a thin coat of Future for the decals. Once the Future was dry 24 hours later, the waterslide decals were cut from the sheet and added. I did not have any problems getting the decals to conform over detail when using Solvaset.
The tank was immersed in a burnt umber watercolor wash. The excess wiped away using damp Q-tips. I then randomly dabbled dots of red, green and blue watercolor paint onto the hull. The dot filters were wiped away to give the Scoprion's paint a slightly weathered look. Finally, I smeared on Mig Red Soil powders onto the lower hull and wheels to show rust and dirt. When the tank was fully assembled, it was sprayed with a thick coat of Tamiya Flat Clear to seal everything it. I brush painted the ID lights and the black portions of the smoke grenade launchers as per instructions.
| FINAL BITS |
I found I could not glue
the tracks together as they wouldn't stick using Tamiya glue or CA glue so I was
forced to look around the internet and to see if I could buy the AFV Club click
link tracks for this kit. These
 were
purchased on line and I was forced to wait a couple of weeks before they were
dropped onto my doorstep. The click link tracks were easy to put together, but a
pain in the rear to drape over the wheels. I ended up gluing most of the links
together to keep them from popping off during handling especially those wrapped
around the drive wheels.
were
purchased on line and I was forced to wait a couple of weeks before they were
dropped onto my doorstep. The click link tracks were easy to put together, but a
pain in the rear to drape over the wheels. I ended up gluing most of the links
together to keep them from popping off during handling especially those wrapped
around the drive wheels.
The click link trackers were first brush painted with Tamiya XF-56 metallic grey and flat black then weathered with a combination of burnt umber watercolor paint and Mig red soil pigment powders. Once dry they were sealed in with a thick coat of Tamiya Flat Clear.
I cut off two 7.5 cm lengths of fine brass wire which were painted black. The holes in the radio antenna bases were drilled out using a fine drill bit and the brass wire was secured with a drop of CA glue into the holes. Lastly I glued on the smoke grenade launchers.
I was finally done with this Scorpion tank model and placed it on the shelf.
| CONCLUSIONS |
It is a fairly straight forward simple kit with not many vices except those rubber tracks. I have read the criticism of the early tracks (after the track debacle) and made a note to research more before building an older AFV Club kit to prevent this from occurring (fat chance.)
So I finally have a Scorpion tank in my collection but it wasn't as simple as it looked (especially the tracks) in the box. Most of the tank can be easily built by a novice but some experience with multilink tracks is recommended if you don't use the awful rubber band style tracks.
9 November 2017
Copyright ModelingMadness.com
If you would like your product reviewed fairly and fairly quickly, please contact the editor or see other details in the Note to Contributors.
Back to the Main Page Back to the Review Index Page Back to the Previews Index Page