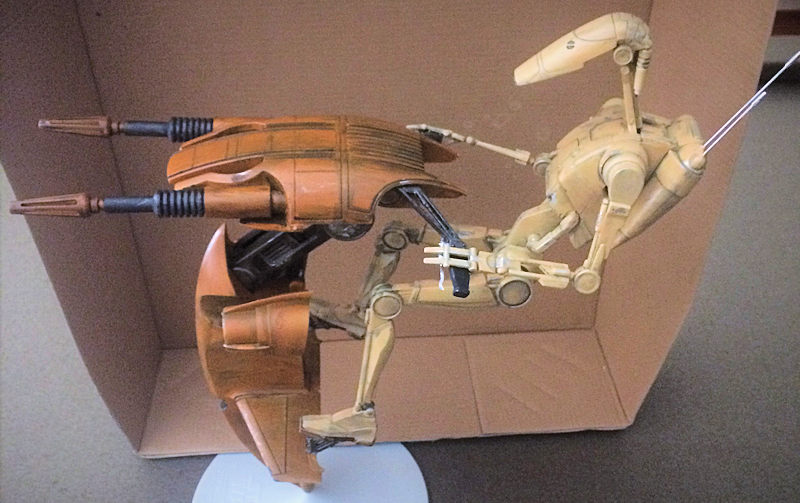
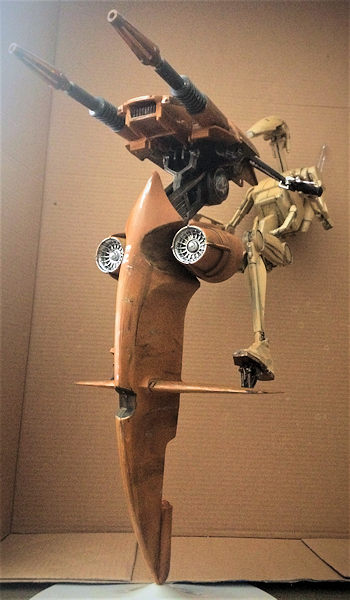
AMT/ERTL 1/6 Star Wars STAP w/ battle droid
| KIT #: | 30124 |
| PRICE: | @$25.00 |
| DECALS: | None |
| REVIEWER: | Donald Zhou |
| NOTES: |
Advantages: Well detailed, large but not too large, articulated joints. Disadvantages: color call outs completely incorrect, joints so loose you might as well cement them, does not fit too well |
| HISTORY |
…A long time ago, in a galaxy far far away…
Thus begin probably the most
profitable and the most popular Sci-Fi film franchise ever! Now, Star Wars is
not just a great sci-fi film, but it is also very widely known for its eclectic
collection of vehicles, some of which had entered sci-fi stardom. Vehicles like
the X-Wing, TIE fighter, the Millennium Falcon, Imperial Star Destroyers and the
Death Star are iconic in sci-fi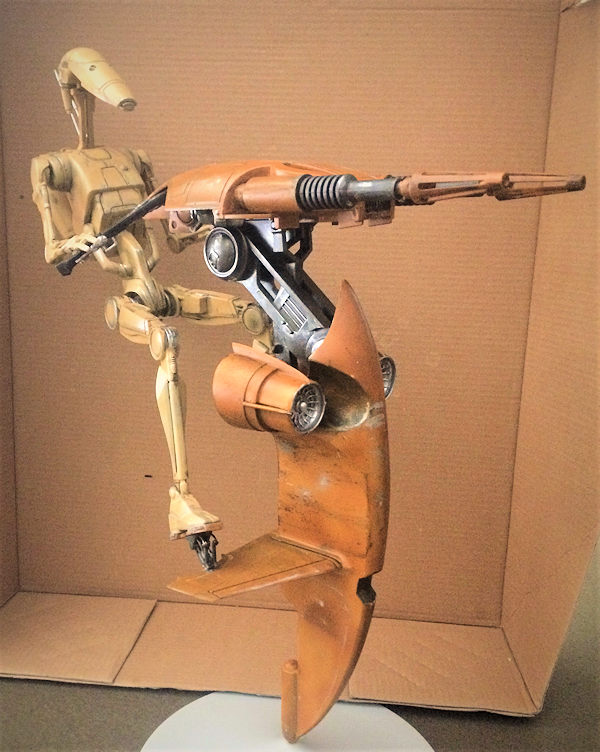 lore. The popularity of the films is such that
when George Lucas announced three prequels, Star Wars fans went absolutely
wild!....Ahh, if they only knew just how sucky those films will become…
lore. The popularity of the films is such that
when George Lucas announced three prequels, Star Wars fans went absolutely
wild!....Ahh, if they only knew just how sucky those films will become…
I still remember when Episode I: The Phantom Menace was released in 1999. I was at Ohio-State then, senior year and I skipped two classes to go see it (Lucky for me, a local radio station was having a promo and anyone who arrived for the 10:30 show and said the station’s name got a free ticket!) and thought just how good the movie was…Warp 8 years later, I popped the DVD back in and…Yeah….It sucked royal behind! Jar Jar Binks is absolutely the worst character of any movie and the pacing and directing just plain sucked so much, I was wondering why I liked it in the first place! Then it dawned on me I was simply forcing myself to like it cause I was such a diehard Star Wars fan, I just can’t bring myself to unlike it…
It’s also that very fact that many of the vehicles developed for that film was left in the dust and had a helping hand bankrupting the original AMT/Ertl (before Round Two finally bought the rights). Today, many people will never ever recognize the Naboo Starfighter, or the AAT, Droid Control Ship etc. However, despite this, there was one esoteric vehicle that stuck in my mind that I had to buy when it was first released, the STAP with Battle Droid. The vehicle is so esoteric, even among Star War vehicles that it just plain sticks out. I remembered how much fun I had building it. Unfortunately, when I graduated less than six months later, it got packed into various boxes when I moved to California. And when I moved to China for the long term, my original STAP kit sadly, was kept by a friend due to…you guessed it, the esoteric nature of it! Now that I moved back, I always want it back. Then one day trolling Amazon, it turned out someone was trying to get rid one of these original kit for only $25! Considering inflation, that’s actually cheaper than the original asking price! Guess what? I jumped right real quick!......It’s also quite telling just how “unwanted” these kits still are and in tangent, just how people still think of the prequels…
| THE KIT |
Basically, the kit is around 1/6th
scale. The kit can actually be considered to be two kits in one. The first part
is the STAP itself, the second is the Battle Droid that comes with the kit to
pilot it. Both kits are the simplicity of easy. In total, the kit consists of no
more than 40 parts and most of those are big and easy pieces to assemble with a
simple fold out page that covers the few steps to build both. This means this
kit is something one would consider to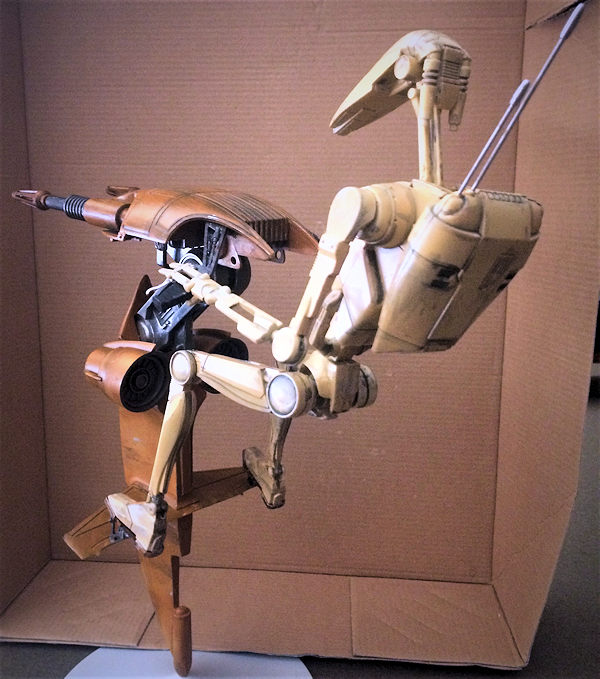 jump into after a few snap kits, or is
trying to get back into the groove after a long hiatus.
jump into after a few snap kits, or is
trying to get back into the groove after a long hiatus.
Construction break down is one of the weaker part of the kit. As you can imagine, a lot of it is broken down into sub-assemblies. Unfortunately, the kit will have you build half of the battle droid, then move on to the STAP, then build the rest of the battle droid, then finish the STAP. It’s kind of convoluted and is just asking you to lose parts. The correct step is to build the battle droid first, then move on to the STAP.
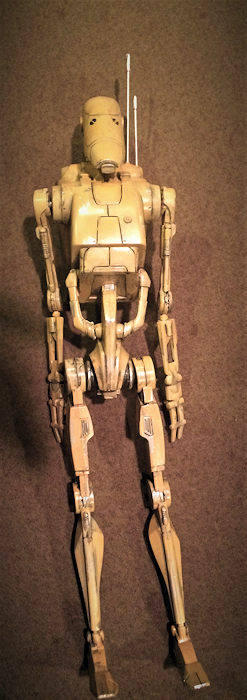
Both the battle droid and the STAP are easy. The battle droid consists of the back pack, the head, and torso first. Becareful reading of the instruction when inserting the neck into the torso since there is a backing plate that will lock the neck in place to allow the head to move. Other than that, the rest is easy. One thing that is not so good is the fit. The whole entire kit leaves seams all over the place. This is true for 1999 and even more so now so break out the putty. Another not so nice thing is the joint are designed to be movable so as to allow an easier fit onto the STAP. But however, the joints are so loose once you get the droid onto the STAP, he will never ever stand up. I should know cause with my first one, I was eventually forced to break out the super glue to glue the joints in place so the droid don’t collapse into a heap. Treat the same with the legs. Now, if you lock down the knee joints tight during construction, they should be movable without it being too loose. Same can not be said about the hip joints. You will need to super glue them in place once it is on the bike.
STAP is just as easy. The only difficult thing is the fact there are two struts that support the top and connects the top to the main body. This is in a different color which means spraying can be difficult if you join them together. Other than that, the rest is straightforward.
Speaking of colors, the color call out is completely wrong so just ignore it. The bike is not rust and the droid is not tan. After breaking out the Blu-Ray edition of the movie and watch several STAP’s in action, I decided the STAP color is more along the lines of Military Brown or Flat Brown (Testor small bottle) with gunmetal support struts and handle bars. The droid is more along the lines of Dark Tan with yellowish tan as high lights. Those are the correct colors.
There are no decals as these vehicles did not carry any insignias or warnings in the movies. Details paintings are not given so one has to judge it from the box art and the completed model shown on the side of the box.
| CONSTRUCTION |
Construction is basically covered previously. But several notes have to be made since this is my second run through.
 The first thing I did was to keep
the arms and legs separate. They are so loose as to be impractical when trying
to get the droid onto the STAP. I should know cause I goofed on my first one on
this. Also, there are tabs on the elbows and knee joints but trust me, the droid
is too heavy for the joints to hold. To this end, the two little tabs that are
supposed to be inserted behind the body shoulder holes and then joined with the
shoulder/arms so as to make the arms swing, I cemented them into the body
shoulder holes. The reason why the shoulder and hip joints are so weak is that
they have to flex upwards in order for the droid to put its feet onto the foot
pedals and for the hands to hold onto the handles properly. However, this result
in the joints being so weak they will not support the droid weight at all.
Anyways, the two separate arms will be joined to the shoulders tabs later on
with super glue.
The first thing I did was to keep
the arms and legs separate. They are so loose as to be impractical when trying
to get the droid onto the STAP. I should know cause I goofed on my first one on
this. Also, there are tabs on the elbows and knee joints but trust me, the droid
is too heavy for the joints to hold. To this end, the two little tabs that are
supposed to be inserted behind the body shoulder holes and then joined with the
shoulder/arms so as to make the arms swing, I cemented them into the body
shoulder holes. The reason why the shoulder and hip joints are so weak is that
they have to flex upwards in order for the droid to put its feet onto the foot
pedals and for the hands to hold onto the handles properly. However, this result
in the joints being so weak they will not support the droid weight at all.
Anyways, the two separate arms will be joined to the shoulders tabs later on
with super glue.
As for the STAP, I assembled the “head”, but the two “body” halves, I did not cement them in because as stated before, the supporting struts and the bottom of the head are gunmetal while the rest are military brown. Luckily, the supporting struts are so tight, you do not need to cement them in. This is because the joints are once again, supposed to be movable in order to facilitate the droid holding on to the handle bars and able to stand properly. Same with the two turbine thrusters. They are held so tight they don’t need to be cemented in. Great news when it comes to painting. After a putty and sanding session to get all the seams cleaned up, time to hit the paint shop. I kept the two separate body sections separate so they can be joined to the supporting struts later after paint in order to avoid taping…..I have no idea how to wrap that big of a section, not without wasting A LOT of tape! I’d rather waste some extra paint and my red spot putty glazing….Those are much cheaper!
| COLORS & MARKINGS |
I started painting the STAP first.
The first thin coat of military brown was blasted on first. I’m doing this a
little differently from my previous models since Star Wars vehicles have always
been a little dirty. In fact, one of the biggest complaints about Prequels
vehicles have been they are a little too clean. After all, the Millennium Falcon
have always been, “That’s the biggest hunk of junk I’ve ever seen!”
 After the
first military brown was blasted on, the vehicle is dirtied up with my usual Tamiya Flat Black. After completely dry, the second and finally, the third coat
was blasted on. This let the black streak to show through and give the vehicle a
well-used dirty look. Then comes the gunmetal for the bottom of the head and the
supporting struts and some details on the vehicle. After everything is
completely dry, I took out Testor’s Chrome Silver, dip it lightly with a brush,
wiped the excess off and dry brushed silver over the vehicle, smudged
appropriately where they are needed to give the effect of paint chipping. Then
Tamiya Flat Black was once again used heavily at the turbine intake spots and to
dirty up the vehicle a little more. For the turbines, silver was used to denote
the blades, with washes of flat black to bring them out and Testor’s Metalizer
Burnt Metal was used for the exhaust. STAP is basically painted at this point
but not completely assembled.
After the
first military brown was blasted on, the vehicle is dirtied up with my usual Tamiya Flat Black. After completely dry, the second and finally, the third coat
was blasted on. This let the black streak to show through and give the vehicle a
well-used dirty look. Then comes the gunmetal for the bottom of the head and the
supporting struts and some details on the vehicle. After everything is
completely dry, I took out Testor’s Chrome Silver, dip it lightly with a brush,
wiped the excess off and dry brushed silver over the vehicle, smudged
appropriately where they are needed to give the effect of paint chipping. Then
Tamiya Flat Black was once again used heavily at the turbine intake spots and to
dirty up the vehicle a little more. For the turbines, silver was used to denote
the blades, with washes of flat black to bring them out and Testor’s Metalizer
Burnt Metal was used for the exhaust. STAP is basically painted at this point
but not completely assembled.
For the droid, the same apply, the appendages are all separate to keep things easier, especially since the legs will flop around like crazy if you keep them on. For the color, tan was used, with beige and dark tan used to highlight some areas. The first light coat was blasted on, then washed with flat black, especially around the joint areas to show dirt. After the second and third coats, the droid was again, washed with flat black where appropriate and then silvered on to show paint chips. The eyes are denoted with Testor’s Flat Black since Tamiya’s is a little too sooty. The two antennas in the back are colored in silver. Now for the messy part, the final construction.
| FINAL CONSTRUCTION |
The first step is to get the STAP
constructed. The supporting struts are removed from their spots and applied with
a little cement at the correct areas and then the two body sections are cemented
on, c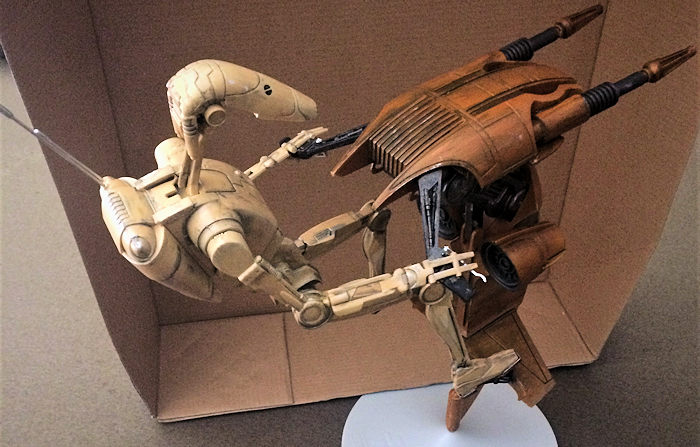 arefully avoiding the struts so they can be moved. Of course a little seam
appeared so they are cured with my usual red spot putty glazing before sanding
off doing the paint sequence again. The foot pedals are also kept separate. Come
to think of it, I should off cemented them onto the feet first then get them
onto the STAP!
arefully avoiding the struts so they can be moved. Of course a little seam
appeared so they are cured with my usual red spot putty glazing before sanding
off doing the paint sequence again. The foot pedals are also kept separate. Come
to think of it, I should off cemented them onto the feet first then get them
onto the STAP!
But nope. The step I did was to cement them onto the STAP first and then tried to get the droid’s feet on. The legs are kept separate for this purpose but the pedals are too wide for the body so the feet didn’t exactly hit the petals correctly. They should made the ankles bend a little but it’s a moot point now! So yes, bend the ankle joints a little to help with the process. In the end, the right petal fell off and this is how I got the feet onto the pedals and then the legs to the body! I ditched the cement and used superglue at this point since it was such a hassle!
After a day for the superglue to completely cure, I superglued the hands onto the handle bars, carefully unfolded the droid’s body since the feet joints are still a little dicey, then carefully superglued the shoulders onto the body tabs and hold them for a bit with one hand while dip a little glue into all the joints so the droid will hold together. This model is finally done!
| CONCLUSIONS |
Well, that’s about all. This kit is highly recommended due to its cheap price (just search around, they should not be more than $30) and it should get beginners started and learn the ropes due to its easiness and allow more experienced modelers something else to sink their teeth into, especially after a big project and will look nice and big, but not so big as to overwhelm the shelf when done.
24 January 2017
Copyright ModelingMadness.com
If you would like your product reviewed fairly and fairly quickly, please contact the editor or see other details in the Note to Contributors.
Back to the Main Page Back to the Review Index Page Back to the Previews Index Page