Daleks in Manhattan – building the Airfix Gift set
| KIT #: | A 50007 |
| PRICE: | $ Out of Production, but can be found. |
| DECALS: | None |
| REVIEWER: | Frank Spahr |
| NOTES: | Set is 1/12 scale with about 250 parts. |
| HISTORY |
Hiding behind the
sofa from the Daleks
 The
Daleks are some of the longest-running arch-enemies in TV history, as they
belong to the longest running SF TV show in existence, the
The
Daleks are some of the longest-running arch-enemies in TV history, as they
belong to the longest running SF TV show in existence, the
Whilst the classical seasons
of Doctor Who relied more on clever stories and imagination than on adequate
production values, the show´s resurrection in 2005 tried to provide both. Hence,
whilst still staying close to the original designs, the entire look of the show
was improved, which led to a positive reception and secured the show´s survival
until now. On the day prior to writing this review, the current Doctor, Matt
Smith, bore the Olympic torch through Cardiff where the show is produced by
The Doctor Who re-boot coincided with the takeover of another British classic,
Airfix, by Hornby. They soon teamed with the
| THE KIT |
The sturdy box is
jam-packed with plastic bags full of nicely molded and large parts in various
colours. The creature is provided in soft plastic. An excellent instruction
booklet printed in full colour gives all the necessary infos on how to build the
kit, and also on how to accentuate and weather it. This booklet is truly worth
keeping. As Airfix omitted decals, you are supposed to cut out certain elements
from the instruction booklet and glue them to the model. Being a gift set, a
large number of small plastic pots of acrylic paint, three brushes and a tube of
cement is included. Watch out as the cement is thinner than expected from tube
stuff.
| CONSTRUCTION |
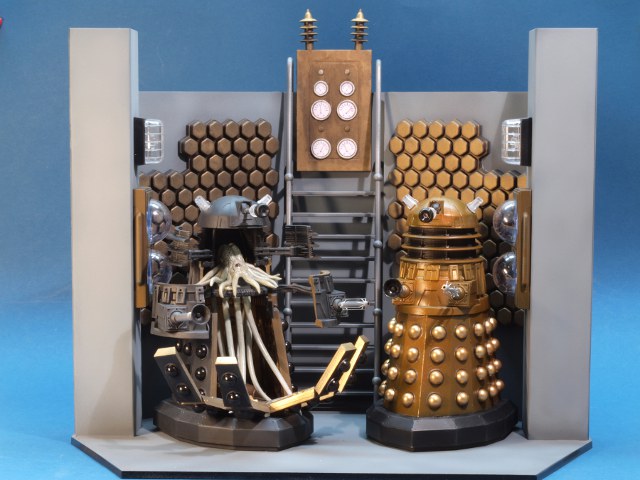
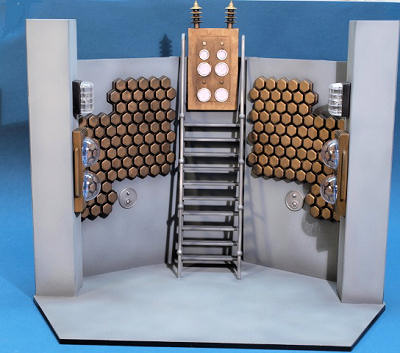
I started with the
diorama base, which was pure unadulterated modeling fun: Clipping big parts from
tree-like sprues, cleaning them up without undue concern for petite surface
details being lost, gluing them together and – hey presto! - having a pretty
large result was a much – welcomed cure for the woes of assembling iffy 1:700 PE
assemblies during the preceding project. As a joke I compared the 1:700 PE
inclined ladders with the central inclined ladder of the diorama and had a truly
Gulliverian moment.
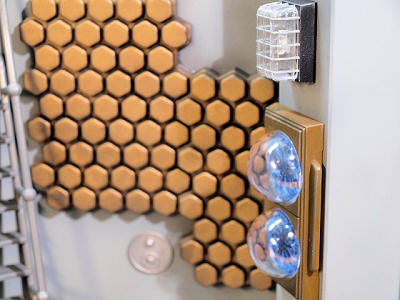 Painting
the dio and its components was an equally jolly task. I did some pre- and
postshading, and experimented with my various metalizer shades, before reverting
to ye goode aulde Revell enamels for the bronze effects. The dials and blue
whirly vortex effect stickers were not cut out from the instruction booklet, but
scanned, printed, cut out and then glued to the model. The only „superdetailing“
was adding lightbulbs from clear sprue for the lamps. The base was done over the
course of a weekend, parallel to work on the Daleks.
Painting
the dio and its components was an equally jolly task. I did some pre- and
postshading, and experimented with my various metalizer shades, before reverting
to ye goode aulde Revell enamels for the bronze effects. The dials and blue
whirly vortex effect stickers were not cut out from the instruction booklet, but
scanned, printed, cut out and then glued to the model. The only „superdetailing“
was adding lightbulbs from clear sprue for the lamps. The base was done over the
course of a weekend, parallel to work on the Daleks.
Obviously the first
thing to do in building a Dalek was to connect the pre-assembled head with
batteries and try the light and sound effects – you remember the play factor.
Sadly, neither Dalek says the iconic „EXTERMINATE“. In order to improve the
look, I carefully drilled through the solid black lens piece at the end of the
eyestalk until I accessed the clear styrene stalk. Now, activating the effects
meant that the eye actually glowed blue (which was the focal point of the
illumination in my tattered discounted pocket book). The lens was covered with
clear acrylic gel and upon curing looked the part. Obviously, the light-emitting
parts of the head needed careful masking – Humbrol Maskol worked fine for me.
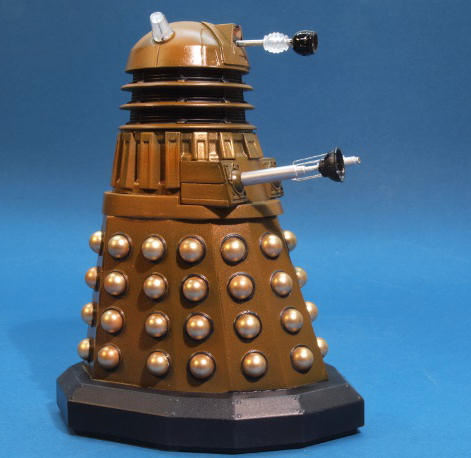
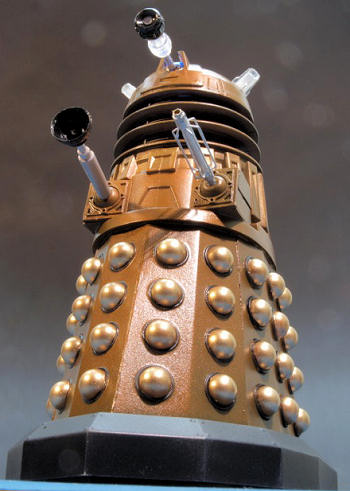
 Building
the first Dalek was pretty straightforward. The numerous parts were cleaned up,
assembled, some small gaps (which I always have, in the most perfect wonderkit,
so don´t lose heart) were filled and sanded. The most boring part was clipping
from the sprues and cleaning up the 50-odd hemispheres which make the Dalek look
so distinctive. These were stuck on kabuki tape for painting, and only
afterwards glued to the completed and painted hull. Using a grey primer, then
black paint and then a final layer of not-quite-covering gold paint did the
trick.
Building
the first Dalek was pretty straightforward. The numerous parts were cleaned up,
assembled, some small gaps (which I always have, in the most perfect wonderkit,
so don´t lose heart) were filled and sanded. The most boring part was clipping
from the sprues and cleaning up the 50-odd hemispheres which make the Dalek look
so distinctive. These were stuck on kabuki tape for painting, and only
afterwards glued to the completed and painted hull. Using a grey primer, then
black paint and then a final layer of not-quite-covering gold paint did the
trick.
The Project Dalek
website is bizarre to begin with (it is aimed at those inclined to build their
own Dalek, preferably full-scale) and a veritable treasure-trove of Dalek info.
Using this site and the many screenshots it contains, I set out to build a more
realistic ray gun than the clear styrene item from the kit. Using brass tubing,
brass wire and styrene, I ended up with what I would term a passable
approximation, which was about the last thing glued to the completed Dalek.
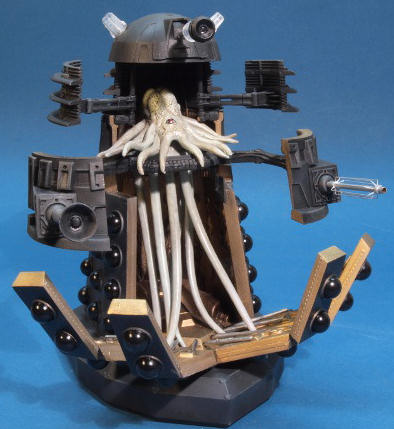
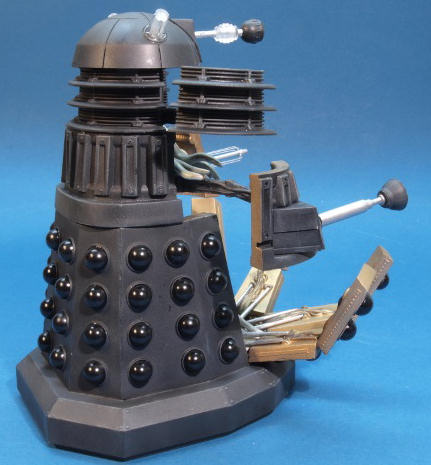
Building Dalek Set
was a more involved project as his open hull implied more work on the various
opaque panels, more masking, and
I had to tackle the creature from my least favorite material, which is Vinyl aka
soft plastic. Luckily, I got away with cleaning up most the seams on
 the
tentacles, and luckily the various solvents and automotive primers I had bought
had some grip on the stuff. The eye was painted in a distinctly unhealthy red,
and some washing did a good job in accentuating the „exposed-brain“ structure.
the
tentacles, and luckily the various solvents and automotive primers I had bought
had some grip on the stuff. The eye was painted in a distinctly unhealthy red,
and some washing did a good job in accentuating the „exposed-brain“ structure.
The open panels
needed a good deal of filling and sanding, and as they ended up looking
positively bland I added some optical interest using generic ship PE, Lion
Roar´s perforated bars. The various actuators proved to be a bit on the fiddly
side, and on the whole I assume many or most of the eight-year-olds I know would
be a tad overwhelmed with building this kit. But then that´s one of the few
occasions we middle-aged auld pharts are able to help the youth – if they want
us too, that is ...
Again, a large
number of hemispheres needed work, but on the whole things proceeded quite
nicely, and a very short time (ten days) after beginning the project I was able
to take my completed shots.
| CONCLUSIONS |
This was a fun
project, and a quite different kit from my normal projects, but one I as a
Whovian had much anticipated and enjoyed a lot. If you happen upon one of them
at a swap meet or wherever old kits see the light of day – feel free to give it
a try!
| REFERENCES |
http://www.projectdalek.co.uk/files/index.html
http://www.bbc.co.uk/doctorwho/dw
http://en.wikipedia.org/wiki/Behind_the_sofa
Frank Spahr
June 2012 If you would like your product reviewed fairly and
fairly quickly , please
contact
me or see other details in the
Note to
Contributors.