| KIT #: | SW-10 |
| PRICE: | $39.95 MSRP |
| DECALS: | Two options |
| REVIEWER: | Dan Lee |
| NOTES: | Easiest 1/48 Scale Kit I’ve ever put together |
| HISTORY |
 As per
Wookiepedia.
As per
Wookiepedia.
The T-47 was heavily modified by
the Rebel
The Snowspeeders made their only appearance in movie The Empire Strikes Back and referenced various times in the Star Wars Universe (except in the Robot Chicken Star Wars specials and Family Guy’s Something Something Dark Side.)
| THE KIT |
In 1980, MPC produced a 1/22 version
that looked like a snow speeder, but the interior, crew and certain details were
inaccurate compared to what was seen in the movie.
This kit was rereleased several times, the latest being
2005 (I purchased one from that
 reissue.)
Fine Molds has certainly done in the
past as they’ve used the actual Lucasfilm Movie Models as the basis for their
kits.
This one is no different.
Major obvious
difference from the MPC kit is that the Rebel crewmembers are the correct scale
and look like folks from the movie.
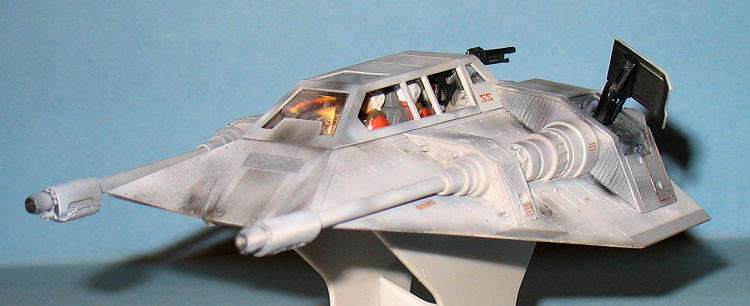
It consists of 74 very detailed parts
with no flash and very fine detail.
The instructions are mostly in Japanese, but do use
English for the paint callouts instead of forcing none Japanese readers to thumb
through their Gunze tables to find out which colors are which.
Only mild complaint I have is the slightly pebbly surface which I suspect won’t be a problem when I paint it.
| CONSTRUCTION |
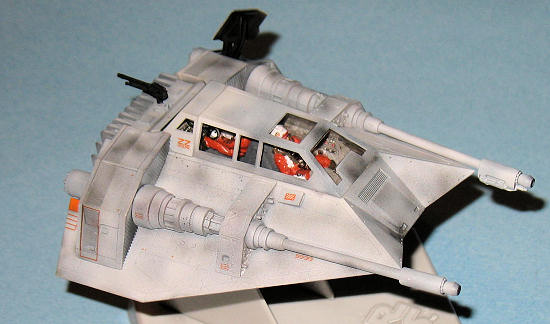
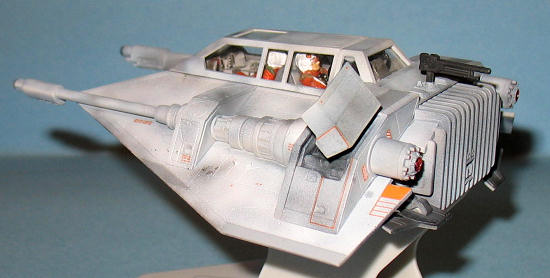
I next worked on the cockpit interior.
The detail is pretty good if not entirely accurate (when
compared to scenes in The Empire Strikes Back) and easy to hand paint.
I used Citadel Red/White/Silver/Tamiya black and Tamiya
Clear Red for the displays.
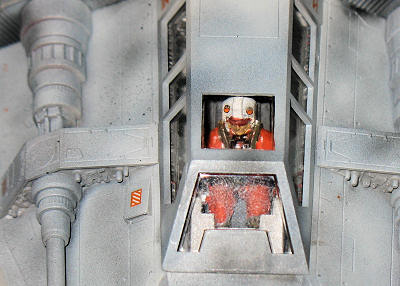 The pilots
were hand painted as per instructions (international orange, white, grey, black
and flesh.)
Fine Molds molded a visor instead of an open helmet which
eliminated the headaches of painting the eyes.
I used a thin black acrylic wash to highlight the fine
details.
Once dry, the pilots were glued to the seat.
The pilots
were hand painted as per instructions (international orange, white, grey, black
and flesh.)
Fine Molds molded a visor instead of an open helmet which
eliminated the headaches of painting the eyes.
I used a thin black acrylic wash to highlight the fine
details.
Once dry, the pilots were glued to the seat.
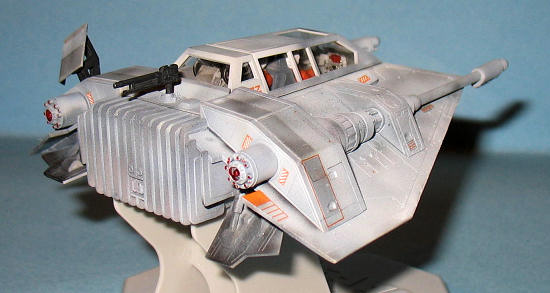
I glued the blaster cannon bits except
the engines at this point because the instructions point out that the rear
canopy must be added first otherwise it will very difficult to add when the
engines are added first.
The only real seams for the entire kit were along the
blaster “muzzle breaks” (?) which were lightly sanded and the detail was redone
with a Number 11 blade.
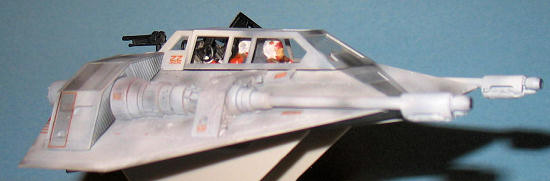
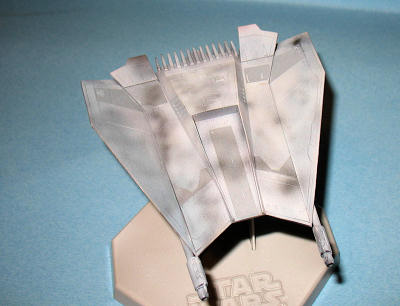
One option on the kit assembly is the
choice to pose with air brakes and flaps open.
I opted to do one of each to improve an otherwise
regular model.
Be careful with it as they are fragile (yes, I discovered that
when I roughly handled the model.)
| COLORS & MARKINGS |
Paint
I preshaded the
Snowspeeder with various colors (
 Fine Molds
suggests FS36495 Light Grey for the base color.
I was fortunate to have a bottle of the Gunze equivalent
kicking around.
I sprayed in several very light coats to get an uneven paint job.
The digital photos don’t show the uneven paint very
well.
Fine Molds
suggests FS36495 Light Grey for the base color.
I was fortunate to have a bottle of the Gunze equivalent
kicking around.
I sprayed in several very light coats to get an uneven paint job.
The digital photos don’t show the uneven paint very
well.
Markings
Once I let the paint dry, I added the
decals.
The kit comes with two different markings, the standard international
 Post
Shading and Final Coat
Post
Shading and Final Coat
When the decals were dry, I wiped
the model clean with a wet J-cloth to remove any decal solution and then loaded
thinned flat black into my Badger airbrush set at low
Once done, the model was covered
in two thin coats of
| FINAL CONSTRUCTION |
The various remaining parts were glued
in order as per the instructions (!) or I would have had a much harder time
assembling the model.
I opted to close the canopy.
| CONCLUSIONS |
Fine Molds designs their models to
eliminate the drama found in the building of other SF kits.
I have nothing but praise for the Fine Molds Series of
Star Wars kits and I highly recommend it to modelers and Star Wars fans of any
skill level.
Simply the easiest 1/48 scale kit I’ve ever assembled/built.
February 2010
If you would like your product reviewed fairly and quickly, please contact me or see other details in the Note to Contributors.