| HISTORY |
| KIT #: | PS-01 |
| PRICE: | 4536 yen |
| DECALS: | Four options |
| REVIEWER: | Dan Lee |
| NOTES: | Lots of seam fillings |
| HISTORY |
BUGS, Mr RICO!! ZILLIONS of THEM!”
Robert Heinlein’s Starship Troopers is one of the seminal and controversial classics of Science Fiction. Viewed by many as an idealized fascist paradise and by others as an important lessons in civics. I’m not going to wade into the philosophical debate on the novel as I sit on the fence with regards to the novel. I read this book first when I was 13. Most of the idea of service (main point of the novel) flew over my barely functioning brain as I was more interested in reading about the Terran Federation’s Mobile Infantry fighting bugs in their “cool” powered armor. I realize now that parts of Heinlein’s story especially the premise of “everybody fights” sounds cool but dies in the reality that the more sophisticated the weaponry, the bigger the organizational/logistical tail has to be.
Despite one’s own personal views on this novel, it made a lasting impact in science fiction literature where one can not write a Military SF novel without alluding to elements of Starship Troopers. It also struck a tone within the real military as it is the only science fiction novel that is on the USMC enlisted man reading list.
And then there’s the movie. The film version of Starship Troopers seemed to me a loud, bloody and rather stupid movie whose satire (as claimed by the director) was lost amid the stupidity of everything else. It had humans fighting alien “bugs” but it dropped what I thought was the most important technical aspect of the the book, the powered armor. For those who remember the movie, the humans instead wore modified hockey helmets and football pads which proved to be useless against the bugs (which was also done to show the pretty faces of the pretty actors.) Also forgotten was the fact that these were supposed to be elite troops, not a bunch of rank amateurs whose preferred combat formation was the circular firing squad and whose “leadership” provided them with mere solid slug firing machine guns while ignoring more useful weapons like explosive tipped bullets, flamethrowers or industrial sized canisters of Bug Strength RAID insecticide (something not forgotten by the writers of the much better movie Aliens.)
In the novel, there are
three main types of powered armor des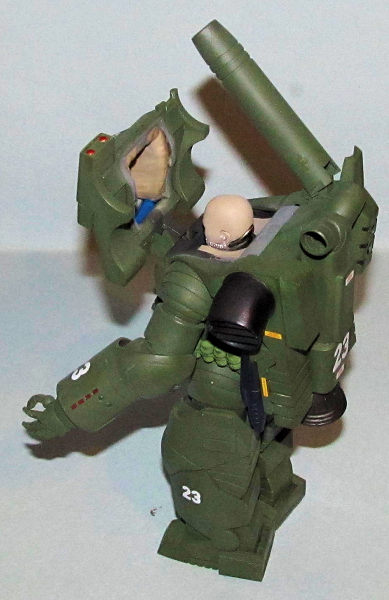 cribed.
The first is the Command Suit for the leaders (a logical extension of the
“everyone fights” philosophy) with extra power and communication gear. The next
is the Scout Suit which is faster than the standard armor and carries recon gear
at the expense of less armor and fewer weapons. The last is the standard
Marauder Suit which as Heinlein put it: “for the sleepy eyed fellows, the
killers.”
cribed.
The first is the Command Suit for the leaders (a logical extension of the
“everyone fights” philosophy) with extra power and communication gear. The next
is the Scout Suit which is faster than the standard armor and carries recon gear
at the expense of less armor and fewer weapons. The last is the standard
Marauder Suit which as Heinlein put it: “for the sleepy eyed fellows, the
killers.”
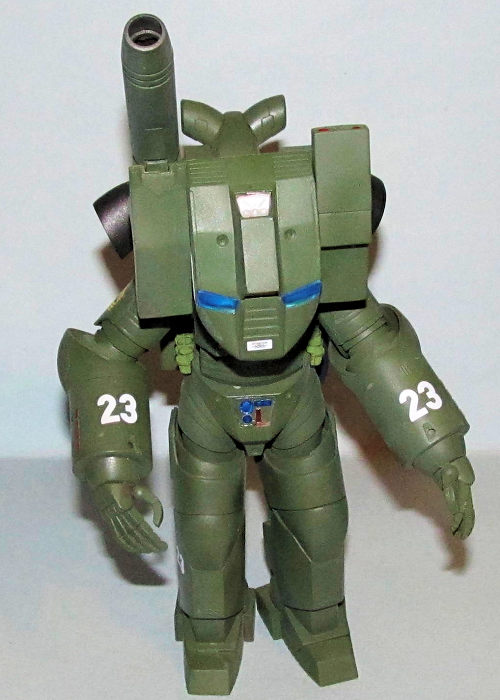
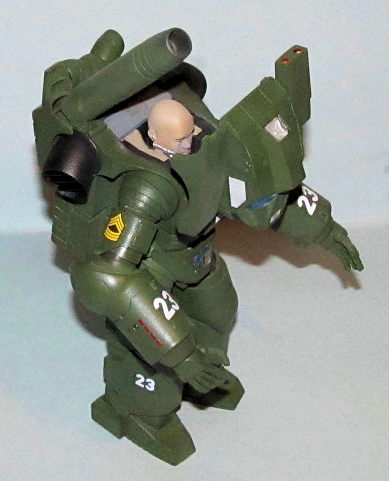
Wave’s version of the Marauder Suit has a “Japanese” look to it (not surprising considering that it is a Japanese model maker) for those who have seen or are familiar with Japanese Samurai Armor and it is based on a Japanese Anime version of Starship Troopers. It contains all the main weapons as described by Heinlein from the hand held flamers to the Y-Rack grenade launcher to the shoulder mounted rocket launcher.
| THE KIT |
Wave is a prominent kit maker from Japan who focuses on semi posable figures. The kit contains 13 sprues of olive drab plastic, one small sprue of clear parts and one polycaps sprue for the joints. The parts look fairly crisp and without any obvious manufacturing defects. As for the accuracy of the parts? Are you kidding me?
Looking back, I can see that the engineering and fit of the parts is not as good as Bandai's. Closer to an 1980s/1990s era kit in terms of fit, but the detail is excellent than the usually fuzzy details provided in Science Fiction kits of that era.
The instructions are in Japanese with some anglicized number callouts for Gunze paints but thankfully Wave provides well detailed pictures for those of us (including myself) who can not read Kanji characters. They provide a step by step assembly guide although I had to deviate from the order due to painting issues.
| CONSTRUCTION |
 It was a
harsh transition going from well done Bandai Star Wars Figures to this kit. It
might have been state of the art in 2004, but it was a teeth grinding, filling
and sanding kit that needed a lot of work to get right. Each of the limbs
required a lot of patience as the polycaps and parts didn't have the best fit. I
first glued the parts together then threw them into a box for a couple of weeks
to allow for the Tamiya Extra Thin Glue to cure.
It was a
harsh transition going from well done Bandai Star Wars Figures to this kit. It
might have been state of the art in 2004, but it was a teeth grinding, filling
and sanding kit that needed a lot of work to get right. Each of the limbs
required a lot of patience as the polycaps and parts didn't have the best fit. I
first glued the parts together then threw them into a box for a couple of weeks
to allow for the Tamiya Extra Thin Glue to cure.
I had some very large obvious gaps like the wrist joints. I think I may have messed up the assembly of the first one I made. The 1mm wide gaps in that area were first filled with Vallejo Plastic Putty and then covered with CA glue then sanded smooth. No other limb seams needed that kind of work, just CA glue to fill and sand with various grits of wet/dry sand paper. I did have to repeat filling/sanding in several places due to the depth of the seams.
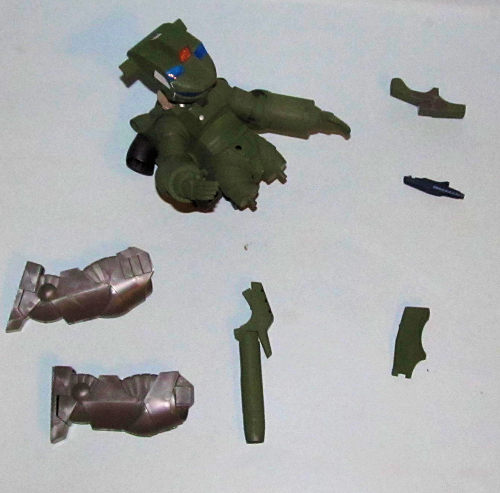
The legs weren't any easier as I had a moment when I forgot to add a polycap in the left leg. In my haste to add the necessary polycap, I snapped off part of the upper thigh off at the pivot. I spent a few minutes swearing and them calmed down enough to glue the broken piece on and fill the gaps. I sanded seams on both sides of the leg, but I ignored the bottom of the feet as no one was ever going to see them and I just about had it with filling/sanding at that moment.
 It is much
easier to write this than actually do as the filling/sanding of the limbs took a
couple of hours of work for at least 7 days (as it was all I could stand in one
sitting.) FYI I went thru several sheets of 320, 400 and 600 grit wet dry
sandpaper to finish this kit!
It is much
easier to write this than actually do as the filling/sanding of the limbs took a
couple of hours of work for at least 7 days (as it was all I could stand in one
sitting.) FYI I went thru several sheets of 320, 400 and 600 grit wet dry
sandpaper to finish this kit!
The body and various elements were the same amount of work. A lot of CA glue was used to fill in the seams on the various pieces including the rocket launcher, the Y-Rack, the hand flamer and the side pieces for the helmet. I attached the headpiece to the torso but avoided the whole filling/sanding thing by cutting pieces of plastic card and gluing them to cover up the seams of the hinge. I did not add the jaw, side pieces or front face of the helmet as I needed to paint the clear parts that went there.
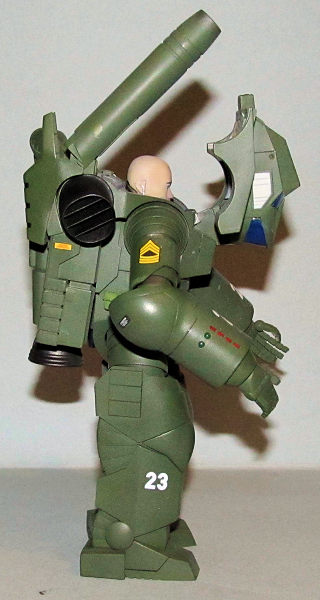
The various rocket pack nozzles needed a lot of careful sanding. The main booster nozzle was difficult because I had to avoid sanding all the detail flat as I had done in the past with similar detail. I did manage to avoid damaging the detail thanks to experience doing similar work on other kits. The side nozzles still required care as I had to sand both the inside and the outside and not sand too much as the parts were very thin. I sanded smooth enough of the inside just so that it would not be noticed when I added the vents. The helmet side pieces were sanded as well. I don't think there was a seam I didn't have at least fill and maybe sand. I did have to fill and sand the head of the Trooper, fill in the various gaps with Vallejo plastic putty because I treated those seams as panel lines.
| COLORS & MARKINGS |
 I opted to
paint most of the figure Tamiya NATO Green without any preshading. Usually my
grounder pounder models are dirty and worn, but I opted to make this one clean
as if it were ready for a combat drop. A couple of thin coats were required for
the initial coat. Note: I did this in between working on the many many limb
seams so the torso and one arm were painted first and then as I completed each
limb I would paint the limb. The various face pieces were also painted NATO
green. Based on the pictures of the completed model in the instructions, the
rocket launcher had some crevices that were brush painted flat black.
I opted to
paint most of the figure Tamiya NATO Green without any preshading. Usually my
grounder pounder models are dirty and worn, but I opted to make this one clean
as if it were ready for a combat drop. A couple of thin coats were required for
the initial coat. Note: I did this in between working on the many many limb
seams so the torso and one arm were painted first and then as I completed each
limb I would paint the limb. The various face pieces were also painted NATO
green. Based on the pictures of the completed model in the instructions, the
rocket launcher had some crevices that were brush painted flat black.
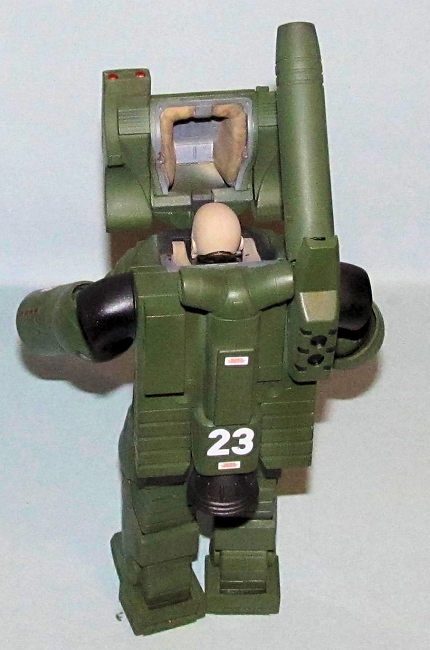
The interior of the helmet needed to be painted. I used a brush for that as I painted the metal areas neutral grey and the padding desert yellow. I then sprayed the bald head Tamiya Buff as I used a skin tone more appropriate for an Asian as Juan Rico is Filipino in the book unlike the character in the movie played by Casper Van Dien. Next I brush painted the eyebrows (I laughed when I remembered dialogue from a Calvin and Hobbes comic strip) and the eyes using a 0 fine brush. Unlike most faces I've painted this one turned out fine. I then painted the inside of the clear pieces using Vallejo clear blue (forward side sensors and visor) and Tamiya clear red (forward center sensor.) Two areas at the side of the head piece were masked off and painted MM Acrylic FS36622.
I sprayed the rocket nozzles flat black then Tamiya
X10 gunmetal and the grenades Tamiya Flat Green.
 The various
light or sensors were hand painted with Vallejo Metal Color Silver. When dry, I
painted certain lights with an over coat of clear red. The last thing that
needed to be painted was the hand flamer. I first sprayed on gunmetal but then I
tried to give it a more of a blue tone and sprayed on Vallejo Clear Blue (I had
some extra after spraying the clear parts.) The blue gave the hand flamer a blue
metal look.
The various
light or sensors were hand painted with Vallejo Metal Color Silver. When dry, I
painted certain lights with an over coat of clear red. The last thing that
needed to be painted was the hand flamer. I first sprayed on gunmetal but then I
tried to give it a more of a blue tone and sprayed on Vallejo Clear Blue (I had
some extra after spraying the clear parts.) The blue gave the hand flamer a blue
metal look.
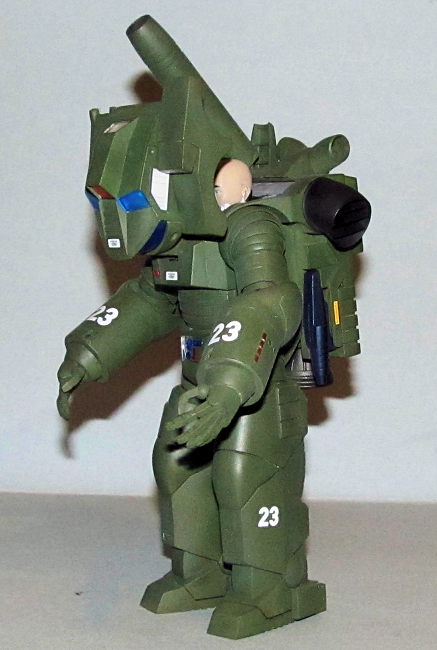
After the face pieces including the visor were added to the helmet, I masked off the clear parts and then sprayed on a few light coats of Gunze Clear in preparation for the decals. There is no decal placement guide so I just winged it. I placed them in places that would be obvious like the rank insignia on the right arm (it should be on both arms, but Wave only supplied a single rank insignia of each type) and used the number decals to denote that the suit belongs to George Two-Three aka squad leader of the 3rd squad, 2nd platoon (which is the Roughnecks) of George Company. There were no noticeable issues with the decals as I used MicroSet to settle the decals in place. When dry, I wiped the model to remove decal solution residue.
As I mentioned above, I did not weather the figure much with the exception of dry brushing the rocket launcher nozzle with metallic grey. Lastly I sprayed on a flat coat to seal the decals in and left off the hand flamer and rocket nozzles for this step.
| FINAL CONSTRUCTION |
I glued in the painted head into place. The visor and helmet face pieces were added. There were some really big obvious gaps so I had to mask off that area and fill it with Vallejo plastic putty, remove the excess with damp Q-Tips, mask and then spray with NATO Green. Once that was done, I glued on the helmet side pieces in place. I had to hand paint the port side clear piece lights silver and then used white glue to secure it into place.
 The shoulder
and hip joints consist of several parts linked together and do not need to be
glued to allow the figure to pose in whatever position. I left them free despite
the fact that the figure's left leg is stiff because I broke it earlier. I added
those then slid each of the limbs in place. Finally the hand flamer, grenades
and rocket nozzles were added.
The shoulder
and hip joints consist of several parts linked together and do not need to be
glued to allow the figure to pose in whatever position. I left them free despite
the fact that the figure's left leg is stiff because I broke it earlier. I added
those then slid each of the limbs in place. Finally the hand flamer, grenades
and rocket nozzles were added.
| CONCLUSIONS |
This is not a Bandai superkit so be prepared to do a lot of work as every seam will need to be dealt with. It is not a kit for beginners at all and probably for those who are comfortable with short run kits and like the challenge, but the effort and work will reward you with a well done model. Once past construction, the painting was a breeze.
I finally have my own Starship Trooper and I am really happy with the final result.
July 2014
Copyright ModelingMadness.com
Thanks to me for picking this one up when it was on sale.
If you would like your product reviewed fairly and quickly, please contact the editor or see other details in the Note to Contributors.