| KIT #: | PL-820 |
| PRICE: | $22.95 MSRP |
| DECALS: | One option |
| REVIEWER: | Dan Lee |
| NOTES: |
| HISTORY |
(ST Movies, the Early Years)
The early
1970s saw a limited amount of SF on TV and the movies.
There were a few good movies mixed with a lot of very
bad TV (Space 1999, Logan’s Run (TV Series) and Planet of the Apes (TV Series)
among them) a situation which did not start to change till Star Wars appeared in
1977.
During the early 70s, 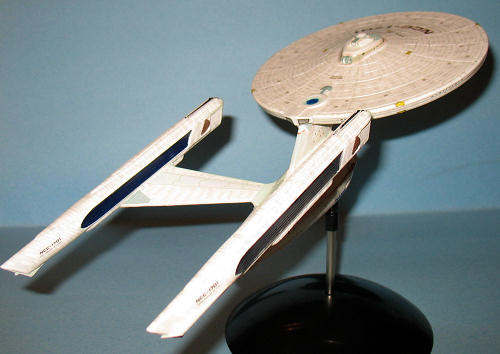 based on
the further adventures of Kirk and crew (minus Leonard Nimoy who was in his “I
am NOT Spock” phase and refused to put on the ears.)
based on
the further adventures of Kirk and crew (minus Leonard Nimoy who was in his “I
am NOT Spock” phase and refused to put on the ears.)
One of the
things that was done was a redesign of the series iconic starship.
Star Trek
The 2nd
Star Trek series was cancelled due to the fact that at the time no major TV
network would pick the show up and that syndication of non network shows was in
its infancy, but the producers ended up using the sets and models in the
expensive (for the time) and not as big a blockbuster as expected Star Trek:
The (slow) Motion Picture.
The cost of
the movie freaked the studio execs out because the box office was not as good as
expected.
Why should they have been surprised?
It had a recycled plot (lifted from the episode
“Nomad”), spent way way way too long lingering on SFX shots that added little to
the plot and lacked drama/conflict.
There is a reason why the first movie is mocked to this
day as Star Trek:
The Boring Picture.
On a
personal note, I am magically drawn to this movie when it plays on TV despite of
everything (yeah, I don’t get it either.)
It is timeless as the middle of the movie still bores me
in the same way as an adult as it did when I saw it the first time as a kid.
 The Wrath of Khan
“Ah, Kirk,
my old friend, do you know the Klingon proverb that tells us revenge is a dish
that is best served cold?
[Pause]
It is very cold in spaaaaaccce!”
It is allegedly a Sicilian quote (someone has told me that it comes from
In an attempt to revive the franchise,
Wrath of Khan made the movie universe safe for Star Trek movies with
enough scene chewing by Richardo Montolban and William Shatner, a plot of
psychotic obsessed revenge and starship battles.
The Wrath
of Khan recycled many of the shots and models from the 1st movie to save money,
but added space combat (huzzah!), drama (huzzah!) and the death of Spock (no
huzzahs.)
It turned out to be one of the best, if not the best of the Star
Trek movies.
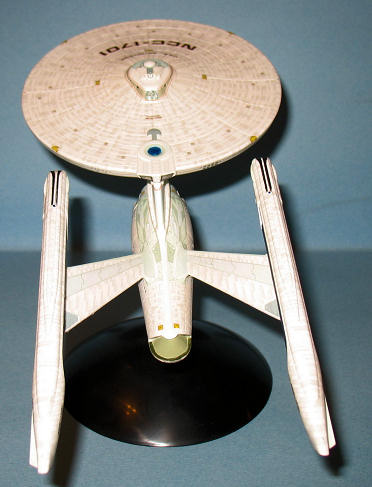
With regards to the plastic models,
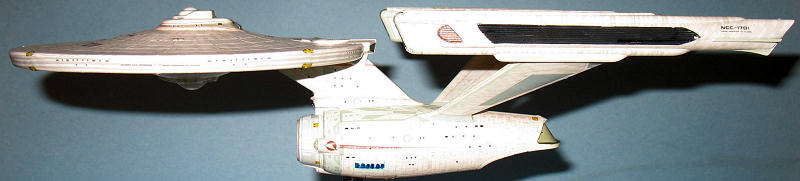
| THE KIT |
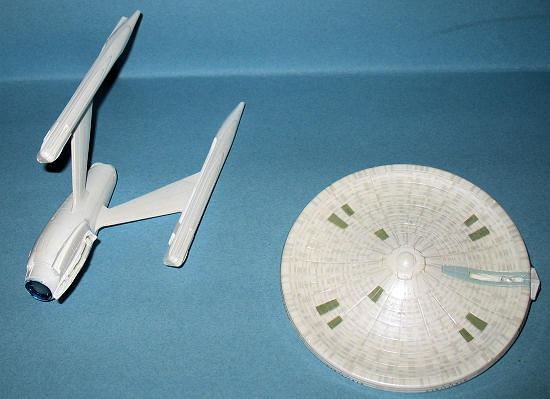
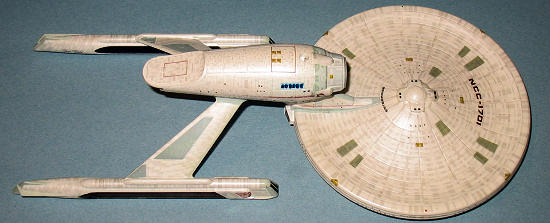
The 1/350 version of the Refit
 Like the original 1/1000 Polar Lights
The instructions and decal placement sheet does a very good job of
identifying the parts/decals and explaining their placement.
It also
includes a decal sheet for the dreaded Aztec Pattern which has become the
“standard” for all Star Trek starships and (to my own annoyance) on other
non-Trek series ships.
Yes, it looks cool, but it can be a pain to reproduce in
the smaller scales.
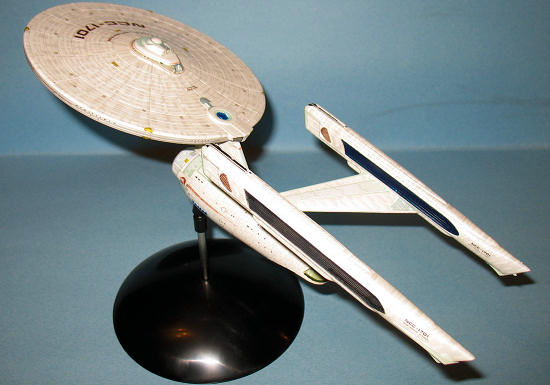
One thing that is much better than the original 1/1000 kits is that the stand is much more stable and sturdier with the wide base and metal rod.
| CONSTRUCTION |
First thing I did was assemble the sensor array so that I could spray
the inside with Tamiya Clear blue from the Spray
 Next I assembled the rest of the
There are
noticeable gaps on the leading/trailing edges of the struts, the nacelles, the
sides of the secondary hull and between the neck pieces.
A bit of CA glue, some
Next I
worked on the primary hull (saucer.)
I attached the impulse crystal to the topside of the
hull and then added some tinfoil stuck there with foil adhesive on the inside.
The engineering on the parts was well done as the parts
were molded so that the gap between the two saucer halves was actually part of
the lip.
Unfortunately, there were some gaps that needed to be sanded/filled, but
not as bad as I remembered the original USS
After some final touchups on the fill/sanding to do, I was ready for painting.
| COLORS & MARKINGS |
Paint
My choice for the base color was Tamiya Pearl White from the Spray
 micromesh pads
to remove imperfections and smooth everything out.
micromesh pads
to remove imperfections and smooth everything out.
Once I got everything done to my satisfaction then I sprayed on the
Eventually I got it where I could tolerate the result.
Next off I
had to mask off certain areas on the nacelle and spray on duck egg blue as per
instructions.
There were areas of underside of the primary hull that needed to
be painted light green so I masked them off and used Tamiya Sky.
Lastly, I masked off the outer nacelle grids and painted them flat black
as per instructions.
Decals
Polar
Lights provides decals to represent the damned Aztec Pattern which is probably
necessary for this particular scale as 1/1000 is too small for decent masks.
It would seem to be an easy task, right?
Ha.
I spent the next three frustrating months on and off
decaling the
I was
reminded why I dislike using decals for big surfaces, complex curves and to
cover raised details.
If I had a brain then I would have cut up some of the
decals into smaller sections like those for the nacelle struts because they
didn’t exactly line up detail wise.
Also, I had issues getting the decals to line up just so
like the markings for the bridge section where I was furious that
 the decals
decided to move a bit during the drying process after I spent a good 20 minutes
trying to line them up just so.
At several points I had to remind myself that this was
supposed to be therapy, not the cause of therapy.
the decals
decided to move a bit during the drying process after I spent a good 20 minutes
trying to line them up just so.
At several points I had to remind myself that this was
supposed to be therapy, not the cause of therapy.
I used up a
lot of SolvaSet and MicroSet to get these decals down.
I didn’t care about silvering except in obvious cases.
Oh yeah, some of the decals were very stubborn, adding
another reason for me to grit my teeth and wonder why I wasn’t crazy enough to
make paint masks instead.
Someone
observed that building a model shouldn’t be a character test.
He’s right, but I know after this one, I think I’m
closer to Khan Noonian Singh character wise thanks to my near obsession to
finish this kit.
It seems only a Star Trek model will make me insane enough to
actually want to finish it rather than punt it aside or use it for target
practice.
Weathering and Final Coat
No weathering done. Looking back, it might have helped cover up some of my decal booboos. As for the final coat, the pieces were coated with several layers of Future so as to seal in the decals and not make my many decal booboos obvious. Finally a top coat of Xtracrylic Satin was used to tone everything down.
| FINAL CONSTRUCTION |
The bussard
collectors were sprayed copper while the clear parts were painted clear blue on
the outside and flat black on the inside (that’s what the instructions said and
at that point I just wanted the model done so I wasn’t going to spend a few
hours looking to verify the color.)
These parts were added without too much issue.
 There was
some fine detail painting required (mostly grays) as per instructions.
In a “it seemed like a good idea at the time” was to add
the clear pieces during construction and paint them clear blue later final
painting.
I forgot about this till the end when I had to sloppily paint
them clear blue as I could not lay down tape to mask these sections off in fear
of tearing the decals off.
There was
some fine detail painting required (mostly grays) as per instructions.
In a “it seemed like a good idea at the time” was to add
the clear pieces during construction and paint them clear blue later final
painting.
I forgot about this till the end when I had to sloppily paint
them clear blue as I could not lay down tape to mask these sections off in fear
of tearing the decals off.
I slid the
secondary hull into the primary hull and then put it on the stand.
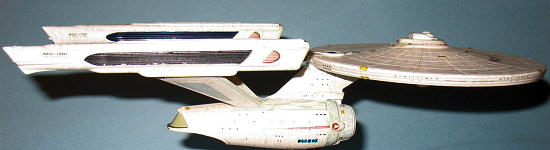
It was then I realized that I screwed up the alignment
of the neck as the
This was a fitting end to a rather frustrating build.
| CONCLUSIONS |
 Assembly wise, this kit is an amazing upgrade over the older
I must
admit that I am not happy with the result of the build which is less common for
me these days.
I think I could have and should have done better with this kit.
On the other hand, I have to consider this one as
practice for the 1/350 one that is sitting in a box waiting for my somewhat
incompetent hands to assemble.
KhaNNNNNNNNNNNNNNN!!!!!!!! KHAANNNNNNNNNNNNNNNNNNNN!!!!
Dan Lee
September 2010
If you would like your product reviewed fairly and quickly, please contact me or see other details in the Note to Contributors.