| KIT #: | 11013 |
| PRICE: | $24.00 SRP |
| DECALS: | Generic options |
| REVIEWER: | Bill Michaels |
| NOTES: |
Can be built as Gemini 4, 9, 10, 11, or 12. |
| HISTORY |
The Gemini Program was a series of ten
manned spaceflight missions launched by NASA in 1965 and 1966.
The two-man Gemini Program was the follow on to the
earlier Project Mercury missions, and the predecessor for the later Apollo
missions. The Gemini missions had several main goals (according to Wikipedia):
-
To
effect rendezvous and docking with another vehicle, and to maneuver the combined
spacecraft using the propulsion system of the target vehicle
-
To
demonstrate Extra-Vehicular Activity (EVA) or space-"walks" outside the
protection of the spacecraft, and to evaluate the astronauts' ability to perform
tasks there.
-
-
To
provide the astronauts with zero-gravity, rendezvous, and docking experience
required for Apollo missions.
All of the Gemini spacecraft were
launched by the Titan II rocket.
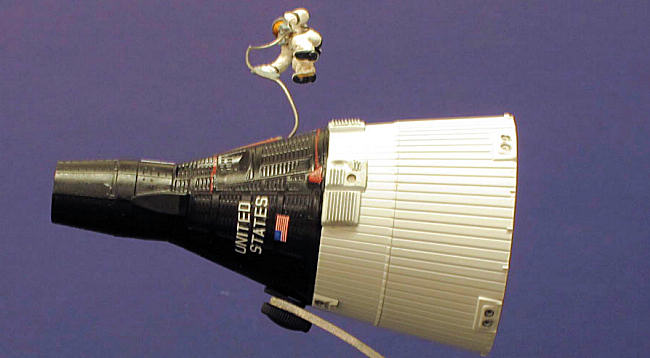
Externally, all the capsules basically looked the same-
they didn’t carry names like the original Mercury capsules did.
Unlike the
Mercury Capsules, which contained all the systems necessary for spaceflight with
the capsule itself, the Gemini spacecraft consisted of two components.
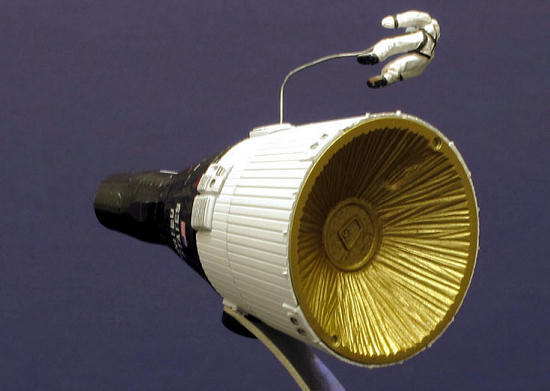
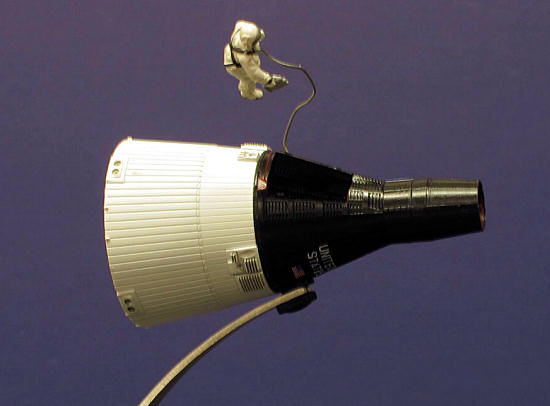
The Re-entry Module (the black section) was the crew
compartment, and the only part of the spacecraft that returned to earth.
The Equipment Module (the white section) held the power,
propulsion, and life-support systems, and was jettisoned immediately before
re-entry, like the follow-on Apollo craft would do.
| THE KIT |
This is another
kit in Dragon’s ongoing series of 1/72 scale models of significant spacecraft
released in the last year, with more to come. (Dragon is releasing plastic kit
versions of a number of their 1/72 scale die-cast models.) It is a great time to
be a builder of Real Space models!
If you’re a “Modeler of a Certain Age”,
you likely built the Revell kits of the Gemini capsule back in the 1960s.
I remember building mine at the age of ten or eleven,
and remember building and painting all the fuel cells, oxygen tanks, etc. that
were in the lower section of the capsule.
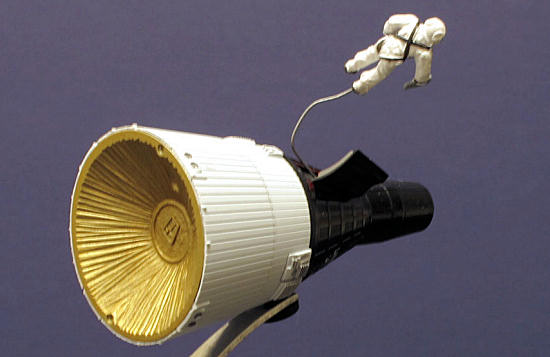
As it turns out, this was Revell’s attempt to add more
detail and interest to the model—the spacecraft actually flew with a
gold-colored foil covering over the lower section—which the Dragon kit properly
provided.
This certainly will speed up assembly!
(If you find a copy of the “First Production” kit, that
part comes pre-painted.)
The kit comes with a simple little pictorial assembly sheet. Printed on a single sheet of paper, they provide basic instructions on the assembly of the model. The model is so simple; it doesn’t need anything more complicated! The instructions do have one small glitch-- they give you two options for the top of the nose cone, and don’t tell you which to use. (The “cover” is for the spacecraft “as launched, while the “exposed stuff” option is for the “in space” configuration.) Finally, there is also a small decal sheet, one that is crammed full of little stripes and other markings.
The only “con” to the kit’s design is
the way Dragon handled the cabin windows. The windows are molded solid like they
are in some of the other Dragon space kits.
For example, I
built their 1/48 scale Lunar Module, and it had solid windows.
But in that kit, there was no interior, so providing
decals for the windows made sense.
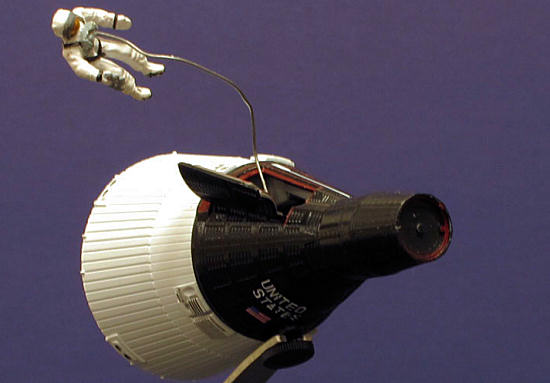
But this kit has an interior, and a door that can be
posed open.
I would have liked to see the door molded with no window.
I suppose you could drill out the window and then clean
up the opening with files— I didn’t do that, as I was building the model OOB.
| CONSTRUCTION |
| COLORS & MARKINGS |
 The
only color information is a comprehensive set of profiles on the bottom of the
box. They call out three main colors—white, black, and gold, and a few detail
ones. Painting the exterior is easy-- the EM is flat white, and the capsule is
semi-gloss black.
You can paint them before assembly, so there’s no
masking needed.
The EM doesn’t have any decals, so all it needed was a little
black wash to add some depth and highlights to the louvers by the maneuvering
thruster ports.
The
only color information is a comprehensive set of profiles on the bottom of the
box. They call out three main colors—white, black, and gold, and a few detail
ones. Painting the exterior is easy-- the EM is flat white, and the capsule is
semi-gloss black.
You can paint them before assembly, so there’s no
masking needed.
The EM doesn’t have any decals, so all it needed was a little
black wash to add some depth and highlights to the louvers by the maneuvering
thruster ports.
| FINAL CONSTRUCTION |
After the decals were dry, the capsule was given a coat of satin clear
to seal in the decals and even out the finish.
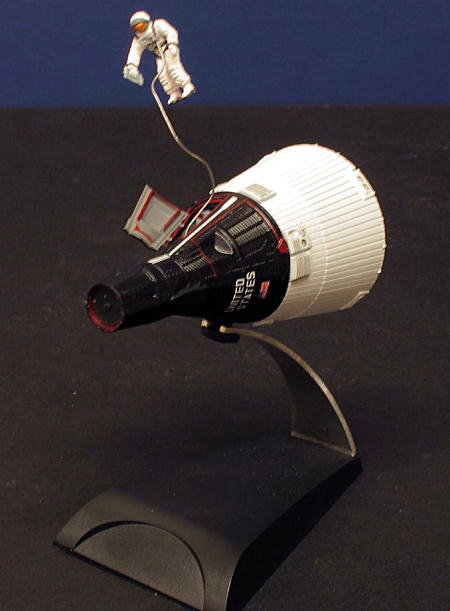
The model was attached to the display stand with a dab
of superglue.
The final step is to install the spacewalking astronaut.
The kit provides a piece of fine steel wire—you can bend
into whatever sort of lazy loop you want.
Before installing it, I painted the wire with flat
silver get rid of the shiny wire look. There was no indication of where or how
to attach the wire in the capsule—so I just drilled a small hole with my pin
vise in the floor of the cockpit to take the end of the wire.
| CONCLUSIONS |
Highly Recommended.
 d
been doing.
This kit fits the bill—it goes together quickly, and doesn’t
require a lot of complicated masking or painting.
d
been doing.
This kit fits the bill—it goes together quickly, and doesn’t
require a lot of complicated masking or painting.
My only complaint concerns the decals—
as mentioned before, some of them are very tiny, fragile, and don’t fit well.
And I do wish Dragon had included a decal for the display base—there is a
recessed area that that looks like it would be perfect for a “Project Gemini”
decal, but none is provided. And
while we’re at it, a decal for the instrument panel would have been nice, too.
Review kit courtesy of my wallet. Note
that while the retail price is $24, the kit can be found for less.
I paid $20 for mine, using my club discount at the local
shop.
Special
thanks to Pip Moss of the IPMS Patriot Chapter in
Update:
After the model was finished and Pip had taken all the
pictures, I realized that I had forgotten to install the radio mast that was
extended when the craft was in orbit.
The kit includes the part—I just forgot to install it
before picture day.
Second
Update:
It has been two months now, and the lost part hasn’t reappeared yet….
Bill
Michaels July 2012 If you would like your product reviewed fairly and fairly quickly, please contact the editor or see other details in the
Note to
Contributors.