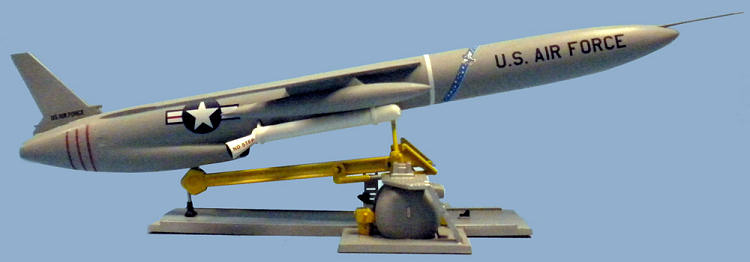
Revell 1/81 SM-62 Snark
Missile
| KIT #: | H-1801 |
| PRICE: | $.89 in 1958, but more later |
| DECALS: | Development/Prototype markings |
| REVIEWER: | Blair Stewart |
| NOTES: |
Reissued
as a History Maker Kit in 1982 and an |

| HISTORY |
The Northrop SM-62
Snark was a specialized
intercontinental cruise missile with a W39 nuclear warhead operated by the
The Snark was developed
to offer a nuclear deterrent to the
The Snark program began
in 1945. Its objective was to produce a subsonic (600-mile-per-hour) cruise
missile capable of delivering a 2,000-pound nuclear or conventional warhead to a
range of 5,000 miles, with a circular error probable (CEP) of less than 1.75
miles. Initially, the Snark used a turbojet engine and an inertial navigation
system, with a complementary stellar navigation monitor to provide
intercontinental range.
By 1950, due to the
yield requirements of nuclear warheads, the design payload had changed to 5,000
pounds, accuracy requirements shrank the CEP to 1,500 feet, and range increased
to more than 6,200 miles. These design changes forced the military to cancel the
first Snark program in favor of a “Super Snark,” or Snark II. Initially there
were two missiles - a subsonic design (the MX775A
Snark) and a supersonic design
(the MX775B Boojum).
 Budget
reductions threatened the project in its first year, but the intervention of
Jack Northrop and Carl Spaatz saved the project. Despite this, funding was low
and the program was dogged by requirement changes. The expected due date of 1953
passed with the design still in testing and SAC was becoming less enthusiastic.
In 1955, Eisenhower ordered top priority to the ICBM and associated missile
programs. The original designation was B-62.
Despite considerable
difficulties with the missile and military reservations about it, work on the
Snark continued. In the 1957 tests the missile had a CEP of only 17 nautical
miles. By 1958, the celestial navigation system used by the Snark allowed its
most accurate test, which appeared to fall four nautical miles short of the
target. However, this apparent failure was at least partially because the
British Navigation Charts used to determine the position of Ascension Island
were based on position determination techniques less accurate than those used by
the Snark. The missile landed where
Even with the decreased
CEP, the missile’s design was notoriously unreliable, with the majority of tests
suffering mechanical failure thousands of miles before reaching the target.
Other factors, such as the reduction in operating altitude from 150,000 to
55,000 feet and the inability of the system to detect countermeasures and
perform evasive maneuvers, also reduced the Snark’s credibility as a strategic
deterrent.
The jet powered, 52
feet long unmanned aircraft had a top speed of 650 mph and a maximum range of
5,500 nautical miles. The complex stellar navigation guidance system gave a
claimed CEP of 8,000 ft. It was designed to carry the W-39 warhead, which
reportedly had a nuclear yield of about 3.8 megatons.
The Snark was an
air-breathing design, launched from a light platform by two booster engines (
known as jet assisted take off, or “JATO”). It switched to an internal jet
engine for the remainder of its flight. The jet was a Pratt and Whitney J57, the
first 10,000 lb. thrust design, which was also used in the early B-52 and the
F-100. Lacking a horizontal tail, the missile used elevons as its primary flight
control surfaces, and flew an unusual nose high aspect during level flight.
During the final phase of flight the nuclear warhead separated from the
missile's main body and followed a ballistic trajectory to the target. Upon
separation, due to the abrupt shift in its center of gravity, the missile body
performed an abrupt pitch-up maneuver to avoid colliding with the warhead.
One advanced feature of
the Snark was its ability to fly missions of up to 11 hours and return for a
landing. If the warhead did not detach, the missile could be flown repeatedly.
Lacking landing gear, it was necessary for the Snark to skid to a stop on a
flat, level surface.
The 556th Strategic Missile Squadron
was activated on December 15, 1957. Training and testing was done at Patrick Air
Force Base in
 During
1958, SAC's commander, General Thomas Powers, requested the program be
revaluated. He then recommended it be canceled, as the technology was
obsolete. Headquarters USAF overrode his objections and decided to
continue a limited Snark program that called for the operational deployment of
one Snark squadron. It was to be the existing 556th SMS.
The 702nd Strategic Missile Wing was
the only Snark Missile Wing. It was established on
The 702nd SMW placed the first Snark
on alert on
The retired Snark missiles were probably sent
to Davis-Monthan AFB and converted to scrap metal, as they had no military value
and could not be used in connection with the space program.
As an aside, The 556th SMS was
reactivated on
| THE KIT |
In keeping with my
latest “sickness” of trying to re-create my youth through the plastic model kits
I grew up with in the fifties and sixties, I couldn’t resist taking a crack at
this old Revell standard. In 1958, with the space race heating up (The USSR’s
Sputnik I launch on October 4, 1957 was followed by the US’ launch of the
Explorer I on January 31, 1958. How well I remember that date: my dad and I were
watching the Friday night fights on NBC’s “Gillette Cavalcade of Sports” on a
black and white TV set when they interrupted the broadcast to announce the
launch), Revell began to offer models of space age missiles to the public. Among
that group was kit H-1801, the Northrop Air Force SM-62 Snark. The kit was
originally molded in red plastic, with a movable launch
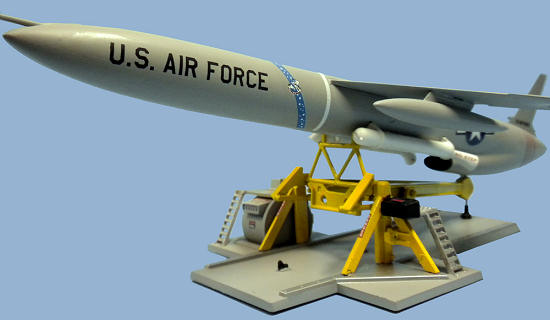 platform
and two small figures. Jack Leynnwood painted the box art, which depicted a
fiery launch of a Snark, clad in its prototype/test markings. The kit consisted
of some 25 parts and the two figures. Decals were for the prototype/test
missile, which was bright red with extensive white markings to aid in visibility
during test launches.
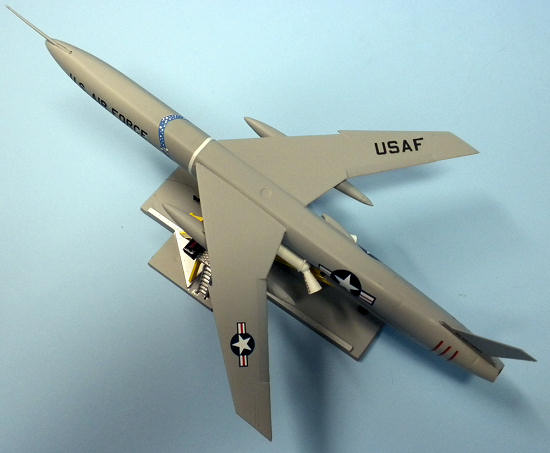
Revell’s Snark captures
the look of the original quite nicely. It does model the Pitot tube as coming
out of the top of the missile’s nose rather than the point. In pictures I could
find on the internet, there appear to have been both configurations during
testing, although I am not sure which was finally adopted for the operational
missiles. The launch platform is quite simple, and includes the launcher
carriage assembly, a fuel tank, and access platforms.
In its 1958 attempt to
cash in on the space race, Revell ended up introducing some 29 different missile
and space model kits. Other modeling companies, primarily Aurora and Monogram,
soon followed suit with their own missile and space kits. Unfortunately, these
kits were not good sellers.
This and other Revell kits were known as “box scale” models; that is, to solve the problem of maintaining a constant scale in its various model types, Revell adopted the approach of scaling these kits to fit specific size boxes and sell at certain price points. Thus, the Revell Snark turned out to be the now odd scale of 1/81, which is very close to model railroading’s HO scale.
| CONSTRUCTION |
I wanted to build this kit as another example
model for my kit collection display (and to add it to my recently completed
Revell
F-94C Starfire). Although I had a History Makers version of this kit, I
opted to purchase one of the 2011 Selected Subjects Program (
As one can expect, this is not an overly
difficult kit to assemble, given its low parts count; however, bringing it up to
today’s modeling standards does require a little extra work.
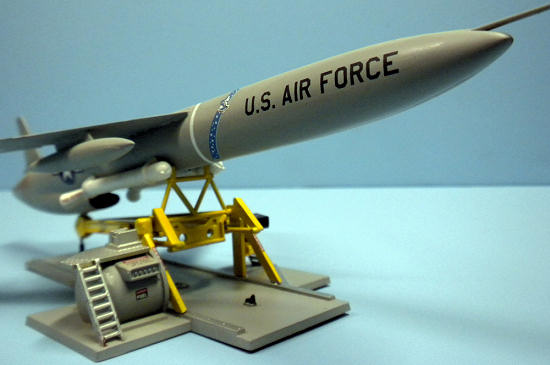 I began
by gluing the fuselage halves together and mounting the air scoop to the right
fuselage half. I then assembled the two JATO tubes and put them aside to dry.
Next, I glued the wing assembly to the fuselage. At this stage, I left off the
pitot tube for a later time to avoid the possibility of breaking it off during
handling.
The wing-to-fuselage joint and the fuselage
joint required some filing and sanding to smooth them out. I applied Mr.
Surfacer 1000 to these joints and then wet sanded them with a medium grit
sanding stick from the Squadron Shop. Once I was satisfied with these joints, I
then used a Micro Mesh sanding pad and wet sanding to remove the “golf ball
sized” rivets and the raised decal placement lines that were so prevalent on
these earlier kits. I was not too worried about loosing some of the raised panel
lines in the process, as, in this scale, these are not as noticeable as one
would think on the finished model.
I then assembled the two wing tanks. The next
step was to smooth out the tank joints via wet sanding. I also had to do the
same for the two JATO tubes. Once the wing tank joints were properly smoothed, I
then glued the tanks to the missile fuselage. Since I was going to paint the
JATO tubes white, I did not glue them to the missile at this time.
The next step was to move to the launch platform. The most “complex” piece of this is the launcher assembly, which consists of eight parts. I assembled these, and then put them aside for painting. The only other assembly that was left at this stage was to glue the launcher fuel tank halves together. After cleaning up the seam, I glued this to the launcher base.
| COLORS & MARKINGS |
The SM-62 Snark on
display at the National Museum of the U.S. Air Force in Dayton, Ohio is painted
in SAC’s operational colors, so I opted for this scheme. I could use a few of
the kit’s decals, but a majority of the markings would have to come from my
scrap box or other scrounged from other kits. The overall color of the
operational missile was aircraft gray and white JATO tubes.
For the overall gray
color scheme, I chose Fresh & Easy rattle can matte gray spray enamel I picked
up at a local Lowe’s. This paint is
cheap and provided good coverage over the red plastic.
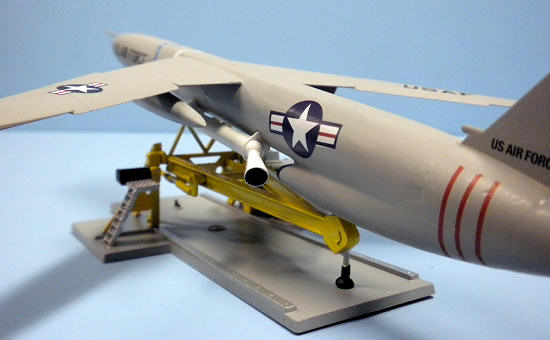 For the
launcher assembly, I chose Model Master Chrome Yellow, which is gloss paint. To
reduce the bleed problem, I first sprayed the launcher assembly with Humbrol’s
bright silver, and then applied the Chrome Yellow paint over this base coat. I
painted the launcher base with the Fresh & Easy matte gray. I then masked off
the rails on the base and sprayed them with Testors aluminum.
Once everything was
thoroughly dry, I started the decal process. At first, I thought I would be lazy
and just gloss the missile with a rattle can of Rustoleum Clear Gloss. For some
reason, however, this left a beautiful but somewhat yellow hue on the gray
paint. After kicking myself for attempting a short cut, I decided to repaint the
missile with the matte gray and start over. I determined that I would then
resort to my old standby of using puddles of Future floor wax to set my decals.
I happened to have an
old Microscale sheet of national insignias in various sizes, so I chose some
from that sheet that were close to the kit decals (the kit national insignias
are printed in conjunction with the test white markings, and, while they can be
used, would require careful cutting to eliminate the white markings surrounding
them).
One of the dilemmas was
the angle of the national insignias: in some pictures, the wing insignia are
placed at 90 degrees to the fuselage; in others, they are parallel to the wing’s
leading edge. Likewise, the large national insignia on the fuselage sides are
sometimes parallel to the fuselage and other times are seen as slanted at an
angle. I opted for setting the wing insignia like they appear on most U.S.
aircraft, but then chose the slanted position for the fuselage insignia. After
looking at the picture of the operational missile from the Air Force Museum, it
was hard to tell if these insignia are slanted or straight. I am sure there is
some old SAC crew chief out there somewhere in modeling land that can set me
straight on this issue! The only other built-up kit in operational markings I
have been able to find on the web is
Phil Brandt's
build of the Lindberg Snark, (obviously Blair missed your editor's build
of April 2011. Ed) and Phil also opted to cant the fuselage insignia (as
they say in the legal profession, “precedence, baby!”).
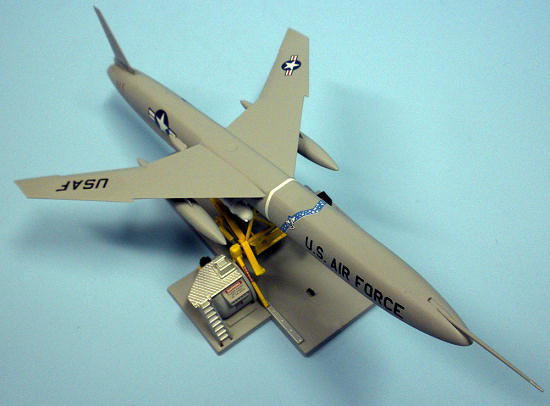
For the SAC star
ribbons and shields, I pirated these from a Minicraft 1/144 scale Boeing KC-97G
Stratotanker. Once I had defiled the decal sheet, I continued to steal the U.S.
Air Force markings from the same sheet (yes, I know, I have just kicked the can
down the road if I ever get around to assembling the Minicraft kit. Oh well, the
choices us modelers must make!). Finally, for the white
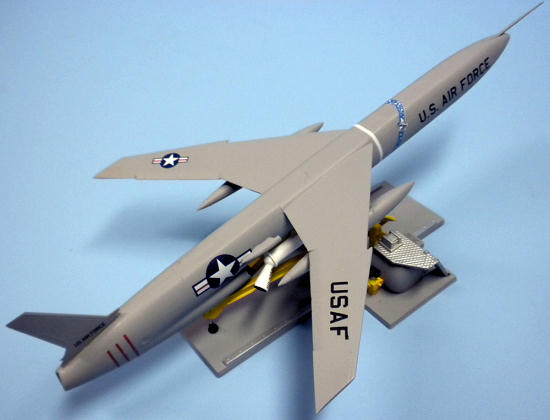 fuselage
band and the three red bands around the missile’s engine, I used decals from old
Scale Master striping sheets I have had in my stash for close to 20 or more
years. These were somewhat fussy, but after a lot of trial and error, I got them
to look half way decent on the model.
All of the decals on
the launcher were from the kit, and these went on nicely. After all of the
decals set, I sprayed the missile and some parts of the launcher with Testors
Dullcote to cut down the gloss of the decals and the areas where I had applied
Future to facilitate the adherence of the decals to the model.
After the decals were dry, I hand-painted various parts of the launcher. I also painted the inside of the air intake, the exhaust, and the two JATO tube exhausts with Humbrol flat black. I masked off the intake and hand painted the edge with Humbrol flat black.
The final assembly
consisted of placing the model on the launcher stand.
| CONCLUSIONS |
Here was another
nostalgic return for me to the modeling days of my youth. Given its age and
simplistic construction, I think it stacks up well when it’s assembled and
finished using today’s modeling techniques. If you are looking for a very quick
“space and missile era” build, I highly recommend this old Revell kit.
| REFERENCES |
1.
SM-62 Snark, Wikipedia,
March 2012.
2.
Northrop SM-62 "Snark," Strategic-Air-Command.com, March 2012.
3.
Rocket and Missile System: The Snark, Encyclopedia Brittanica On-line, March
2012.
4.
Graham,
Thomas, “Remembering Old Revell Model Kits,” Schiffer Publishing Ltd., Atglen,
PA, 2004.
http://en.wikipedia.org
April 2012
Thanks to my wallet for
the review kit. You should still be able to find this kit at some local hobby
shops.
If you would like your product reviewed fairly and fairly quickly, please contact the editor or see other details in the Note to Contributors.