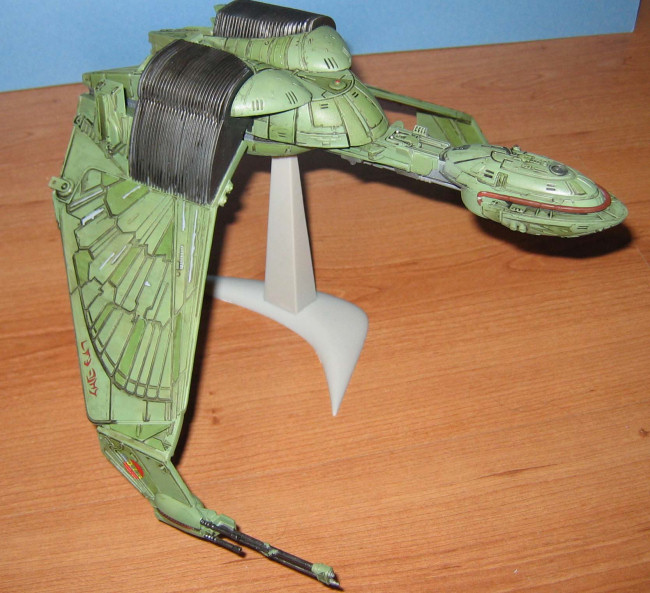
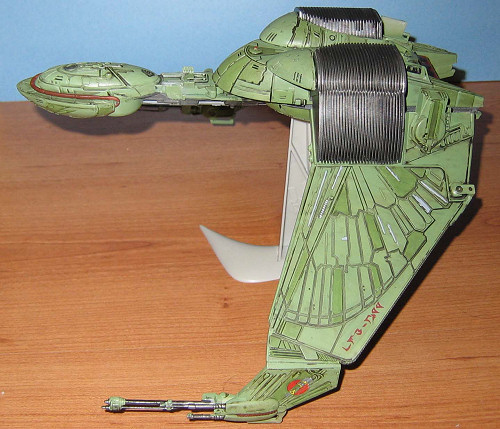
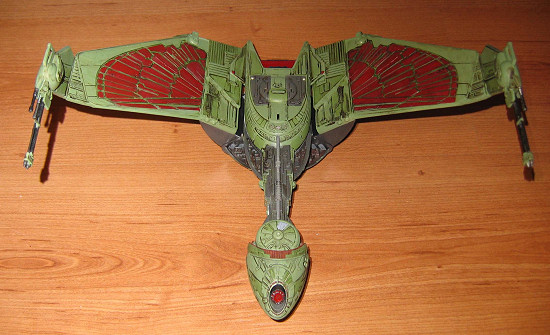
AMT/ERTL Klingon Bird of Prey
| KIT #: | 38389 |
| PRICE: | $15.00 MSRP |
| DECALS: | One option |
| REVIEWER: | Dan Lee |
| NOTES: | Not a Sturdy Bird |
| HISTORY |
Klingons off the Starboard Bow
 The B’rel Scout Ship made its first
appearance in the movie Star Trek III: The Search for Spock. According to
various “sources”, it was a curious hybrid of Klingon and Romulan technology
(the primary enemies of the Federation) due to a shaky political/technological
alliance. The Klingons provided the warp engines and weapons while the Romulans
designed the B’rel’s hull (it seems the Star Trek designers gave the Romulans a
bird fixation when it comes to designing their starships) and provided the
cloaking device.
The B’rel Scout Ship made its first
appearance in the movie Star Trek III: The Search for Spock. According to
various “sources”, it was a curious hybrid of Klingon and Romulan technology
(the primary enemies of the Federation) due to a shaky political/technological
alliance. The Klingons provided the warp engines and weapons while the Romulans
designed the B’rel’s hull (it seems the Star Trek designers gave the Romulans a
bird fixation when it comes to designing their starships) and provided the
cloaking device.
In Star Trek III, a B’rel class scout ship was commanded by the renegade captain Ziggy Ignatowski, uh, Kluge, who was ran a covert operation to obtain the secrets of the Genesis device. The net result of the mission was the destruction of the Genesis planet, the death of Kirk’s son (apparently one of many), the loss of Star Fleet’s most famous starship, the USS Enterprise, the deaths of Kluge and most of his crew, and the capture of the Klingon scout ship by the Enterprise’s survivors traveled to Vulcan to reunite a fellow named Spock with his soul.
The captured ship was eventually renamed the Bounty and was destroyed in another film while trying to save the Earth from the ravages of a menacing dark cylinder. It crashed into San Francisco Bay carrying a trio of whales from Earth of the past.
The later producers of the Star Trek franchise proved to be adept at recycling (ship designs as well as plots) so the Bird of Prey reappeared often in subsequent movies and TV series.
| THE KIT |
See my very brief preview.
| CONSTRUCTION |
After reviewing the instructions, I decided to assemble the wings and weapons first. The wings were pretty easy to build, but had some prominent gaps on the leading and trailing edges that needed filling (used a combination of CA glue and Mr Surfacer.)
The weapons were a little trickier to build as there were prominent gaps. I glued some 10 thousand plastic card over the gaps and sanded down the edges. The weapon barrels were rather sloppy due to flash and ejection pin marks on the barrels that need sanding/cleaning.
The main hull was a bit more problematic. Due to the complexity of the paint scheme, I opted to paint it first before assembling.
| COLORS AND MARKINGS |
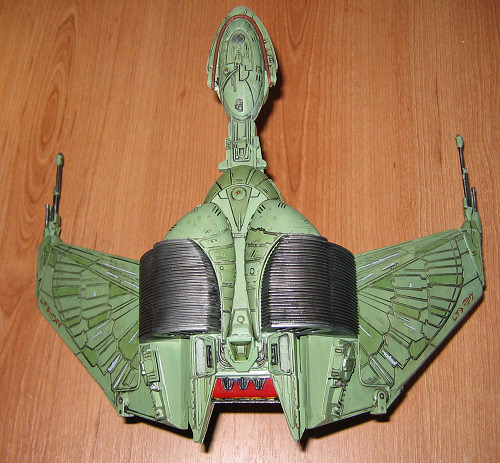
The B’rel is one big light green machine with the base color of FS34227—I used an entire jar of Gunze H312 Acrylic to cover the hull. Then I followed the painting instructions and masked various portions of the main hull and paint with Fieldgrau (aka SAC bomber green), Zinc Chromate Green, Gunship Grey, Rust and Steel. This took quite some time and used up a lot of Tamiya Tape.
And that was just the hull.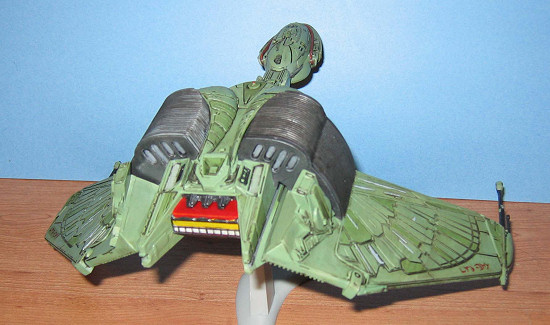
The wing joints were easy to paint (Gunze Steel) while the B’rel’s wings were a whole other time consuming chore of masking. The wing individual bird feathers were to be painted on the top (Zinc Chromate Green) and the bottom (Flat Red) and would require lots of masking if one wanted to airbrush it. I took the easy way out by painting the feathers with a brush instead. I took my time painting the feathers on top while I was rather sloppy with the ones on the bottom. My rationale to slop on the red was that the Bird of Prey was a very dirty ship and that my sloppiness could be covered up with a dark green wash. Once that was done, I took a 0 tip brush and painted various ridges with Light Ghost Grey.
The weapons located at the wingtips were hand painted as well with a mix of FS34227, rust and Gunze Steel.
| CONSTRUCTION CONTINUES |
Once the main hull pieces were finally painted and dry, I glued the hull together. Unfortunately, I discovered that the absence of gaps during dry fitting was deceiving as there were rather large gaps running up and down the most inaccessible parts of neck of the Scout Ship. At this point, I mentally noted the location of my hammer while I went about trying to undo what I just did.
Fortunately, the glue hadn’t really
dried so I pried the hull pieces apart (very carefully.) I suspected that the
gaps were caused by the neck tabs as they were too deep to fit in the slots.
Some careful sanding and dry fitting showed that they not totally to blame. The
pieces that form the sidewalls of the neck were also too shallow in other places
so I ended up cutting some 10 and 20
 thousandth card and gluing them to the
neck. One thing I should point out that the neck’s surface is rather irregular
and any trimming of the plastic card needs to be done carefully.
thousandth card and gluing them to the
neck. One thing I should point out that the neck’s surface is rather irregular
and any trimming of the plastic card needs to be done carefully.
At this point, I also used this opportunity to add plastic card on the bow lower half to cover the gaps where the cloaking device array (the rusty rail located on the upper half of the bow) is mounted. Again, I carefully trimmed along the contours of the hull.
Even with all the careful trimming, there was still a large gap where the two neck halves meet. I ended up filling in those gaps with superglue and sanded them flat. After some careful sanding with finer grades of sand paper, I masked and sprayed pale green over the affected areas.
I then tackled the wing hinges which consisted of three pieces. I opted to put my Bird in attack mode which means wings down. Some of the really serious SF modelers claim that the wing angle is too much and they should be sanded down a few degrees. I didn’t bother and left them as is. Of course, if I were really lazy, I could have just glued the stand together and “modeled” it in cloak mode (bad SF modeler joke)…
The Bird of Prey main hull was re-glued together without too much incident. However, I still had to take care of the gaps in the stern of the hull on the sidewalls of the engine compartment. There was nothing that some superglue and some careful sanding could not fix.
Unfortunately, the same could not be said for the wings. The wing attachment points are not that good so I had to glue the steel painted hinges to the wings first and let them dry before attaching them to the main hull.
One final sanding and filling task needed to be done at the stern of the main hull. I put some superglue into the gaps and sanded them smooth. Once done, I repainted the section with pale green.
| FINAL BITS |
Once completed, the B’rel under went
two different washes to make it a dirty bird. The first one was the
standard dark watercolor wash of equal parts black, burnt sienna, and raw umber
and a couple of drops of dish soap to bring out the surface detail. The
second wash was a mixture of raw umber and park green for the underside of the
wings. The purpose of this wash was to hi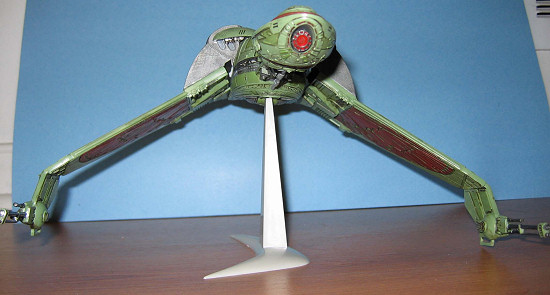 de
my lazy sloppy paint job. I estimate that masking the feathers for airbrushing
would have taken some 5-10 hours of tedious work which I was not willing to do
unlike the one hour of work it took to hand paint the feathers and putting down
a wash.
de
my lazy sloppy paint job. I estimate that masking the feathers for airbrushing
would have taken some 5-10 hours of tedious work which I was not willing to do
unlike the one hour of work it took to hand paint the feathers and putting down
a wash.
Once the wash was dry, I airbrushed two thin coats of 50/50 Gunze Flat Clear/rubbing alcohol mix all over the ship. Once it was dry, I sprayed a thin coat of 50/50 Future/rubbing alcohol over the areas that were to receive the decals. The four decals were done in less than 10 minutes. When the decals were dry a day later, I sprayed over them with the Gunze Flat Clear/Rubbing Alcohol.
The clear “canopy” bits consisted of the photon torpedo tube and the engine nozzle. These proved to be a bit more problematic than a standard plane canopy. I had to paint on both the inside and outside of the engine nozzle to get the look I wanted. Meanwhile, the photon torpedo tube had issues of its own. The not-so-easy to-get-to-with-a-brush interior bits were to be painted red while the frame was painted gunmetal. I ended up spraying the tube gloss red first and then dry brushed gunmetal onto the frame. This saved me from unleashing a torrent of profanity while playing around with a brush.
These were attached with Humbrol clear glue and that was it.
| CONCLUSIONS |
This by far is one of the easiest AMT Star Trek kits I have ever assembled but also has a one of the most complex paint schemes that I have ever done. It is a paint scheme that will demand lots of patience and low tack tape.
 AMT should be commended for reissuing
these kits.
AMT should be commended for reissuing
these kits.
A very nice kit, but there are two things I do not like about this kit:
1) I recommend that you build or obtain a better display stand as the kit stand, for lack of a better word, sucks. At the time of this writing, I am in the process of designing a much sturdier and stable stand for this model so that it won’t crash to the floor in the middle of the night.
2) I am not impressed with how the wings attach to the hull as the join is too weak. Of course, this issue makes a new stand a necessity unless you enjoy repairing models on a regular basis (like I did with this particular ship.)
June 2006
Copyright ModelingMadness.com
If you would like your product reviewed fairly and fairly quickly, please contact the editor or see other details in the Note to Contributors.