PST 1/72 PMZ-2 (US-6)
|
KIT: |
PST 1/72 PMZ-2 (US-6) |
|
KIT # |
72049 |
|
PRICE: |
$8.97 MSRP |
|
DECALS: |
None |
|
REVIEWER: |
|
|
NOTES: |
|
BACKGROUND |
For a full review of what’s in the box, see Scott’s preview at this Link. I wasn’t able to find any more references, so this part is skimpy.
|
CONSTRUCTION |
My plan after receiving the kit was to build it into subassemblies to facilitate painting. Ones that jumped out after a quick review of the instructions were the Studebaker cab, the chassis, and the firefighting gear / tank in the bed. With a plan in mind, it was time to desecrate plastic.
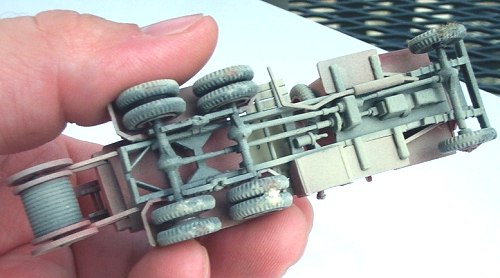
 I first put together the chassis. It went together without
difficulty, and parts of it cry out for additional detail for those with
a bent to supplying it. Being a Studebaker, I can’t imagine that
research would be difficult. I personally built it (mostly) out of the
box. I left the wheels off to facilitate painting. While it seemed a
sound decision, it gave me some difficulty with aligning the wheels later
I first put together the chassis. It went together without
difficulty, and parts of it cry out for additional detail for those with
a bent to supplying it. Being a Studebaker, I can’t imagine that
research would be difficult. I personally built it (mostly) out of the
box. I left the wheels off to facilitate painting. While it seemed a
sound decision, it gave me some difficulty with aligning the wheels later
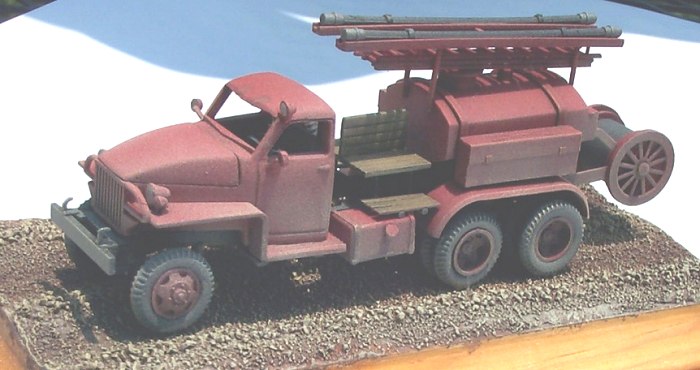
The cab was nice to put together, with the hood molded separately making it easy to depict it open. The kit comes with no clear bits, so those will need to be scratched. Also, in the instructions, the left and right fenders were reversed. It wasn’t difficult to figure out what was going on. I left the major pieces of the cab unglued again to facilitate painting.
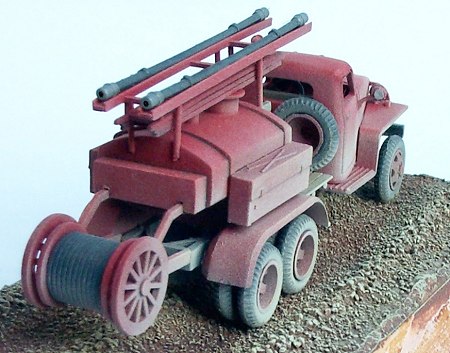
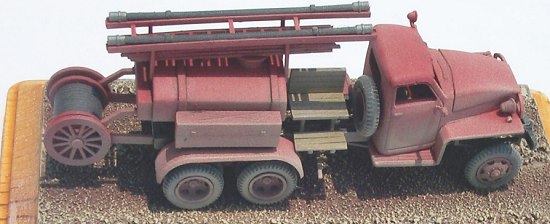
The tank assembly was pretty straightforward, but the location of the various boxes was left to the eyeball and what looked good. The ladder assembly is also “magically” suspended, but since I couldn’t locate references that’s the way it had to remain. I scratch built a footrest for the bench seat, since picture those poor Russian firemen riding out there dangling their feet over the frozen roads was too much even for me. The hose assembly fit together nicely, with the hose reel requiring very little touchup. I kept breaking off the little rods that hold up the tank, so next time I’d replace them with brass and drill locating holes in the chassis.
|
PAINTING |
 After completing construction into the various subassemblies, I primed
them with generic enamel gray primer. When this was complete, the model
was ready for the initial coat of paint.
After completing construction into the various subassemblies, I primed
them with generic enamel gray primer. When this was complete, the model
was ready for the initial coat of paint.
I attempted to follow the basic red scheme presented in the instructions and on the box cover.
The body and wheels of the truck was airbrushed with Model Shipways Flat Red acrylic tinted with a touch of Hull Red as a base color. While this was drying, the chassis was airbrushed with a coat of Tamiya Semi-gloss black acrylic, with a drop of Tamiya Flat Base to cut the gloss a bit.
The tires and the hoses were brush painted with Floquil Grimy Black. The interior received Tamiya Khaki for the seat, and some black details. The shiny bits received Silver for “shininess”.
 After this was complete, the subassemblies were assembled, and the
model was given a wash of Winsor & Newton Burnt Umber to unify it,
followed by a dry brush of the Model Shipways Red lightened with a Pale
Yellow.
After this was complete, the subassemblies were assembled, and the
model was given a wash of Winsor & Newton Burnt Umber to unify it,
followed by a dry brush of the Model Shipways Red lightened with a Pale
Yellow.
The final touch was spraying a varying coat of lightened dust on the vehicle to depict a hard working Russian fire truck.
There were no decals to worry about.
|
CONCLUSIONS |
All in all, I found this kit to be a nice change of pace from the usual fare. Parts fit was good, with the only challenge being scratchbuilding the clear parts. Recommended for all modelers with a 1/72 scale vehicle under their belts.
|
REFERENCES |
I wasn’t able to locate specifics for the fire truck version of this truck, but Studebaker references weren’t difficult to line up with a search engine. The “camouflage” I duplicated off of the box top.
If you would like your product reviewed fairly and quickly, please contact me or see other details in the Note to Contributors.