Mikro man “Video Game Player”
| KIT #: | MikroMan Player 01 |
| PRICE: |
£7 |
| DECALS: | None |
| REVIEWER: | Jeff Simpson |
| NOTES: |
Etched Metal.
One of a series of fifteen featuring a sort of two-dimensional
character “Mikro man” |
| BACKGROUND |
 Mikro man was the creation of a budding designer, Sam Buxton in about 2003. Sam
has since gone on to make a name for himself as an interior designer based in a
studio in
Mikro man was the creation of a budding designer, Sam Buxton in about 2003. Sam
has since gone on to make a name for himself as an interior designer based in a
studio in
My own feeling is that the kit aspect reduces its appeal for the average
artwork purchaser, who wants a finished item, not a rather fiddly challenge for
his/her dexterity. Although it has to be admitted that the packaged kit is
attractively presented and could be put on show unassembled as a “flat” artwork.
| THE KIT |
 The kit
came to me protected by bubblewrap and a cardboard box well able to survive the
postal system.
The kit
came to me protected by bubblewrap and a cardboard box well able to survive the
postal system.
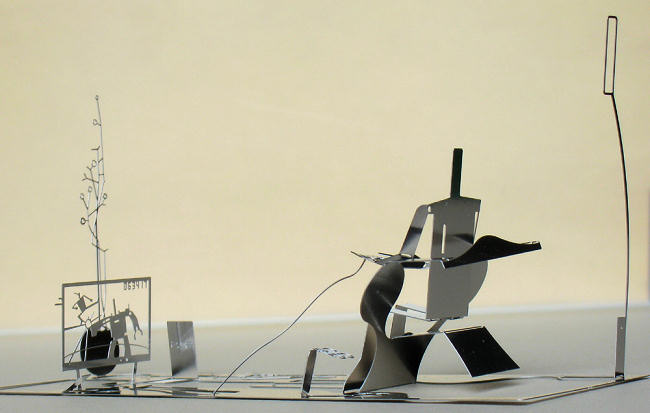
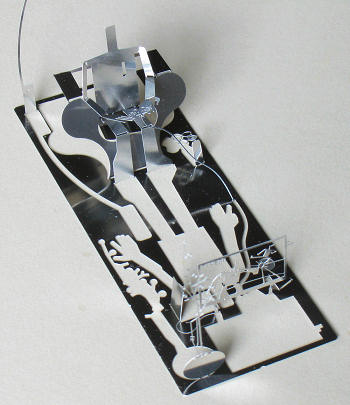
The “kit” is a single sheet of chemically-etched steel plate (magnetic too!). It comes protected in a clear plastic tray inside a very nice presentation black cardboard surround. There is a small sheet of paper illustrating the various moves required to erect the photo-etch. There is a photograph of the finished kit on the protective card and an illustrated catalogue of the whole Mikroman series.
| CONSTRUCTION |
The
instructions suggest that assembly merely requires clean hands or blunt
tweezers. I found that a modelling knife was very useful to lever the photo-etch
up out of the flat, and then two blunt tweezers could be used to ease the
“shapes” into position. The four steps illustrated in the instructions require
the artist/ 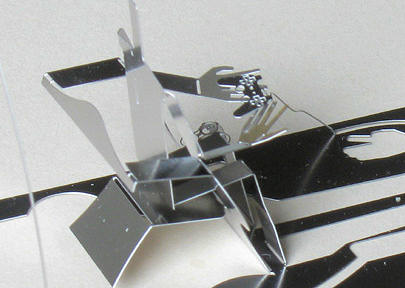 modeller
to interpret the photograph of the finished article to figure out how far to
move the various parts, but, I suppose there is a certain amount of artistic
freedom permitted. No cutting is required, just bending. The instructions
properly caution against too much bending forwards and backwards, otherwise the
steel might fracture at the joints.
modeller
to interpret the photograph of the finished article to figure out how far to
move the various parts, but, I suppose there is a certain amount of artistic
freedom permitted. No cutting is required, just bending. The instructions
properly caution against too much bending forwards and backwards, otherwise the
steel might fracture at the joints.
| COLORS & MARKINGS |
The
instructions do not suggest any painting or protective coating.
The
photos give an idea of the appeal of the finished article in shiny steel.
However I could imagine a painted version.
| CONCLUSIONS |
An unusual and fun little object. It is all photo-etch, might be just the trick as a starter project for manipulating photo-etch.
October 2009
Copyright ModelingMadness.com. If you would like your product reviewed fairly and quickly, please
contact
the editor or see other details in the
Note to
Contributors.
Back to the Review
Index Page 2019