| KIT #: | HS-993 |
| PRICE: | 8.99 GBP |
| DECALS: | None |
| REVIEWER: | Jeffery Simpson |
| NOTES: |
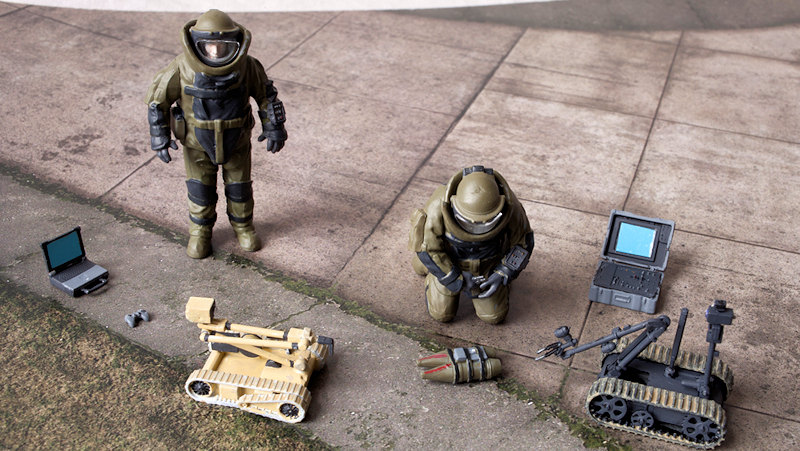
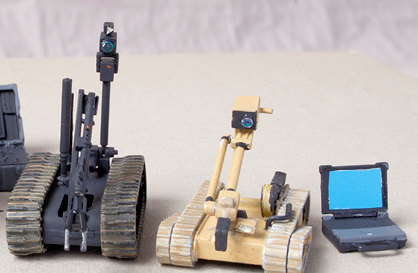
Two figures, one bomb and two tracked robots with accessories. |
| HISTORY |
The “Advanced Bomb Suit” of the kit looks exactly like the one that is depicted in Wikipedia. It is made by “Med-Eng” and seems to be available in either sand or green colours. The instructions say that the sand coloured robot is an “iRobot 510 Pacbot” and the grey one is a “Talon EOD Robot”. A Google search verified that these machines do exist, again in optional colours. At the time of writing, March 2016, this is a very topical issue, suffice it to say that I am extremely grateful that people can be found to do “Ordnance Disposal”. Good luck to them.
| THE KIT |
 The
standing figure is 54 mm tall, which is about right for 1:35 scale.
The
standing figure is 54 mm tall, which is about right for 1:35 scale.
The kit comes in an end-opening box. The parts, in grey and clear plastic, are all sealed in plastic bags. There are no decals. The clear parts are only the visors for the helmets, no “lenses” are included for either the cameras or the sensors on the robots.
There was a no flash on my kit, most of the parts have an imperceptible ridge where the mould join line would be.
There is a 2 page instruction folded card, the multi-lingual headings are vague, but the diagrams showing the assembly of the robots and their controller units are straightforward. There are no diagrams for assembling the humans. There are no painting notes, however the box art and the front of the instruction card are in colour, so one gets a reasonable idea of what colours are needed. The side of the box has Vallejo colour codes for 17 colours.
| CONSTRUCTION |
 I
decided to make the kit "out-of-box”. I washed the plastic trees in
detergent, but not the clear parts. (There were later some problems with
paint adhesion and maybe all the parts should have been primed).I
detached the parts from the trees with a sprue cutter and then trimmed and
smoothed the nubs. At the same time I trimmed off any intrusive mould lines.
I
decided to make the kit "out-of-box”. I washed the plastic trees in
detergent, but not the clear parts. (There were later some problems with
paint adhesion and maybe all the parts should have been primed).I
detached the parts from the trees with a sprue cutter and then trimmed and
smoothed the nubs. At the same time I trimmed off any intrusive mould lines.
I put the trimmed parts for each “person” in separate plastic trays. There were no parts that could be confused so I did not need to label any individual parts. I assembled the humans bodies, arms and legs before painting, but I painted the trimmed parts for the robots and controllers before assembly. I did not, but I would recommend, that the clear parts are test fitted before assembly and painting. I would also recommend that the hands are test fitted, especially for the kneeling figure.
| COLORS & MARKINGS |
All painting was by brush. I used Vallejo colours, as noted, but the little detail touches of red, silver etc were from whatever acrylic paint came to hand.
What I do is put a few drops of the colour in a palette and then add a dot of “Thinner Medium” and give it a stir with the brush, adding more thinner if required. The colour is applied in a few rapid strokes and the part left to dry. Most times a second coat will be required, if the colour is thinned correctly this will produce a perfectly smooth, even surface.
| BUILD DETAIL |
Discussing each “person” in turn:
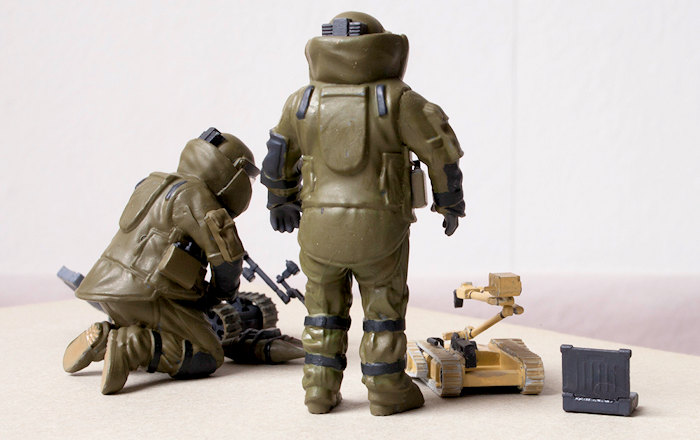
Standing man: fit was very
impressive. After glueing the legs I stood the figure up to check that the legs
adopted the correct alignment, there was no vis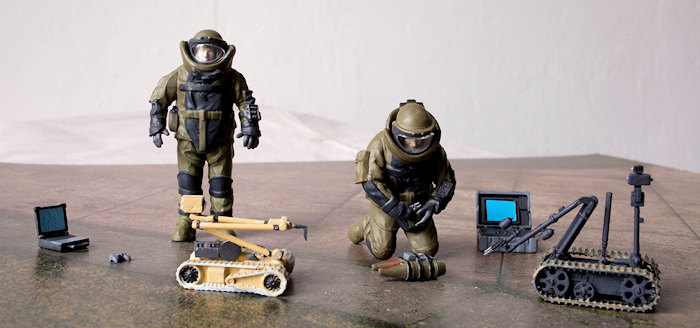 ible
gap. There was no need to fill any joins, not least because the joins are
concealed by the design of the body armour.
ible
gap. There was no need to fill any joins, not least because the joins are
concealed by the design of the body armour.
I had some difficulty with paint adhesion and washed the assembled man in a rather stronger solution of washing up liquid than I normally use, and rinsed: that seemed to fix the problem. I painted the body with vallejo olive 924. I painted the head, with flesh face and green helmet. I applied vallejo greys 992 and 995 and 862 to the various pads and straps on the suit and hemet, as illustrated on the box top. Dots of colour were applied to the wrist keypad.
I checked the fit of the head, scraped any paint off the mating surfaces, then glued head to body. I fitted and glued the gloved hands last, and then painted them black-grey. I painted the whole man with matt Varnish.
Naturally when I tried to fit the clear face mask to the helmet, it would not go. Very gingerly I attempted to sand the faceplate the minimum amount to get it to fit. As you can see in the photos the fit is not perfect. I glued the face mask with a thin bead of “Microscale Kristal Klear”. With the benefit of hindsight I should have checked this right at the beginning: painted the face and then carved away the recess in the helmet until the face piece could be popped in (and out).
 Kneeling
man: as for standing man, except that in this case leaving the hands to last was
not so clever, the hand with the wire cutters does not seem to be correctly
aligned and I should have checked this before glueing the arms to the body. Once
again the face mask did not fit perfectly and some anxious and careful sanding
was required.
Kneeling
man: as for standing man, except that in this case leaving the hands to last was
not so clever, the hand with the wire cutters does not seem to be correctly
aligned and I should have checked this before glueing the arms to the body. Once
again the face mask did not fit perfectly and some anxious and careful sanding
was required.
Although the box art shows the wire cutters with red handles and silver jaws I felt that my painting skills were not up to this level of detail and I painted them all silver.
I did not attempt to paint any garment labels or badges, these are not very clear on the box art and I feel that, in case of doubt, it is better to leave these things alone rather than risk making a mess. In other words a neat job is much better than a messy one, no matter the accuracy.
Pacbot (sand coloured robot)
I carefully trimmed the parts and
assembled, painting as I progressed. However I had bad paint adhesion and
applied vallejo grey surface primer to all the parts. Then I applied dark sand
and dark grey as depicted on the box art. My painting technique was not perfect
and I did not manage to achieve the smooth finish that one would expect on a
real machine. The robot arm sections were a very tight fit and push fitted, but
it is not really poseable, so I could have glued them. I left the tracks in
primer grey
 with
little dashes of dirt brown marks on tracks. The cable was painted yellow on the
cable reel before fitting to the chassis.
with
little dashes of dirt brown marks on tracks. The cable was painted yellow on the
cable reel before fitting to the chassis.
I cut out small hexagons of foil and applied these to the lenses and secured with Klear adhesive and/ or gloss varnish.
Talon EOD (grey robot)
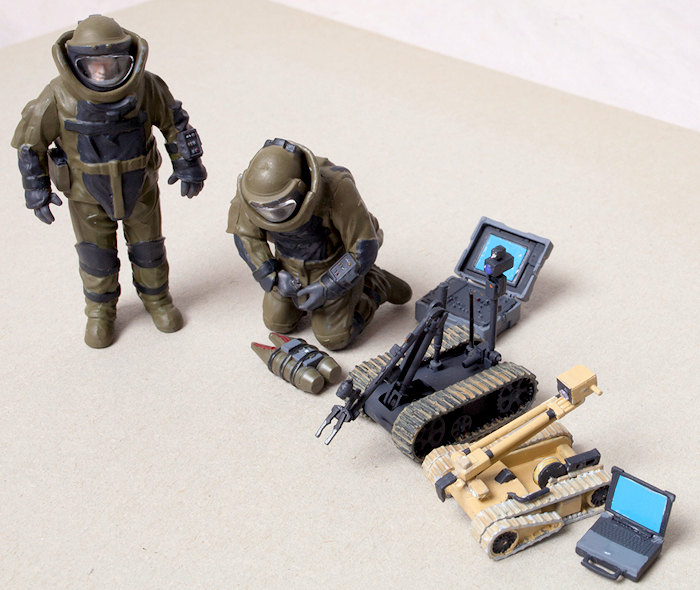
I carefully trimmed the parts, I applied vallejo black surface primer to all the parts. I then painted the parts grey as I assembled them, leaving the recesses in the chassis in primer black. The tracks were then daubed in thinned “dirt brown”. I cut out small hexagons of foil and applied these to the sensor lenses and secured with Klear adhesive and/ or gloss varnish. The arm was push fitted and can be moved in the vertical plane. I assume the real machine would have the ability to traverse too.
Robot Controllers:
I painted the controllers and screens grey. Then dots of colour on the buttons and panels. I used “Microscale Trimfilm TF-32” day-glo blue decal for the screens, cutting out rectangles 6 x 7mm approx (looking at the photos it seems that I did not manage to make these perfectly square). I used Microscale “Decal sol” to help get the decal to conform to the screen recess. I glued the screen panels to the controllers with “Kristal Klear”, the hinge on the Talon’s controller is quite flimsy. Bomb and other bits: each part was painted as appropriate, referring to the box art.
Display:
A set of figures like this invites posing as a diorama. As a gesture to this I found a suitable off-cut from a “Noys” aircraft tarmac display card (probably 72 scale) and used that to pose the figures on.
| CONCLUSIONS |
An interesting and unusual subject. It is disappointing that no decals are provided. In my opinion dayglo decals for the screens are essential. Not a bad introduction to 35 scale figures given the plain colours and the faces concealed behind masks.
I have no doubt that dioramas could be made around these figures, and indeed science-fiction adaptations would be quite possible. Overall recommended.
| REFERENCES |
Google and Wikipedia.
April 2016
Copyright ModelingMadness.com
If you would like your product reviewed fairly and fairly quickly, please contact the editor or see other details in the Note to Contributors.