| KIT #: | FG 4209 |
| PRICE: | $37.49 |
| DECALS: | None |
| REVIEWER: | Dale Rannals |
| NOTES: | Resin |
| HISTORY |
 This is one of E2046’s ORI Project series of kits.
They have no background in any Manga/Anime series
that I know of, but I am definitely no expert and could be mistaken.
This is one of E2046’s ORI Project series of kits.
They have no background in any Manga/Anime series
that I know of, but I am definitely no expert and could be mistaken.
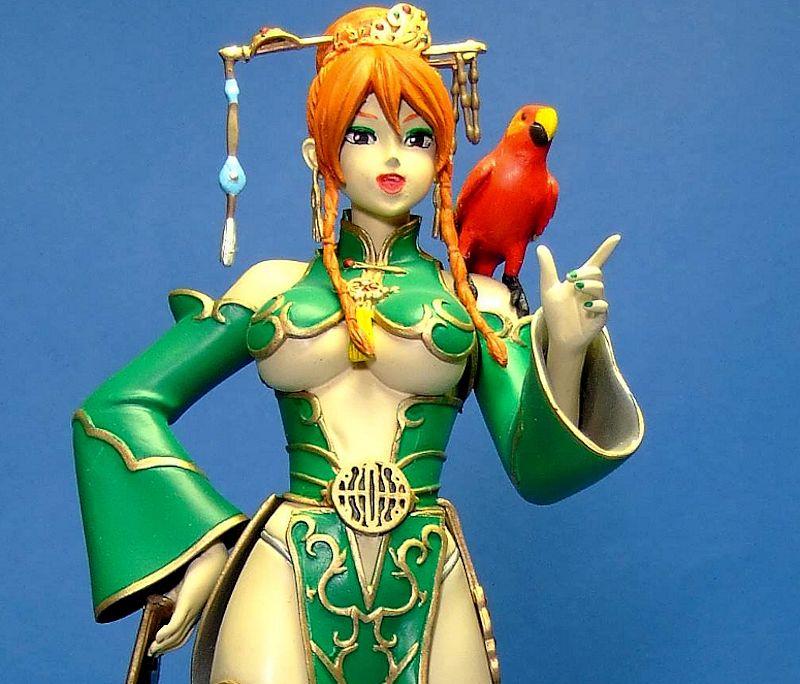
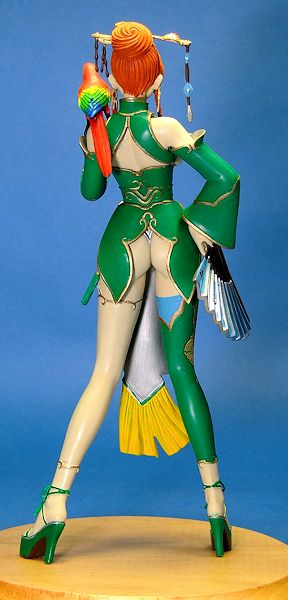
From the website: Qiao Yin is the first work of the Elegance Series, integrating Oriental elements into figures. She is a curious, energetic and caring young woman, with a clever parrot always sitting on her shoulder.
| THE KIT |
Here is another of E2046’s fantastic line of resin figures.
The 26 pieces are packaged in several sealed plastic
bags.
These bags are wrapped in bubble wrapped and placed, with
foam and more bubble wrap, into a plastic tub.
This tub is placed in a sturdy cardboard box which
is then shipped halfway around the world in about 2 weeks.
The tan colored, very fine resin contained no
casting flaws that I could find, nor was anything broken.
Included is several pages of instructions, but this only includes a parts breakdown and some general hints and tips for working with resin (and this comes in several languages). A small decal sheet is included, a rather large dragon and two smaller crests. They look decent, albeit with a home-made look to them. It'll be interesting to see how they work.
| CONSTRUCTION |
 Things
started out here with washing the parts in a mild soap and water bath to remove
any release agent left on the parts.
Then I took everything out and gave it a coat of
primer, in this case Tamiya's fine gray primer in a rattle can.
This does two things. First, since most hobby paints
don't stick well to the resin, it gives the paints something to bite in to.
Second, for me at least, it better shows any casting
flaws that may have to be dealt with.
Once it was dry thoroughly I carefully placed
everything back in its plastic tub, and for some reason never looked at it
again.
Other things on the workbench were a higher priority and
the kit languished in its semi-started condition.
Things
started out here with washing the parts in a mild soap and water bath to remove
any release agent left on the parts.
Then I took everything out and gave it a coat of
primer, in this case Tamiya's fine gray primer in a rattle can.
This does two things. First, since most hobby paints
don't stick well to the resin, it gives the paints something to bite in to.
Second, for me at least, it better shows any casting
flaws that may have to be dealt with.
Once it was dry thoroughly I carefully placed
everything back in its plastic tub, and for some reason never looked at it
again.
Other things on the workbench were a higher priority and
the kit languished in its semi-started condition.
Fast forward about six months and it was time for a change
of venue.
Out again came the kit.
Looking things over I decided on colors, none of
which I had at the moment, so off to the LHS I went.
I grabbed a bottle of Model Master Ivory gloss as
that was closest to the skin tone I was after, and I picked up a bottle of
Kustom Kolor Jade Green.
I've never tried that line of paints before but they
were on sale, so I grabbed several bottles.
I sprayed all the body pieces with the Ivory and set them
aside to dry.
Not knowing how to mix up the Kustom Kolor, I experimented
a bit.
It seemed to respond best to Testors Metalizer thinner, so
I went with that.
I sprayed the clothing bits in thin layers and it
laid down very nicely.
Her right leg, now covered in a nice gloss coat of
ivory, needed green sprayed on a good portion of it.
For this I used a liquid mask, brushed on liberally
to the areas that needed protection, and let it dry overnight.
After the green was thoroughly dry, I carefully
peeled off the masking agent from her leg.
It came off easily and the ivory underneath it was
unmarred.
 With some Testors gold (small bottle), a tiny brush, a
magnifying glass, and a couple weeks time, I laid down the gold accents to the
outfit.
Slow work, to be sure, but it went well and without major
flubbs.
Minor areas were easily touched up with the appropriate
color.
With some Testors gold (small bottle), a tiny brush, a
magnifying glass, and a couple weeks time, I laid down the gold accents to the
outfit.
Slow work, to be sure, but it went well and without major
flubbs.
Minor areas were easily touched up with the appropriate
color.
Originally I was going to paint the shoes gold also, but
around here I decided to go with green with silver accents.
I didn't feel like masking and airbrushing the
green, so I just brushed it on.
Almost immediately the paint started bubbling on the
shoe; the paint reacting with the gloss ivory underneath.
I assume the Kustom Kolor line is a "hot" lacquer
and it just didn't like the enamel underneath.
Airbrushing it in light coats causes no ill effects,
but laying it on with a brush is just too thick. I cleaned both shoes by gently
scrubbing with a cotton swab damp with mineral spirits until I was down to the
gray primer.
Still too lazy too mask and airbrush, I ended up brushing a
very similar acrylic green for the foot-ware.
The eyes came
next, and this is always the most interesting part for me.
The eyes make or break a figure.
I started out by filling in the white areas.
Then the iris was painted brown, and pupils a very
dark gray.
Try to keep the pupil/iris on the large size .... Avoid
small circles that tend to give the character that "deer-in-the-headlights"
stare.
A small dot of white off-center tries to mimic light
reflection.
I painted eye-liner around most of the perimeter to add
definition.
Next up was her hair.
I decided on a ginger color, thought it would go
well with the green.
So I broke out the oil paints and mixed up some
orange and brown .... Not too thoroughly as some color variations were desired
here.
I painted the hair pieces and also her eyebrows and set
things aside to dry.
Of course being oil paints, these took about a week
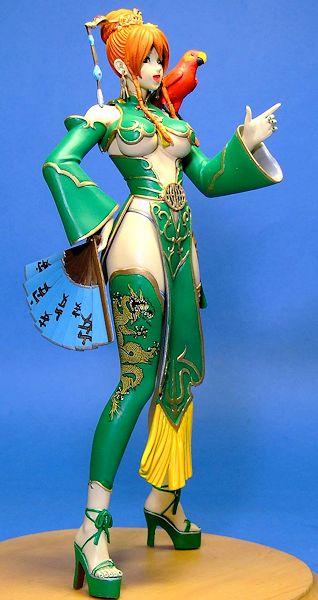
to dry completely. The dragon decal was put on her right leg.
It was fairly stiff and I put small slices in a
couple areas to help it conform to the curves.
It did react well to Micro-set and -sol and looks
nice on the leg.
The crests were to go on her sleeves, but I did not
like the look of them and just left them off.
 The actual assembly of the kit was easy.
All the pieces fit well and securely with a bit of
superglue.
The side of the breast-piece was a bit too wide but with
quick did in very hot water I was able to readjust it easily.
I bought a cheap wood base from a crafts store and
threw some stain on it.
I then drilled a hole into the bottom of each foot,
added a length of coat-hanger wire, and drilled corresponding holes into the
base to keep her secure.
I'm not fond of how the base turned out ..... I may
just end up repainting it.
The actual assembly of the kit was easy.
All the pieces fit well and securely with a bit of
superglue.
The side of the breast-piece was a bit too wide but with
quick did in very hot water I was able to readjust it easily.
I bought a cheap wood base from a crafts store and
threw some stain on it.
I then drilled a hole into the bottom of each foot,
added a length of coat-hanger wire, and drilled corresponding holes into the
base to keep her secure.
I'm not fond of how the base turned out ..... I may
just end up repainting it.
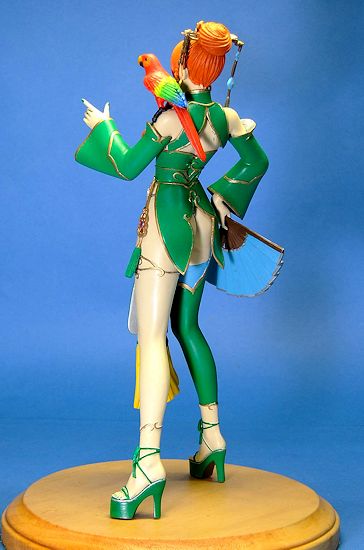
I painted
her fan a light blue to match the stocking (peeking out from under her right
legging) and hairpieces.
I accented it with silver trim and tried my best to
hand paint a Japanese symbol for tranquility randomly on the one face.
Didn't turn out as nice as I wanted but they look
okay.
I lined these with gold and moved on to her bird.
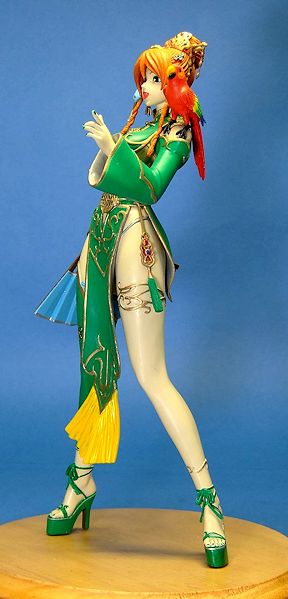
The Parrot I painted with oil pants to get some blending
between the colors.
This was left to dry for about a week also.
Trying to get it to fit correctly on her shoulder
took some doing and marred up the ivory on her shoulder, but this was easily
fixed.
A final dull coat was applied … with some apprehension as
everything looked so nice as a gloss …. and I called her done.
| CONCLUSIONS |
This is another fantastic quality kit from E2046. Everything about it, from the almost flawless casting to the care that is evident in packaging and shipment, screams first-class. These are great kits to do when you just need a break from the norm.
May 2013
If you would like your product reviewed fairly and fairly quickly, please contact the editor or see other details in the Note to Contributors.