E2046 1/6 Shunya’s Demon
resin figure
| KIT #: | FG 4873 |
| PRICE: | $55.00 MSRP (includes shipping) |
| DECALS: | None |
| REVIEWER: | Dale Rannals |
| NOTES: | Resin figure |
| HISTORY |
 This
is one of E2046’s
This
is one of E2046’s
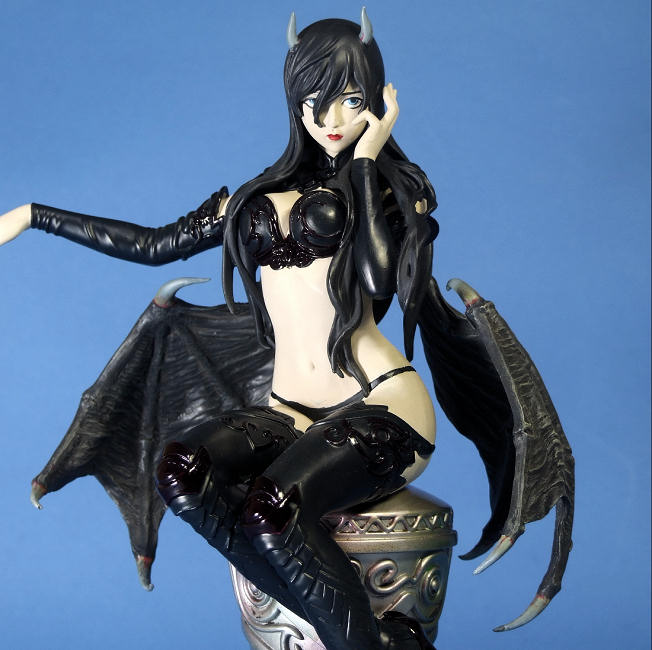
From the website: Inspired by the Japan illustration master Shunya Yamshita, the work features a pair of half melancholy and half lustful eyes and realistic wings with details down to the muscle.
| THE KIT |
Here is another of E2046’s fantastic line of resin figures.
The 14 pieces are packaged in several sealed plastic bags.
These bags are wrapped in bubble wrapped and placed, with foam and
more bubble wrap, into a plastic tub.
This tub is placed in a sturdy cardboard box which is then shipped
halfway around the world in about 1 ½ weeks.
The pale colored, very fine resin contained no casting flaws that I
could find, nor was anything broken.
Included are several pages of instructions, but this only includes a parts
breakdown and some general hints and tips for working with resin (and this
comes in several languages). No
decals are included or needed.
| CONSTRUCTION |
Most, if not all, of the mold
seams on these kits are already
sanded smooth.
The only parts cleanup I had was the removal of several small casting
blocks on the tips of the hair pieces, the horns, and the talons.
I assume these were left in place for protection during shipping.
All of these were snipped off and sanded smooth in a few short
minutes.
Painting is best done before
assembly, for the most part, with these kits. First thing to get painted was
every single part with Tamiya fine gray primer in a rattle can.
Paint doesn’t like to stick to the resin very well so a primer gives
it something to “bite” into. I
then grabbed some Model Master Skin Tone but decided it was far too pink for
our Miss. I wanted a pale
color, but more a
 grayish hue than a pink one.
So I added drops of gray until I got the color I wanted.
This was then thinned and airbrushed on the parts and allowed to dry
thoroughly. I painted the hair
pieces and the wings a very dark gray, and then threw some neutral gray on
her horns and talons.
grayish hue than a pink one.
So I added drops of gray until I got the color I wanted.
This was then thinned and airbrushed on the parts and allowed to dry
thoroughly. I painted the hair
pieces and the wings a very dark gray, and then threw some neutral gray on
her horns and talons.
Over the next couple days I
worked on her eyes. The eyes
make or break the figure, so I always take my time here and try to get the
look right. I was going for an
innocent, mournful look in the eyes to go with the pose, and to contrast
with some nasty, deadly looking wings and talons.
I was satisfied after a couple tries and touch ups.
Back to the wings.
I gave each wing a dirty brown oil wash and allowed it to dry.
This did a good job at highlighting the detail here. After this was
dry I broke out the oils and painted yellow at the base of each talon,
blending it outwards towards each tip.
Some thin lines of bloody red were added around the base of the
talons, with some small lines outward to give it some more “mood.”
Final step for the wings was a light brushing of gray pastels to pop
out the highlights.
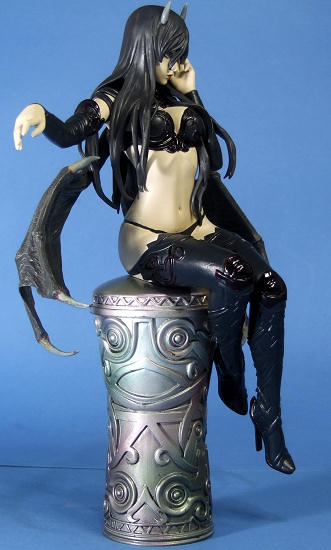
I needed to start painting
the clothes now, but even up to this point I wasn’t sure what color.
I knew it had to be something dark and moody, so a settled on a dark
green. I painted up the boots
and halted …. Just didn’t look
quite right. I tried again with
After all this was dry, I
assembled the parts. Pretty
easy, though I did need to bend a couple of the hair pieces (with hot water)
to make things fit a bit better.
There were a couple of loopy hair pieces that I didn't like the look
of so I left them off. I
touched up the
 areas that needed it, and then set her aside while I put my
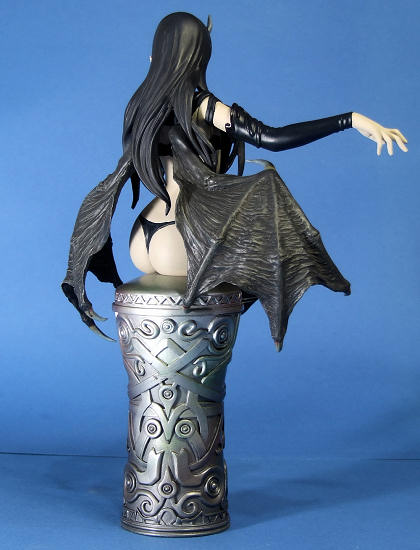
attention on the base. A big
chunk of resin, it has a totem look to it.
I figured it should have a stone or metal look to it.
I went for metal. Using
Metallizer paints, I sprayed the base Stainless steel, the middle magnesium,
and the top aluminum to give it a dark to light look.
I sealed this in with a coat of Future, then sprayed some random
areas with Tamiya red, green, orange, and yellow.
I was going for slight color splashes to give it multi-hued look, but
the green and red dominated it too much.
I ran a thin black oil wash over it to highlight the edges and subdue
the colors. I’m not sure I like
the result and may try again with a brass/bronze color.
After all this was dry I attached her to the base and she was
complete.
areas that needed it, and then set her aside while I put my
attention on the base. A big
chunk of resin, it has a totem look to it.
I figured it should have a stone or metal look to it.
I went for metal. Using
Metallizer paints, I sprayed the base Stainless steel, the middle magnesium,
and the top aluminum to give it a dark to light look.
I sealed this in with a coat of Future, then sprayed some random
areas with Tamiya red, green, orange, and yellow.
I was going for slight color splashes to give it multi-hued look, but
the green and red dominated it too much.
I ran a thin black oil wash over it to highlight the edges and subdue
the colors. I’m not sure I like
the result and may try again with a brass/bronze color.
After all this was dry I attached her to the base and she was
complete.
| CONCLUSIONS |
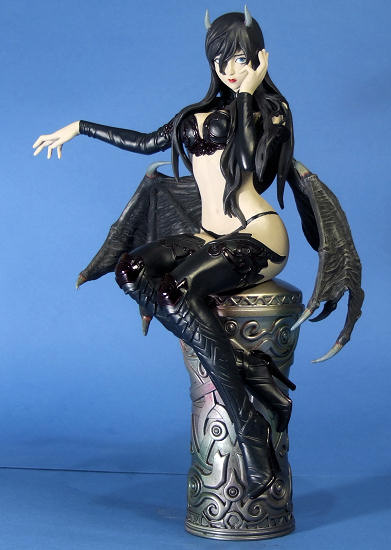
I am pleased with the end result
….. a feminine, elegant form till your eyes notice the horns and nasty wings,
hopefully giving people a mild mental shock; a “Whoa….” moment.
Things aren’t always as you first think they are.
Another fantastic kit from E2046.
| REFERENCES |
E2046 website (
www.e2046.com )
October 2011
If you would like your product reviewed fairly and fairly quickly, please contact the editor or see other details in the Note to Contributors.