Polar Lights Godzilla
| KIT #: | 7502 |
| PRICE: | $16.00 MSRP in 2002 |
| DECALS: | None |
| REVIEWER: | Shawn Payne |
| NOTES: | Reissue of a classic |
| HISTORY |
This is what got me started in the hobby of modeling. I was around 8yrs old when over at a friend’s house I watched him put together a “Monster Model”. This was the coolest thing I had seen and I had no idea what models were, but I had to have one. So I ran home and bugged mom to take me out to get a monster model. We were not able to fine the Godzilla model but we did find the Wolfman model with the glow in the dark head, hands and feet. Got it home and started right in on it. Twisting the parts off of the sprue and gluing them together using the tube of model glue. But is was not long before I had to have dad help me put it together, because my theory of the more glue the better was not working out to well and he (the Wolfman) kept falling apart while I was building him. I did not paint him as I did not have any paints nor did I know at the time that you could even paint models, but this would change in a short time. Once completed I stared at it for hours. I was now hooked on model building and wanted more. I did end up getting the Godzilla model for Christmas and built it in about an hour; my glue skills had been improving and I had gotten my first set of Testor model paints.
So when I was in my local hobby shop a few years ago now, I saw the re-release of this kit and thought why not, this would be fun to do again and build it up as I had seen it in my mind as an 8yr old.
| THE KIT |
 Aurora
The instruction sheet looked to be
a reprint of the original
| CONSTRUCTION |
 I started with the base.
I knew that to improve on the base
I wanted to add rubble detail.
So I used evergreen strips and
small electronic parts to add this detail.
The small electronic parts were
used to simulate the buildings A-C units and antennas.
I added floors and walls with sheet
styrene to the inside of the knocked over buildings and evergreen strips to make
the buildings steel frames.
I started with the base.
I knew that to improve on the base
I wanted to add rubble detail.
So I used evergreen strips and
small electronic parts to add this detail.
The small electronic parts were
used to simulate the buildings A-C units and antennas.
I added floors and walls with sheet
styrene to the inside of the knocked over buildings and evergreen strips to make
the buildings steel frames.
After the detail was added it was
time for the paint.
I sprayed the whole base with
Testors enamel 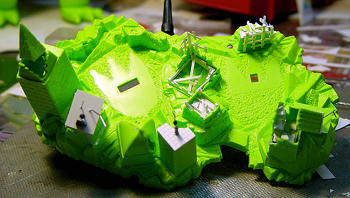 ushed the reds for the
steel framework and the knocked over smoke stacks.
A touch of silver paint here and
there on the exposed steel frame work really brought out the detail.
I kept working on the base by dry
brushing different shades until I reached a look I liked.
ushed the reds for the
steel framework and the knocked over smoke stacks.
A touch of silver paint here and
there on the exposed steel frame work really brought out the detail.
I kept working on the base by dry
brushing different shades until I reached a look I liked.
The last part of painting the
base was doing the detail work of the windows and the added A-C components.
Gloss black was used to paint in
the windows.
I painted the dome of one of the
destroyed building’s gold to add some color contrast to the city scape.
By
air brushing pulled cotton balls gray then black I simulated the smoke coming
from the ruined buildings.
I used white glue to attach the
smoke plumes to most of the major breaks in the buildings.
Then I trimmed the plumes with
scissors to get the effect I was looking for.
The p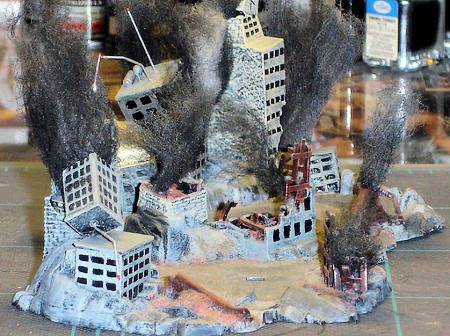 aint stiffened up the cotton
enough to allow me to shape it.
aint stiffened up the cotton
enough to allow me to shape it.
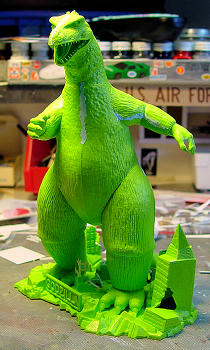
Now to the figure.
Assembly went straight forward out
of the box.
A little putty and sanding of the
seems and it was now ready for paint.
Again I used Testors enamel paints
and the airbrush.
Started with OD green for the base
coat then darkened with drops of black to spray on the shading.
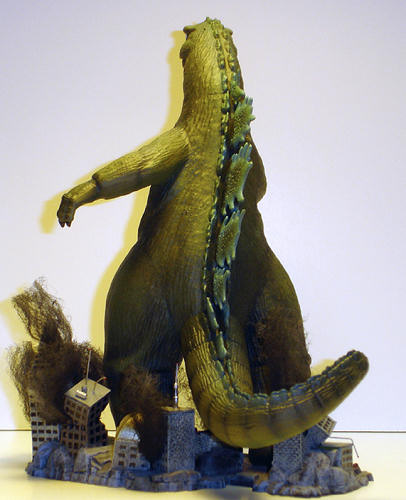
I sprayed on a light blue over the
edges of the spine to give him that electric look.
I then sprayed on the highlights by
adding a little white to the base coat.
Then I went back to the base color
with a light overspray to blend to colors together.
Once
I had his body done I masked off the area around his mouth and sprayed a mix of
red and white to the color of pink I thought looked right.
The teeth were painted ivory and
claws gloss black, then touched up with the eyes with white and gloss black. 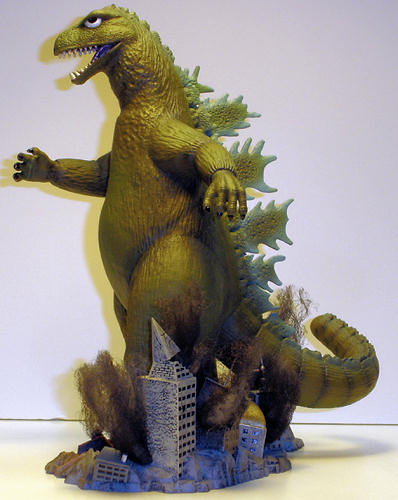
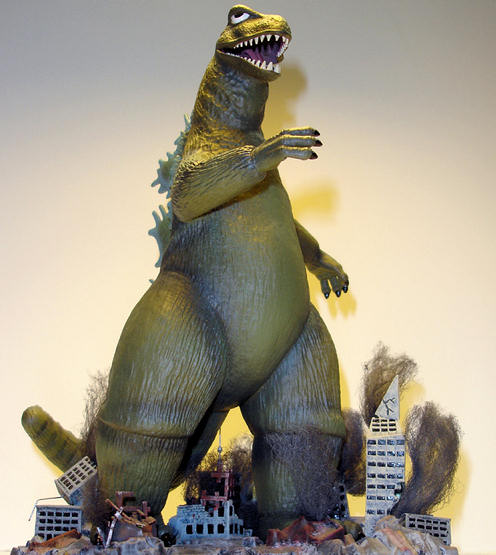
| CONCLUSIONS |
Once finished I was happy with the results. It was fun to build a model where you could be creative in your painting and not worry about matching up paints from references. These “simple kid” models can be a lot of fun. They were molded with a lot of detail and were just as must fun to do again as an adult then it was as a kid playing around. Now the real trick is keeping it out of the hands of my 10yr old nephew.
December 2008
If you would like your product reviewed fairly and quickly, please contact me or see other details in the Note to Contributors.