Minion
| KIT #: | |
| PRICE: | Total outlay about AUD$5.00 |
| DECALS: | Say what? |
| REVIEWER: | George Oh |
| NOTES: | The club made me do it |
| HISTORY |
 The world
was introduced to Minions in Disney’s CGI movie “Despicable Me”, and the 2015
“Minions” movie divulged a bit more of their history. Apparently, they have
evolved since the dawn of time, from
a single-celled organism (didn’t ALL life-forms on Earth?) into small, (OK –
cute), yellow bipedal creatures, who exist to serve history's most villainous
masters. But they are generally incompetent, and usually end-up causing their
master’s death. Just the sort of minions I need for my mistresses’ evil cat.
The world
was introduced to Minions in Disney’s CGI movie “Despicable Me”, and the 2015
“Minions” movie divulged a bit more of their history. Apparently, they have
evolved since the dawn of time, from
a single-celled organism (didn’t ALL life-forms on Earth?) into small, (OK –
cute), yellow bipedal creatures, who exist to serve history's most villainous
masters. But they are generally incompetent, and usually end-up causing their
master’s death. Just the sort of minions I need for my mistresses’ evil cat.
| THE KIT |
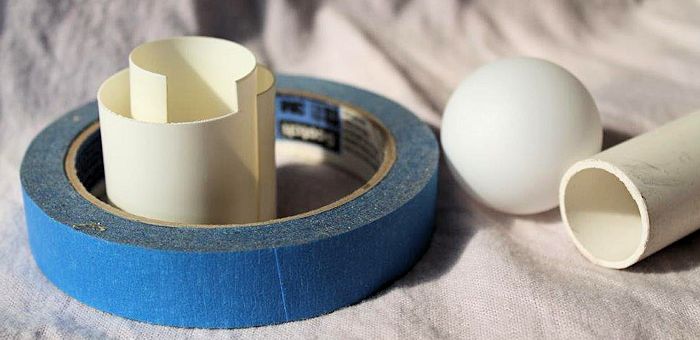
When the Display Co-ordinator of my model club announced that the Club’s display at the national competition (Model Expo 2015) was to be models built from ping-pong (aka table-tennis) balls, I had to rack my brains and came-up with only a few basic ideas. This particular idea evolved during the 5 months we had to build the display elements. A pong-pong ball is just about 40mm in diameter, and it’s internal pressure is a little above one atmosphere (aka, 33 PSI).
I was inspired to build a Minion by their current popularity due to the release of “The Minion Movie”, and the fact that their shape is so capsule-like. I suppose that, along with numerous rigid and plush toys, there are some Minion kits available in various media. But I’ve not seen any kits – only toys.
| CONSTRUCTION |
 With
only a little planning, and only a vague attack-plan, I plunged into this
project. OK – I elected to use two balls as the basis of this Minion’s body.
They were threaded onto a length of sprue that touches the inside top and bottom
of each ball, and the three bits were glued together by 2-part epoxy glue. By
cutting a small hole in each ball, I ensured that each ball was firmly clamped
onto the sprue. A wide belt of thin sheet plastic gives the Minion’s body its
capsule shape. Note – I could have separated the balls a little, for a taller,
thinner Minion. For a neat fit, I soaked the plastic sheet in near-boiling water
so that it curled. When the curvature of the sheet was a bit smaller than the
ball, it was quenched in cold water to arrest the curling action. After fitting,
the body-belt was trimmed for a neat fit. Yes – the body-belt’s join seam had to
be filled and sanded, and Yes - there was a visible seam where the body-belt met
each ball (but I had plans for them).
With
only a little planning, and only a vague attack-plan, I plunged into this
project. OK – I elected to use two balls as the basis of this Minion’s body.
They were threaded onto a length of sprue that touches the inside top and bottom
of each ball, and the three bits were glued together by 2-part epoxy glue. By
cutting a small hole in each ball, I ensured that each ball was firmly clamped
onto the sprue. A wide belt of thin sheet plastic gives the Minion’s body its
capsule shape. Note – I could have separated the balls a little, for a taller,
thinner Minion. For a neat fit, I soaked the plastic sheet in near-boiling water
so that it curled. When the curvature of the sheet was a bit smaller than the
ball, it was quenched in cold water to arrest the curling action. After fitting,
the body-belt was trimmed for a neat fit. Yes – the body-belt’s join seam had to
be filled and sanded, and Yes - there was a visible seam where the body-belt met
each ball (but I had plans for them).
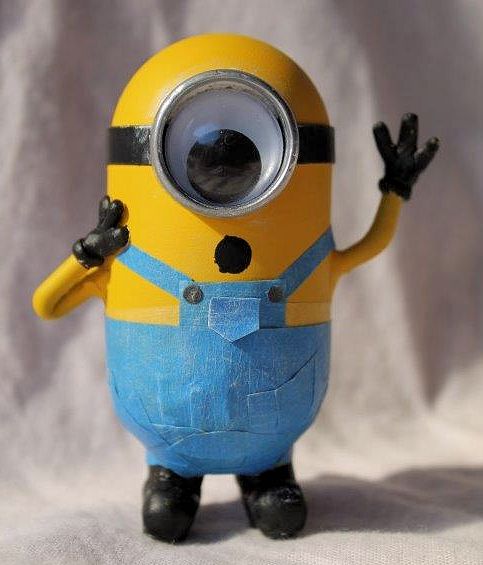
 At this
point, I began to plot where his external features would go. Note – I went for
the one-eyed Minion (the “Minions” movie names him Stuart) because his
appearance is a little-more distinctive from the others, and besides - it was an
easier option. Stuart’s eye went where his goggle-band could be placed to hide
the upper body-belt seam. The size of his eye was determined by the size of the
plastic tubing (aka, electricians conduit) I had lying around the garage. The
eye itself came from a packet of them I found in a $2-store. His arms are only
lengths of sprue, bent with the aid of a burning candle. They too, are clamped
by tight holes and secured with epoxy glue. A little Milliput fairs them into
his body, and also forms his hands. More sprue forms the ‘skeleton’ of his legs
& boots, and Milliput fills them out. Four small plastic plates are embedded
into the bottom of the Milliput to form the soles and heels of his boots. At
this stage, he was spray-painted Tamiya FX-3 Yellow.
At this
point, I began to plot where his external features would go. Note – I went for
the one-eyed Minion (the “Minions” movie names him Stuart) because his
appearance is a little-more distinctive from the others, and besides - it was an
easier option. Stuart’s eye went where his goggle-band could be placed to hide
the upper body-belt seam. The size of his eye was determined by the size of the
plastic tubing (aka, electricians conduit) I had lying around the garage. The
eye itself came from a packet of them I found in a $2-store. His arms are only
lengths of sprue, bent with the aid of a burning candle. They too, are clamped
by tight holes and secured with epoxy glue. A little Milliput fairs them into
his body, and also forms his hands. More sprue forms the ‘skeleton’ of his legs
& boots, and Milliput fills them out. Four small plastic plates are embedded
into the bottom of the Milliput to form the soles and heels of his boots. At
this stage, he was spray-painted Tamiya FX-3 Yellow.
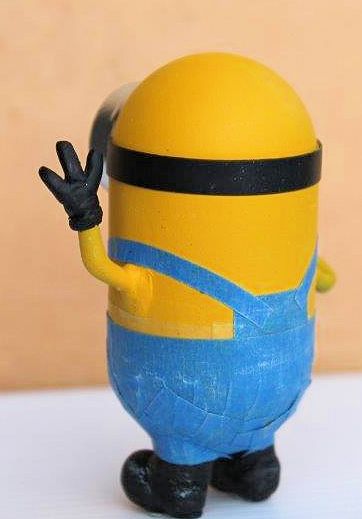
The blue dungarees stumped me for a bit. Painting them on would look like he is
wearing Lycra/Spandex. Instead, I layered him with lengths of a cheap blue
painter’s masking tape (which covers the lower belt-seam). Lots of vertical cuts
(and trimming) converted the blue ‘skirt’ into the pants. More blue tape formed
the bib and shoulder straps. Dry-brushing with a light grey highlighted the
texture of the tape. Citadel chaos black paint on plastic disks replicated the
buttons, and coloured his boots & hands.
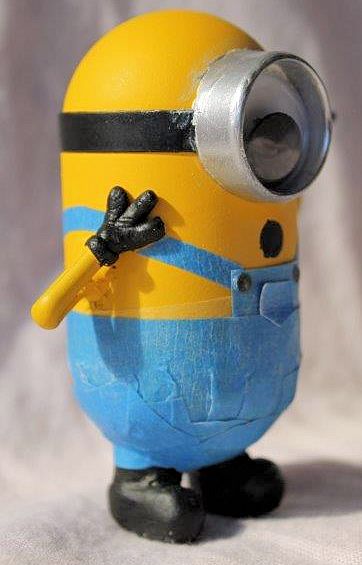 A piece
left-over from the body-belt was trimmed to form the black band of his goggles.
Allied with calculated positioning, it hid the body-belt’s upper seam. Clever, ‘aint
I? To create the goggle that surrounds his eye, I selected a length from the
electrician’s conduit/pipe. After rounding-off the edges of one end, a short
piece was cut-off. This was then rubbed on a piece of coarse sandpaper placed
along a piece of 40mm pipe to give it a curvature on its back, equivalent to
that of the body-belt (and ball). Paint it with chrome and it was ready for
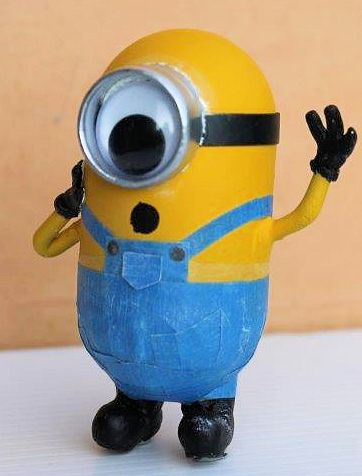
fitting. Not quite – the upper edge of the goggle had to be filled with Milliput
because the ball curves away from it. And the Minion had to be masked so that
the extra Milliput could be painted. Drop-in the eye, and he was almost done.
All he needed was a round mouth (because his hand suggests that he is saying “Ohhhhhh!!!!”)
painted-on. I coulda cut a hole instead – for a more 3-D look, - and backed it
with a black card (or something). But time beat me, so I didn’t. I’ve yet to add
some black threads on his head so that he isn’t so bald (though some are).
A piece
left-over from the body-belt was trimmed to form the black band of his goggles.
Allied with calculated positioning, it hid the body-belt’s upper seam. Clever, ‘aint
I? To create the goggle that surrounds his eye, I selected a length from the
electrician’s conduit/pipe. After rounding-off the edges of one end, a short
piece was cut-off. This was then rubbed on a piece of coarse sandpaper placed
along a piece of 40mm pipe to give it a curvature on its back, equivalent to
that of the body-belt (and ball). Paint it with chrome and it was ready for
fitting. Not quite – the upper edge of the goggle had to be filled with Milliput
because the ball curves away from it. And the Minion had to be masked so that
the extra Milliput could be painted. Drop-in the eye, and he was almost done.
All he needed was a round mouth (because his hand suggests that he is saying “Ohhhhhh!!!!”)
painted-on. I coulda cut a hole instead – for a more 3-D look, - and backed it
with a black card (or something). But time beat me, so I didn’t. I’ve yet to add
some black threads on his head so that he isn’t so bald (though some are).
| CONCLUSIONS |
Well, this was a fun
build. To be honest, I didn’t think that I could do him (those dungarees!!)
because I’m not much of a scratch-builder. But I discovered that it was just a
question of tackling one problem at a time. My Minion musta
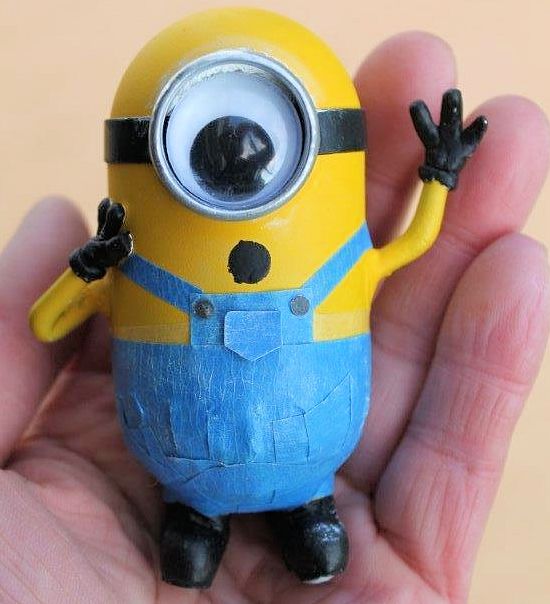 looked
convincing, because there were about 20 little children who saw him in the
display, and wanted to pat him and/or take him home. THAT was very gratifying.
looked
convincing, because there were about 20 little children who saw him in the
display, and wanted to pat him and/or take him home. THAT was very gratifying.
My other basic ideas included a snowman, a Looney-tunes bomb & dumbbell weight, and a Death Star. You should have seen the in-progress Death Star that my completed one inspired. Other items included a brace of sea-mines, a clutch of Ladybird beetles, an orchid, an all-terrain vehicle (with balloon tires), a Russian fighter-jock’s helmet, several hovercraft racers, a brace of choppers (Apongalips Now) and a Sputnik satellite. I’m really glad that other Club members had better imaginations than me.
| REFERENCES |
‘Despicable Me’
George
Oh October 2015 If you would like your product reviewed fairly and fairly quickly, please
contact
the editor
or see other details in the
Note to
Contributors.