Horizon 1/30 Apatosaurus
| KIT: | Horizon 1/30 Apatosaurus |
| KIT #: | ? |
| PRICE: | ? |
| DECALS: | None |
| REVIEWER: | Scott Lyle |
| NOTES: | Vinyl kit |
| HISTORY |
“Life During the Jurassic”
A Diorama Featuring Horizon’s “Apatosaurus”
 Spanning roughly 145
million years ago to 200 million years ago, the Jurassic Period was a time when
dinosaurs literally ruled the earth. Evolving into a range of sizes and shapes
that boggles the mind, dinosaurs dominated the landscape so thoroughly that our
own ancestral mammals never developed beyond the size of a house cat. One of
the most recognizable families of dinosaurs was the Sauropods, a group that
featured the longest and hugest dinosaurs including Brachiosaurus, Diplodocus,
and Apatosaurus (formerly known as Brontosaurus), among others. At 75 feet long
and weighing some 25 tons, one can only imagine what seeing a herd of Apatosaurs
roaming across the earth must have been like.
Spanning roughly 145
million years ago to 200 million years ago, the Jurassic Period was a time when
dinosaurs literally ruled the earth. Evolving into a range of sizes and shapes
that boggles the mind, dinosaurs dominated the landscape so thoroughly that our
own ancestral mammals never developed beyond the size of a house cat. One of
the most recognizable families of dinosaurs was the Sauropods, a group that
featured the longest and hugest dinosaurs including Brachiosaurus, Diplodocus,
and Apatosaurus (formerly known as Brontosaurus), among others. At 75 feet long
and weighing some 25 tons, one can only imagine what seeing a herd of Apatosaurs
roaming across the earth must have been like.
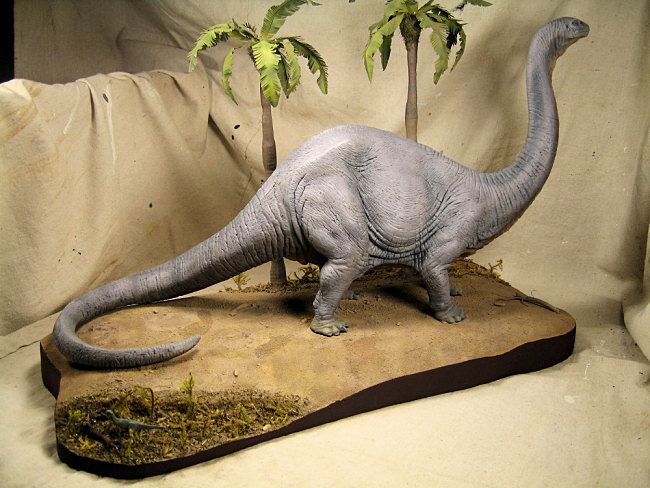
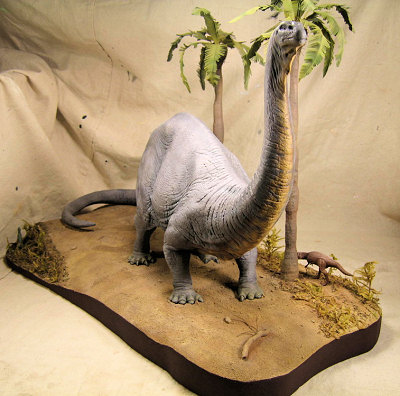
A few years ago I built Horizon’s “Apatosaurus” vinyl model kit. I painted it in a few shades of green and put it on the shelf. As time went on I began thinking it would look great with a different paint job and as the centerpiece of a diorama featuring some other “dino action” going on around it. I liked the idea of the Apatosaurus standing on a floodplain while a smaller predatory dinosaur stalked its prey in the underbrush nearby.
| THE KIT |
Horizon’s Apatosaurus is a large vinyl figure kit. Advertised as 1/30 scale, the finished model measures roughly 25” long and 13” high. While the parts breakdown consists of only the neck, body, two tail sections and four legs, assembly wasn’t necessarily simple.
| CONSTRUCTION |
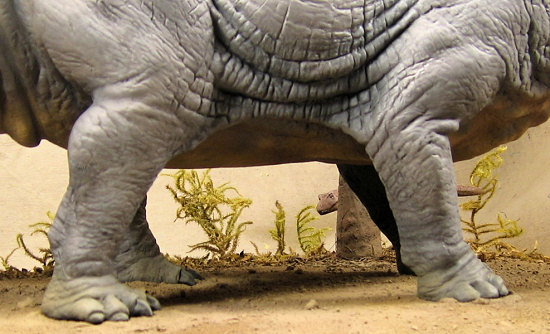
The usual vinyl kit rules applied, meaning the parts didn’t line up very well upon assembly. I had to use some homemade pins (finishing nails with the heads cut off) to help fix the tail to the body, and then all of the seams had to be attacked with large amounts of Squadron Green Putty, and yes, caulking (not the first time I’ve used caulking on a model!) The story was not all bad however. The sculpting of the skin folds and texture is excellent, and it’s big – meaning it has a magnetism all of its own!
| COLORS & MARKINGS |
 I wanted to paint the
Apatosaurus in a two-tone scheme; mottled gray on top and mottled beige on his
undersides. Since he had been originally painted in shades of green, my first
step was to re-prime him with Tamiya’s Light Gray Spray Primer. Next I
preshaded his undersides by airbrushing Tamiya XF-64 Red Brown into all of his
lower folds, recesses, and armpits (legpits?). I then oversprayed the lower
areas with Tamiya XF-59 Desert Yellow, being sure to leave a fair amount of the
Red Brown uncovered. I painted his upper surfaces using a similar approach.
His upper folds and creases were preshaded with Tamiya XF-69 NATO Black, and
then Testors Acrylic RLM 75 Gray-Violet was sprayed over that, being sure to let
some of the NATO Black show through. Finally some Tamiya XF-19 Sky Gray was
sprayed in a mottled pattern on his upper sides to provide a highlight effect.
I wanted to paint the
Apatosaurus in a two-tone scheme; mottled gray on top and mottled beige on his
undersides. Since he had been originally painted in shades of green, my first
step was to re-prime him with Tamiya’s Light Gray Spray Primer. Next I
preshaded his undersides by airbrushing Tamiya XF-64 Red Brown into all of his
lower folds, recesses, and armpits (legpits?). I then oversprayed the lower
areas with Tamiya XF-59 Desert Yellow, being sure to leave a fair amount of the
Red Brown uncovered. I painted his upper surfaces using a similar approach.
His upper folds and creases were preshaded with Tamiya XF-69 NATO Black, and
then Testors Acrylic RLM 75 Gray-Violet was sprayed over that, being sure to let
some of the NATO Black show through. Finally some Tamiya XF-19 Sky Gray was
sprayed in a mottled pattern on his upper sides to provide a highlight effect.
All of those well defined creases and folds were screaming out for a wash, so I mixed up a wash of about 75:25 Black:Raw Umber and applied it all over his upper surfaces with about a ¾” wide brush. I did the same to his beige undersurfaces using just a straight Raw Umber wash. Once dry, the creases definitely looked more defined.
 I lightly drybrushed some
Testors Enamel Neutral Gray over his upper surfaces, and then painted his claws
Testors Panzer Gray. I drybrushed them Neutral Gray, and then his eyes were
painted Testors Leather with black pupils.
I lightly drybrushed some
Testors Enamel Neutral Gray over his upper surfaces, and then painted his claws
Testors Panzer Gray. I drybrushed them Neutral Gray, and then his eyes were
painted Testors Leather with black pupils.
Construction of the Base
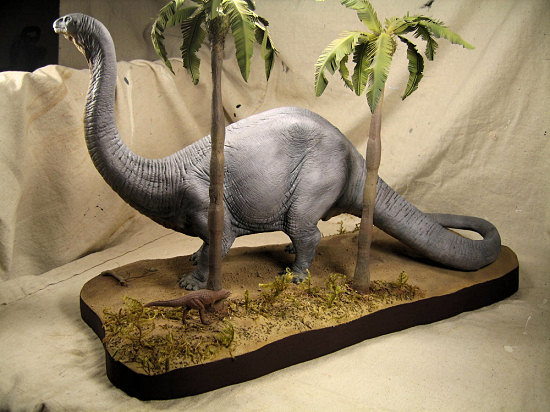
At this point I knew roughly what my scene would consist of. Of course the Apatosaurus would be the centerpiece. There would be some palm trees behind him on the edge of a tropical jungle, where a small predator would be hidden. In the foreground I wanted another small creature, not worried about the harmless giant near him and oblivious to the predator stalking him in the jungle. I started making the base.
I’ve become a fan of the Woodland Scenics foam bases. They come in different thicknesses, and being Styrofoam they are easy to shape with no need to varnish or seal them. The one no-no I’ve discovered with them is that you cannot use Celluclay. Celluclay shrinks as it dries, and it will curl the weaker foam base like a banana! With the foam bases however I’ve found there’s no need for Celluclay. Once I have it sculpted the way I want I just smear on joint compound to create subtle contours, and rocks and pebbles can be pushed into the joint compound as it dries. After that you just brush on a mixture of white glue and water and start sprinkling on your groundwork. I find it very quick and simple and in two nights you have a good base ready to paint!
In creating the base for this diorama I wanted some large Bronto-footprints to be clearly seen, so I smeared on some Joint Compound and pressed the Apatosaurus’ plastic-wrapped feet into it. Once that was dry I added my groundwork (a couple different types of sand and some kitty litter), and than airbrushed it in some different shades of brown, mostly Tamiya XF-52 Flat Earth, Testors Dark Tan, and a couple of others. The next step was to create the palm trees.
Building the Palm Trees
I would never have attempted to make the two palms if I hadn’t r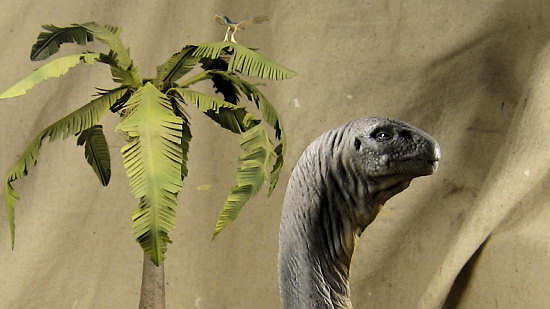 ead
about how do it in issue #77 of Tamiya Model Magazine. That issue contains
an excellent article that details step-by-step instructions on how to
inexpensively make palm trees, and it explains it much more thoroughly than I
can. The gist of it is as follows. You start out with some narrow
wood dowels and cut them to the height of the trees you desire. You then
wrap some thin rope around the dowel to give the trunk that “ribbed” look,
securing it with white glue. Leave some of the dowel exposed on one end –
this you will use to anchor the tree into your diorama base. You can wrap
extra rope around the dowel here and there to create a “lumpy trunk” look.
Next you smear plaster or joint compound onto the assembly, completely covering
the rope. It may take a couple of applications for it to look more like a
model palm trunk than a stick with a rope wrapped around it! Make sure to
smear it on roughly, so that it will have a natural, rough texture when it
dries.
ead
about how do it in issue #77 of Tamiya Model Magazine. That issue contains
an excellent article that details step-by-step instructions on how to
inexpensively make palm trees, and it explains it much more thoroughly than I
can. The gist of it is as follows. You start out with some narrow
wood dowels and cut them to the height of the trees you desire. You then
wrap some thin rope around the dowel to give the trunk that “ribbed” look,
securing it with white glue. Leave some of the dowel exposed on one end –
this you will use to anchor the tree into your diorama base. You can wrap
extra rope around the dowel here and there to create a “lumpy trunk” look.
Next you smear plaster or joint compound onto the assembly, completely covering
the rope. It may take a couple of applications for it to look more like a
model palm trunk than a stick with a rope wrapped around it! Make sure to
smear it on roughly, so that it will have a natural, rough texture when it
dries.
On the top of the tree you “smush” on a large blob of modeling clay and smooth its edges down on to your plaster trunk. This will hold the palm’s fronds, which you make by cutting out of scrap paper. Cut the fronds to different sizes and shapes, and then cut all of the individual leaves. Fold them down the middle and then cut pieces of wire that can act as the stems for the fronds. Bend the wires in the shape of the frond you desire, and then use white glue to glue the fronds to the wires. Once they’re dry just insert them into the clay blob on top of your tree, and then arrange them all as you desire. I used some white glue to permanently attach the stems to the clay, and then coated the whole clay blob with some long model railroad grass to make it look more natural. I painted my palm fronds with Tamiya Green and Yellow Green, and the trunks were painted Tamiya Flat Earth with a dark brown wash to add depth to the textured plaster.
 I was fairly happy with
the look of the palms, and I’d like to use this technique again some day in a
WW2 Pacific diorama. I really recommend you look up the original article in the
Tamiya Magazine if you’re interested in making palms like this.
I was fairly happy with
the look of the palms, and I’d like to use this technique again some day in a
WW2 Pacific diorama. I really recommend you look up the original article in the
Tamiya Magazine if you’re interested in making palms like this.
Finishing the Base
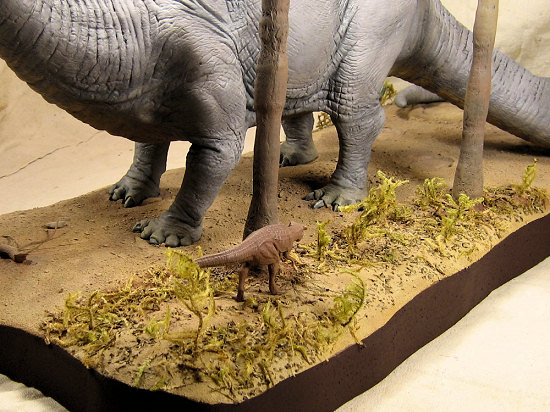
Another nice thing about using Styrofoam for your diorama bases is how easy it is to attach trees and foliage. To attach my two palms I just made large holes with a utility knife, poured in some white glue, and then inserted the exposed dowel part of the tree. To create the jungle areas I used two items: dried moss from a craft store, and oregano. Using a nail punch I poked holes in my base and used white glue to attach some pieces of dried moss. This material has a “ferny” look to it, and it looks a little prehistoric to me. I glued several of them upright, and then spread some of them around on the ground to act as jungle floor litter. Next I brushed on some water/white glue mixture onto the areas that were to be jungle and sprinkled on the oregano. Not only does it make good forest floor litter, but it makes your diorama smell good too!
The last thing to do on the base was paint the vertical edges. I had sanded and smoothed these as best I could ahead of time, but since you could still see the grain of the Styrofoam I smeared some joint compound on all of the edges and smoothed it out using my fingers. Once dry I painted it dark brown using some acrylic craft paints.
 Finishing
the Diorama
Finishing
the Diorama
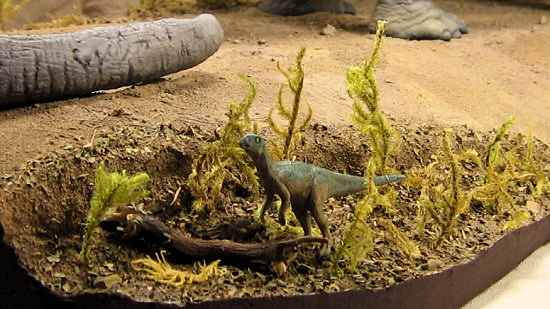
To complete the action in my diorama I assembled the Young T-Rex and Hypsilophodon from the Tamiya “Mesozoic Creatures” set. In my Jurassic world these would become a Young Allosaurus and Camptosaurus respectively – maybe not anatomically perfect, but close enough. There were painted red brown and green respectively with beige undersides, given a wash of raw umber, and then lightly drybrushed with lighter shades of their respective colors.
It was now time to put it all together. The two small dinosaurs were glued into position with white glue, and then the monster Apatosaurus was just placed in his own footprints on the base. The diorama was finally finished!
| CONCLUSIONS |
My love affair with dinosaur models goes back to the old Aurora Prehistoric Scenes kits, but now the selection (thank you ebay!) of highly accurate models is better than ever. This kit had its challenges, but the effort was worth it because it does attract attention. Dinosaurs models lend themselves to dioramas and the options for scenery and action are virtually limitless. Maybe I’ll build a whole series of dinosaur dioramas, depicting all of the different prehistoric ecosystems like swamps, floodplains, volcanoes, and forests? Sounds like fun, but first I think I’ll build something a bit quicker. Time for a tank or an airplane.
January 2008
If you would like your product reviewed fairly and fairly quickly, please contact the editor or see other details in the Note to Contributors.