Dragon 1/35 US Marines, Iwo Jima 1945
| KIT: | Dragon 1/35 US Marines, Iwo Jima 1945 |
| KIT #: | 6408 |
| PRICE: | $ |
| DECALS: | None |
| REVIEWER: | Wyll Jones |
| NOTES: |
| HISTORY |
| THE KIT |
From the preview:
 Dragon
has helped to make a name for itself by producing quality figure sets for the
1/35 enthusiast and this set continues that tradition. Included are two large
and one small set of standard sprues along with two smaller more highly detailed
sprues of weapons along with a photo etch fret.
Dragon
has helped to make a name for itself by producing quality figure sets for the
1/35 enthusiast and this set continues that tradition. Included are two large
and one small set of standard sprues along with two smaller more highly detailed
sprues of weapons along with a photo etch fret.
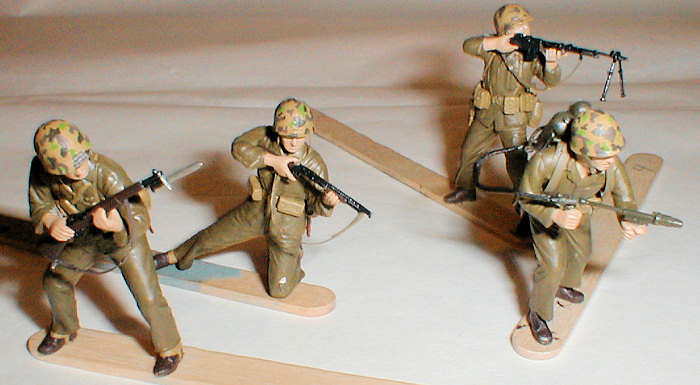
There are four figures as shown on the box art and as one would expect, the molding on these is very good with minimal mold seam so clean-up will be pretty quick. As you might expect, there are really more bits than you'll probably use, but then again, looking at the parts placement/painting drawings, perhaps they will need all this stuff as the figures are pretty loaded down with gear.
In with this set is a flame thrower and bazooka along with a number of weapons, probably more than will be used by these figures, so you will have spares. There is also an etched fret that is basically straps for the various weapons used by the figures.
There is no construction guide as one is normally used to with larger models. Instead, there is a full color painting guide that shows where the various bits and pieces are attached to the figure. This guide shows both sides of each figure so there is no doubt as to what goes where. As these figures have camouflaged helmets, there are two pattern guides provided for that as well. Paints pretty much look like Gunze and Model Master with some of the colors needing to be mixed.
| CONSTRUCTION |
 I've been spoiled when it
comes to model companies knowing that builders like me ain't the brightest
bulbs in on the tree, I always have had instructions that save me from my own
stupidity. Heck I need directions for mac and cheese. Just ask my girls.
Did you know that you add milk and butter to make the whole concoction to
work. This kit doesn't know me so well and oh my goodness I had to put
thought into it. But that's OK, I was up to it. First things first, get
acquainted with the kit and the parts. There isn't a step by step with this
kit so take your time and use your own judgment as to which order things
should go together.
I've been spoiled when it
comes to model companies knowing that builders like me ain't the brightest
bulbs in on the tree, I always have had instructions that save me from my own
stupidity. Heck I need directions for mac and cheese. Just ask my girls.
Did you know that you add milk and butter to make the whole concoction to
work. This kit doesn't know me so well and oh my goodness I had to put
thought into it. But that's OK, I was up to it. First things first, get
acquainted with the kit and the parts. There isn't a step by step with this
kit so take your time and use your own judgment as to which order things
should go together.
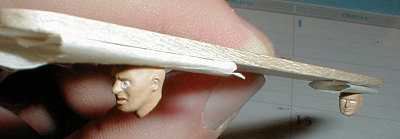 ir
chin straps just hanging vs. strapped. I chalk this up to the builder's
stupidity and not to kit.
ir
chin straps just hanging vs. strapped. I chalk this up to the builder's
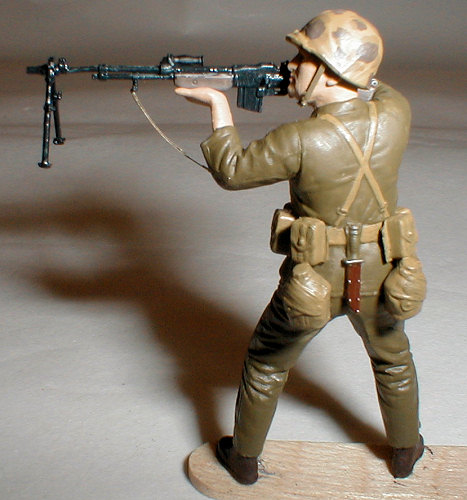
stupidity and not to kit. 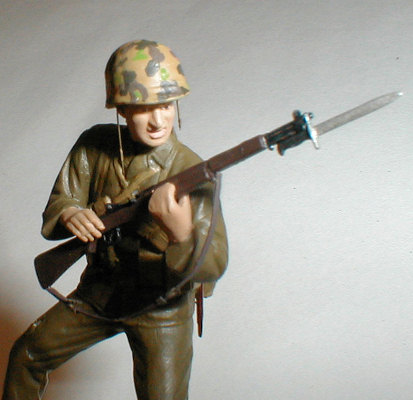 Next came the weapons.
These are beautifully rendered. I don't know what most of them are but they
are pretty. And Scott was more than right with his preview when he said that
there are way more weapons than you will need. They have more guns than Rambo
and more ammo than the 82nd Airborne. I don't know if Dragon does a weapons
only kit out there but judging from this if they don't they should really
think about having one. The only problems I ran into with the weapons was the
Flamethrower. I had a tough time getting the guy's hands to line up eith the
flamethrower handles. I also could not get the gas line from the tank on his
back to hook up with flame launcher in his hand. I finally gave up with that
and replaced it with braided wire that was intended for automotive models. I
found out that if you touch the end of braided wire to liquid CA that the
braided wire will suck up the glue to where your fingers are holding it and
make you cuss, a lot.
Next came the weapons.
These are beautifully rendered. I don't know what most of them are but they
are pretty. And Scott was more than right with his preview when he said that
there are way more weapons than you will need. They have more guns than Rambo
and more ammo than the 82nd Airborne. I don't know if Dragon does a weapons
only kit out there but judging from this if they don't they should really
think about having one. The only problems I ran into with the weapons was the
Flamethrower. I had a tough time getting the guy's hands to line up eith the
flamethrower handles. I also could not get the gas line from the tank on his
back to hook up with flame launcher in his hand. I finally gave up with that
and replaced it with braided wire that was intended for automotive models. I
found out that if you touch the end of braided wire to liquid CA that the
braided wire will suck up the glue to where your fingers are holding it and
make you cuss, a lot.| COLORS & MARKINGS |
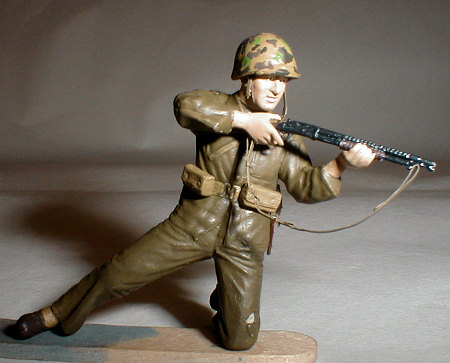
Simply put I used what I had on hand. That and I don't have enough
Dragon kits under my belt to know their color system. But mostly I just
always go with what I have on hand and looks about right to me. Olive Drab
for their overall uniforms and a tanish color for the belts and straps. Now
before anyone gets to excited and feels the need to point out th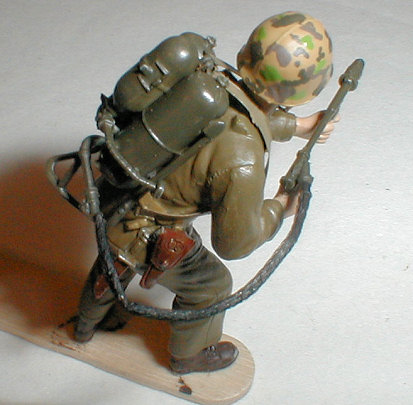 e
obvious no I haven't done a wash yet. Mostly because I won't do one until I
know just how I'll use these guys in a diorama, but from what I'm seeing
these should take a wash very well.
e
obvious no I haven't done a wash yet. Mostly because I won't do one until I
know just how I'll use these guys in a diorama, but from what I'm seeing
these should take a wash very well.
| FINAL CONSTRUCTION |
| CONCLUSIONS |
| REFERENCES |
November 2007
Copyright ModelingMadness.com.
If you would like your product reviewed fairly and fairly quickly, please contact the editor or see other details in the Note to Contributors.