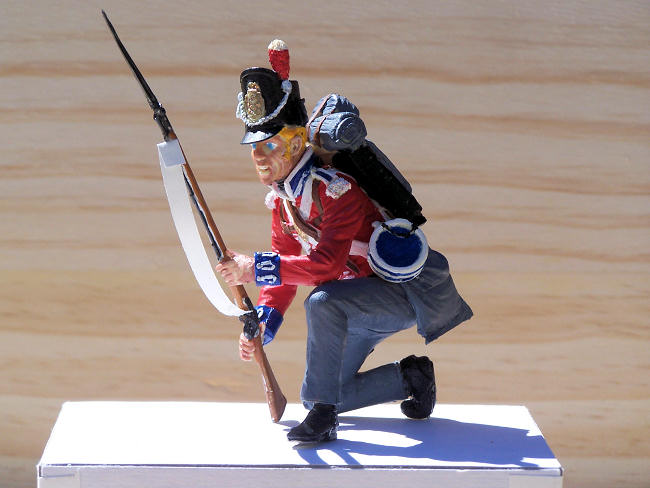
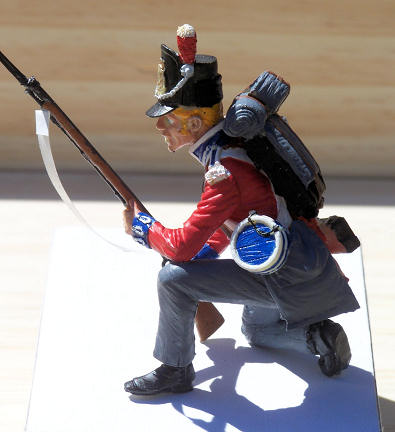
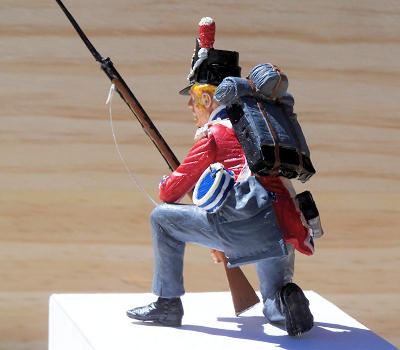
TLB Miniatures 120mm Pvt, 3rd Battaliion, 1st Royal Scots, Waterloo
| KIT #: | LB 16131 |
| PRICE: | $39.95 SRP |
| DECALS: | None |
| REVIEWER: | Erik Fedde |
| NOTES: | Resin and white metal |
| HISTORY |
 The
The
At
that point in time, the 3rd Battalion had fought in
| THE KIT |
This
120 mm scale kit is manufactured by a small company in
| CONSTRUCTION |
The
very first thing you MUST do with a resin model is clean it using hot water and
dishwater soap. I did this, using one of my wifes empty margarine containers
(which has become part of the stuff on top of my desk.) Dry the parts carefully
using a dry dish
 rag or a paper towel. I do this because resin release agents,
if not cleaned out, don't hold paint.
rag or a paper towel. I do this because resin release agents,
if not cleaned out, don't hold paint.
Next
comes removal of pouring blocks and sanding down attachment points. Here is a
way I remove small pouring blocks. I stole my wifes floral cutter (and bought
her another one). Use the tip of the cutter between the join of the pouring
block and the part. Do not attempt to go all the way; a simple start on the part
is all that is neccessary. Then sand down the part. Watch out for flying blocks
of resin- wear eye protection.
I
normally paint all parts before I assemble them, because of the nature of the
figure. If you wait until it's all together, you will have a tough time reaching
some of the details, but I'll talk about painting later.
I
started at the top and worked my way down. Unlike some other companies, the head
is provided separately. I used a pin vise to drill holes in the head and the
torso, and test fit the match using a small splinter of balsa I had whittled
down to hole size to match head to torso. I used Superglue gel to mate the
pieces. Then I used the same procedure to mate arms to the torso, legs to the
torso, and shoes to the torso.
| COLORS & MARKINGS |
Although the figure is a 120mm scale model, and huge compared to smaller (i.e.
1/48th or 1/72nd) scales, the level of detail is therefore much more intense. So
I would strongly recommend fine (sometimes one hair) brushes. I used enamels
although acrylics are just as good and easier to clean. The instructions
provided are an excellent reference for painting. As mentioned above, I painted
all parts before assembly; it's a great way to pick out details.
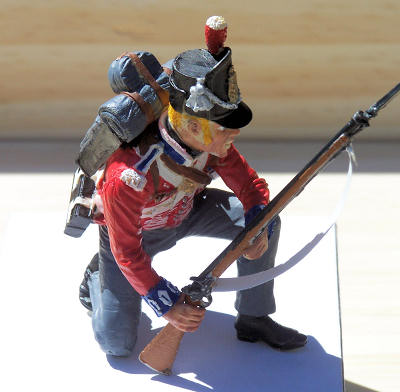
The
head required slow, detailed painting, starting at the top and working down. I
painted the shako flat black, let it dry, then painted the white cord across
flat white. The regimental badge was painted gold. The plume of the shako,
mounted on the left hand side, was painted white over red. The face was done
using a combination of warm and light flesh tones; eyes were done using a fine
brush of white; hair was painted yellow; and my final touch was blue eyes. (You
can get 120mm eyes in decal form.) The final touch was the stock, which was
painted black. (In doing my research, I found that the stocks were made of
leather and intentionally made to be uncomfortable. This kept the soldiers head
up and alert.)
The
tunic has a white edged, deep blue collar. (Deep blue was considered the color
of royalty, and as this was a Royal regiment, the soldiers had collars and
facings of deep blue.) I painted the tunic flat red (cloth is not shiny), let it
dry, got out my magnifying glass, and painted cross belts, and the elaborate
button catchers white. I painted the turnbacks on the back of the coat again
with white edges and deep blue inners. Epaulet straps were edged with white and
had dark blue inners. There's one leather belt on the torso, so I painted that
leather. The arms followed, again with deep blue cuffs, white button holes, and
silver buttons.
| CONCLUSIONS |
| REFERENCES |
 http://www.royalscotsgrenadiers.com/uniform.html
http://www.the-black-watch-lha.org/1815/1stuniform.html
October 2011
If you would like your product reviewed fairly and fairly quickly, please contact the editor or see other details in the Note to Contributors.