Master Box 1/35 US Machine Gunners, Europe 1944
| KIT: | Master Box 1/35 US Machine Gunners, Europe 1944 |
| KIT #: | MB 3519 |
| PRICE: | $11.99 MSRP |
| DECALS: | Yes |
| REVIEWER: | Greg Ewald |
| NOTES: | Quirky fit, nice detailing. |
| HISTORY |
One of the most reliable squad weapon systems in the second world war was the Browning 30 caliber water-cooled machine gun. You can read more here:
http://en.wikipedia.org/wiki/M1917_Browning_machine_gun
 Firing at a rate of an average 500
rounds per minute, the Browning put out a fair amount of lead on the
battlefield, and since it was cooled by a supply of water, was not subject to
the dreaded “cooking off” of the air-cooled guns. Of course, water isn’t light,
and having to cart around cans of liquid as well as ammunition and the gun
itself did not make this machine gun too portable. Used in a defensive position,
however, it proved itself time and time again to be a sturdy and dependable
firearm. The heavy cooling chamber kept the gun from rising during rapid fire,
and the massive tripod made for a steady platform.
Firing at a rate of an average 500
rounds per minute, the Browning put out a fair amount of lead on the
battlefield, and since it was cooled by a supply of water, was not subject to
the dreaded “cooking off” of the air-cooled guns. Of course, water isn’t light,
and having to cart around cans of liquid as well as ammunition and the gun
itself did not make this machine gun too portable. Used in a defensive position,
however, it proved itself time and time again to be a sturdy and dependable
firearm. The heavy cooling chamber kept the gun from rising during rapid fire,
and the massive tripod made for a steady platform.
The gun and it’s crews saw a lot of action after the landing in France on D-Day, helping to try to counter the strong German resistance and the superb MG42 that they used to keep the Allied invasion force pinned down. Reverse ambush sites were set up using wooden fortifications at road junctures as the Second Infantry Division worked their way towards Germany, and the Browning Machine Gun teams helped quite a few German troops to Valhalla.
| THE KIT |
Scott did a good preview:
http://modelingmadness.com/scotts/misc/figures/master%20box/mb3519.htm
 The molding is actually superb, with
almost no flash at all, and very nice details in certain areas. Oddly enough,
the hands are too clunky, and the ears are not sculpted at all. There are no
printed instructions, but there is an exploded diagram on the back of the box
showing what bit goes where, and what colour it is supposed to be. As Daboss
noted, you are going to have to come up with your own water supply and hose
feed, why this is not included is a mystery to me.
The molding is actually superb, with
almost no flash at all, and very nice details in certain areas. Oddly enough,
the hands are too clunky, and the ears are not sculpted at all. There are no
printed instructions, but there is an exploded diagram on the back of the box
showing what bit goes where, and what colour it is supposed to be. As Daboss
noted, you are going to have to come up with your own water supply and hose
feed, why this is not included is a mystery to me.
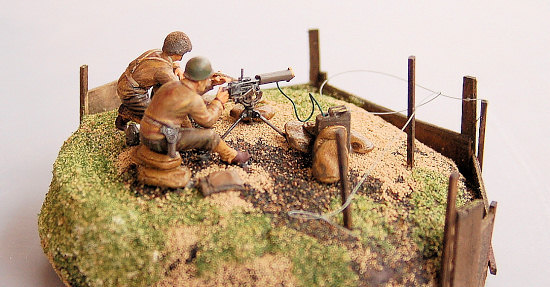
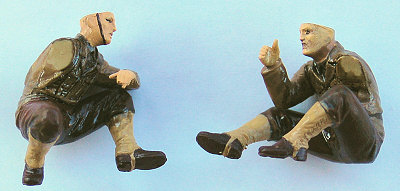
The parts go together perfectly, but great care must be taken to align them correctly prior to using any sort of adhesive. I did most of the initial painting while the parts are still on the sprue, due to the fact that the figures are going to be hunched over after they are put together.
| CONSTRUCTION |
 After doing the base painting of the
figures while on the tree, I assembled the gun and tripod , and affixed them
onto my base. At this stage, the base looked like something I found in a cattle
field or a small ‘Lil Debbie cake with an antennae on it. Don’t worry, there is
a method to my madness ! When the gun has been set in place, you can seat the
gunner figure behind it, and by maneuvering the arm, position the s
After doing the base painting of the
figures while on the tree, I assembled the gun and tripod , and affixed them
onto my base. At this stage, the base looked like something I found in a cattle
field or a small ‘Lil Debbie cake with an antennae on it. Don’t worry, there is
a method to my madness ! When the gun has been set in place, you can seat the
gunner figure behind it, and by maneuvering the arm, position the s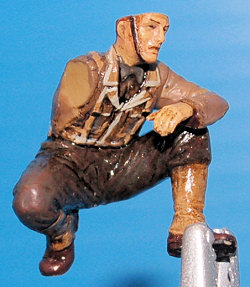 ergeant so
that he looks like he actually firing the weapon. While the directions show him
firing from a seated pose, it actually became obvious that he needed something
to sit on to make it look like he was not just getting rid of excess C-Rats. I
cruised by a few lhs’s, but found the sandbags in 1/35th scale to be
much too regular for a front-line military unit. I wanted something that looked
dumpy and was malleable, so I brought out the Sculpey clay. Slice the ribbons up
into rectangular chunks, and form to a rough pillow shape with your fingers.
Using a pair of hemostats (needlenose pliers work just as well), you can shape
the seam edges of the bags on three sides. Some field bags were sewn in place,
and tied off at the neck when they were filled, so vary your sculpture. Take a
bit of an old t-shirt and lightly form the Sculpey into its final shape, and
then place them on the base. It took me a few tries before I got the gunner
seated correctly, so that he looks like he is actually holding the gunstock.
Carefully remove the figure, and then transfer the sandbags to an aluminium
sheet, bake for 15
ergeant so
that he looks like he actually firing the weapon. While the directions show him
firing from a seated pose, it actually became obvious that he needed something
to sit on to make it look like he was not just getting rid of excess C-Rats. I
cruised by a few lhs’s, but found the sandbags in 1/35th scale to be
much too regular for a front-line military unit. I wanted something that looked
dumpy and was malleable, so I brought out the Sculpey clay. Slice the ribbons up
into rectangular chunks, and form to a rough pillow shape with your fingers.
Using a pair of hemostats (needlenose pliers work just as well), you can shape
the seam edges of the bags on three sides. Some field bags were sewn in place,
and tied off at the neck when they were filled, so vary your sculpture. Take a
bit of an old t-shirt and lightly form the Sculpey into its final shape, and
then place them on the base. It took me a few tries before I got the gunner
seated correctly, so that he looks like he is actually holding the gunstock.
Carefully remove the figure, and then transfer the sandbags to an aluminium
sheet, bake for 15 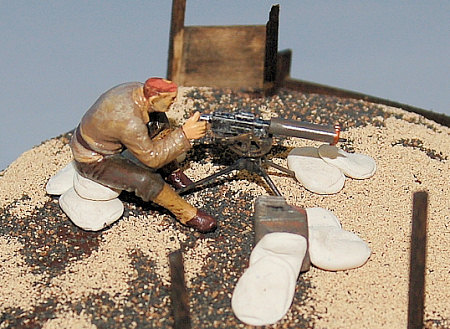 minutes, and paint an acrylic tan undercoat on them.. I like
to use Minwax wood stains to bring out the detail in these, but you can use any
sort of wash.
minutes, and paint an acrylic tan undercoat on them.. I like
to use Minwax wood stains to bring out the detail in these, but you can use any
sort of wash.
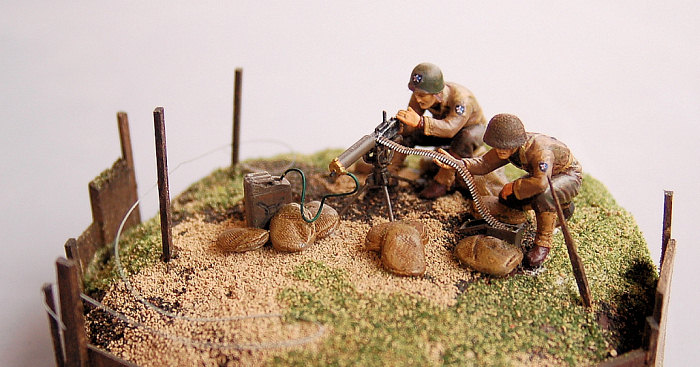
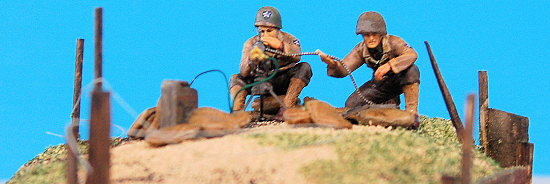
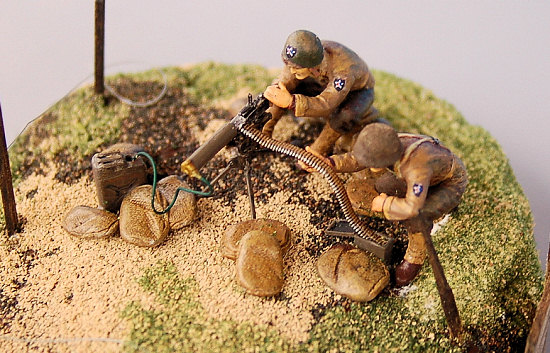
Now comes the tricky part. You have to glue the sandbags, the figures, and the arms in place pretty much at the same time, as they are all dependant on each other. I seated the gunner first, then glued on the left arm that is holding the upper receiver of the Browning down. After he is dry, do any and all touch up painting necessary before moving onto the second figure, because they are close together. With the second figure in place, it was time to fit in the ammobelt and can. The water supply can was made using a sparebox jerry can, which I was told by a WW2 vet was often the case. Initially, the Browning had a dedicated steel box-can , but as these were damaged, other types of water containment vessels became more popular. Hey, at least you can carry a jerry can! I used a piece of green arbor wire to simulate the hose that leads from the can to the left side of the brass headpiece on the machinegun, twisted to look like the reference photos I came across.
| COLORS & MARKINGS |
 I used Tamiya and Testors Model
Master acrylics for the figures and gun. Field drab, olive drab, and an
assortment of browns went into each piece. I did paint the straps a light gray,
then washed them with olive drab, this makes them stand out a bit from the bland colouration. The gun has a brass cover on the front where the water hose is
attached, I like to use gold paint that is then weathered with an oil stain to
replicate the look.
I used Tamiya and Testors Model
Master acrylics for the figures and gun. Field drab, olive drab, and an
assortment of browns went into each piece. I did paint the straps a light gray,
then washed them with olive drab, this makes them stand out a bit from the bland colouration. The gun has a brass cover on the front where the water hose is
attached, I like to use gold paint that is then weathered with an oil stain to
replicate the look.
The kit comes with a plethora of squad markings for individual units, including medics. I decided to follow the box art for mine, with one addition: using a small bit of pantyhose purloined from my wife’s closet, I made the gunner’s mate a nice webbed helmet cover. While watching “Saving Private Ryan” for the umpteenth time, I noticed that quite a few of the soldiers kept their helmet webbing on, and it serves to distinguish the two figures well. Just cut a piece of the hose a bit oversize, glue on one side, let dry, then pull it over to the other and glue. Trim to fit.
Once dry, I sprayed the whole deal with a clear dullcoat.
| CONCLUSIONS |
The figures are excellent, except for the lack of ear detail, and the fit is superb. If you are looking for a stand alone group, or something to spice up an action packed diorama, you’ll be happy with this set.
| REFERENCES |
 http://www.rt66.com/~korteng/SmallArms/30calhv.htm
http://www.olive-drab.com/od_other_firearms_mg_m1917.php3
http://en.wikipedia.org/wiki/2nd_Infantry_Division_%28United_States%29
January 2008
If you would like your product reviewed fairly and quickly, please contact me or see other details in the Note to Contributors.