Master Details 1/32 USN/USMC Aviator (1930's)
|
KIT #: |
32013 |
|
PRICE: |
$14.95 SRP |
|
DECALS: |
No options |
|
REVIEWER: |
Les Dorr |
|
NOTES: |
Resin with six head options |
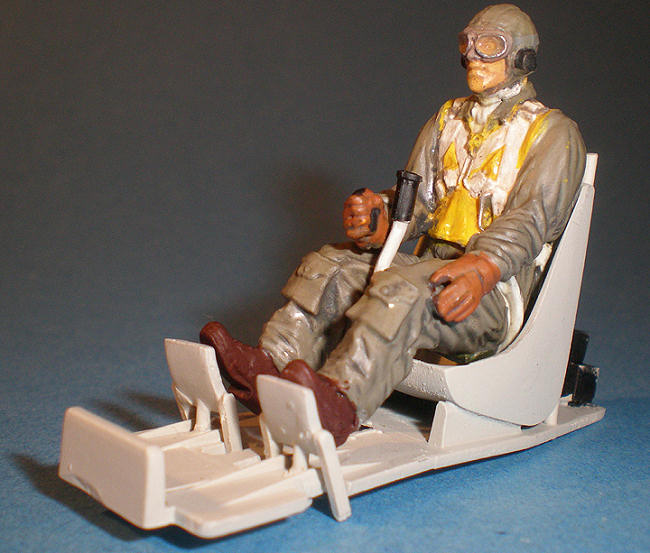
A smiling hotshot pilot wearing a G-1 leather jacket and helmet is
perhaps the quintessential image of a 1930s
U.S.
naval aviator. The 37S3 flight suit worn by Master Details’ Navy/Marie Corps
aviatior isn’t nearly as well known. In fact, I’d never heard of it before I
built this figure. I found zero images online, and the only boo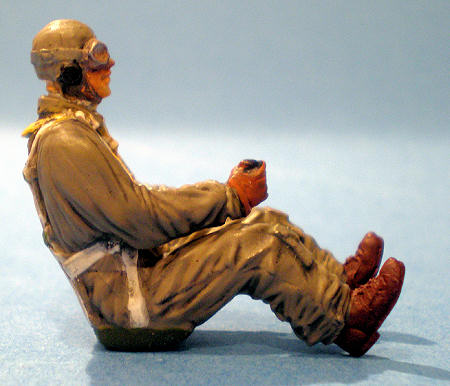 k
that seems to include anything on the suit (Full
Gear) apparently was published only in
Japan
and written in Japanese except for photo captions.
k
that seems to include anything on the suit (Full
Gear) apparently was published only in
Japan
and written in Japanese except for photo captions.
Studying
period photographs, it looks as if a similar flight suit – if not the 37S3
itself – debuted in the late 1920s. The “Bedford Cord” (a type of fabric) flight
helmet appears to have been in use at least until 1940, judging from
this example in the collection of the
Museum
of
Naval Aviation:
You can check out the figure’s parts, etc., in
Scott’s most excellent
preview.
I’ll
echo Scott’s positive comments about the quality of the casting. It’s simply the
best of any resin figure I’ve seen, noticeably crisper than similar (standing)
white metal figures, and immeasurably better than the cartoonish pilots included
with the 1/32 Hasegawa F4B-4 and BF2C-1.
Be
aware the figure’s arms aren’t completely interchangeable. If you choose the
right arm holding the stick grip, you must use the left arm that reaches down to
his thigh. The other left arm would collide with the right hand. You’ll also
need to research the particular aircraft you’re using the figure with. It sounds
obvious, but if the plane appears to have radio aerials, use one of the heads
with earphones. If no radio, use one with the smooth helmet.
There isn’t much to
building this guy. I attached his arms and legs with gap-filling CA glue.
Despite some fiddling with the fit, a noticeable gap remained between the left
leg and body. I filled it in with white glue, and since the joint is along a
parachute strap line, it looks fine. I left off the figure’s head until later
for ease of painting.
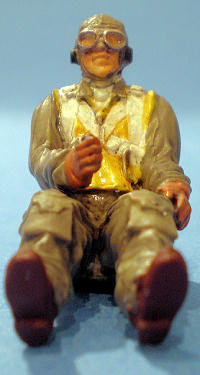
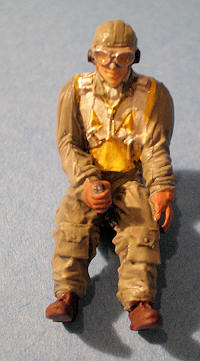
I hand-brushed all
the colors on the figure, starting with the life preserver. The Master Details
painting guide calls for cadmium yellow, but I found that shade too light
compared with photos and used Model Master Chrome Yellow instead. Note that part
of the life vest extends outside the parachute harness.
The
guide specifies “khaki green” for the overall flight suit color. I couldn’t find
paint with that name,
 so I
mixed some el cheapo acrylic craft store paints to match the flight jackets worn
by Errol Flynn and Fred MacMurray in the 1941 classic,
Dive Bomber.
The relevant frame grab can be found
here:
so I
mixed some el cheapo acrylic craft store paints to match the flight jackets worn
by Errol Flynn and Fred MacMurray in the 1941 classic,
Dive Bomber.
The relevant frame grab can be found
here:
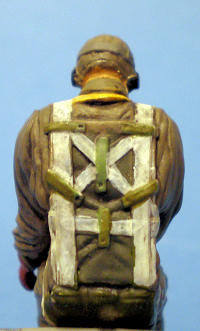
I
followed the manufacturer’s recommendations for the remaining colors, matching
acrylics I had on hand to the illustrations. In retrospect, I’d probably use a
lighter gray on the goggle strap. I also omitted the white lines on the
parachute pack, since they’ll never be seen when the figure is mounted in a
seat. You’ll need an extremely fine brush to paint the D-ring and parachute
harness buckles.
I brushed a coat of Future over the entire figure
in preparation for a dark gray acrylic wash. I then applied the wash to the
figure, removed the excess when dry, and brush-coated everything
except the
life preserver (which should be somewhat glossy) with Model Master Flat.
I
had to enlarge the neck opening slightly to get a good fit with the head I
chose. Once it was mounted with CA glue, I made goggle lenses with a healthy
application of Model Master clear parts cement & window maker.
 The
Master Details Navy/Marines aviator is a perfect way to avoid superdetailing the
Spartan cockpits found in the 1/32 Monogram F3F-3 and the Hasegawa F4B-4 and
BF2C-1. My figure is destined for the latter, and test-fitting suggests he’ll
fill up much of the small cockpit. If you insist on going the superdetail route
anyway, frequently check to make sure the figure will actually fit. I’ve just
finished adding reams of detail to an F4B-4 cockpit, and his arms would impinge
on some of the sidewall equipment if I tried to force him in there.
The
Master Details Navy/Marines aviator is a perfect way to avoid superdetailing the
Spartan cockpits found in the 1/32 Monogram F3F-3 and the Hasegawa F4B-4 and
BF2C-1. My figure is destined for the latter, and test-fitting suggests he’ll
fill up much of the small cockpit. If you insist on going the superdetail route
anyway, frequently check to make sure the figure will actually fit. I’ve just
finished adding reams of detail to an F4B-4 cockpit, and his arms would impinge
on some of the sidewall equipment if I tried to force him in there.
Okay,
so you’ve finished your figure. How about those five other beautifully sculpted
heads? If you’re building the Monogram F3F-3, one possibility is to mercilessly
decapitate the standing Al Williams figure and substitute a Master Details head,
as I have. You might also consider modifying another 1/32 resin or plastic
figure into a 1930s deck crewman using one of the heads without earphones.
Tanks
to Scott for the review sample. I’d love to see Master Details do a matching
1930s Army Air Corps pilot for the Hasegawa P-12E and P-26A!
U.S.
Naval Aviation,
Naval
Aviation
Museum
Foundation, 2001
Les Dorr
September 2008
Copyright ModelingMadness.com
Thanks to Master Details for the review kit.
If you would like your product reviewed fairly and fairly quickly, please
contact
the editor or see other details in the
Note to
Contributors.
Back to the Main Page
Back to the Review
Index Page 2019