Ugear Cash Register
| KIT #: | 70136 |
| PRICE: | $AUD129.00 |
| DECALS: | N/A |
| REVIEWER: | Peter Burstow |
| NOTES: | Wooden mechanical model kit. |
| HISTORY |
 An early mechanical cash
register was invented by
James Ritty and John Birch
following the American
Civil War. James was the owner of a
saloon
in Dayton, Ohio,
US, and wanted to stop employees from pilfering his profits. The Ritty Model I
was invented in 1879 after seeing a tool that counted the revolutions of the
propeller on a steamship. With the help of James' brother John Ritty, they
patented it in 1879. It was called Ritty's Incorruptible Cashier and it was
invented to stop cashiers from pilfering and eliminate employee theft and
embezzlement.
An early mechanical cash
register was invented by
James Ritty and John Birch
following the American
Civil War. James was the owner of a
saloon
in Dayton, Ohio,
US, and wanted to stop employees from pilfering his profits. The Ritty Model I
was invented in 1879 after seeing a tool that counted the revolutions of the
propeller on a steamship. With the help of James' brother John Ritty, they
patented it in 1879. It was called Ritty's Incorruptible Cashier and it was
invented to stop cashiers from pilfering and eliminate employee theft and
embezzlement.
History shamelessly pilfered from Wikipedia.
| THE KIT |
Most of the 405 parts are supplied on eight laser cut sheets of plywood, 360 x 165mm in size. The parts are clearly numbered as are the sheets. Additional parts are a selection of rubber bands. Also included is a little square of 240 grit sandpaper, made in Poland, and a small cylinder of candle wax.
The parts are almost completely cut out, with a few, three to six, uncut strips, about 0.1mm wide, to stop them falling out. The parts are easily removed from the sheets, with a little thumb pressure. A small tool is provided to help lever or push off the small parts.
The instructions are excellent, a 68 page book, with clear illustrations of each construction step. There are breakouts of any assembly that needs clarification such as alignment, direction of rotation,etc. Symbols show parts that need waxing for lubrication of the gears and bearings.
| CONSTRUCTION |
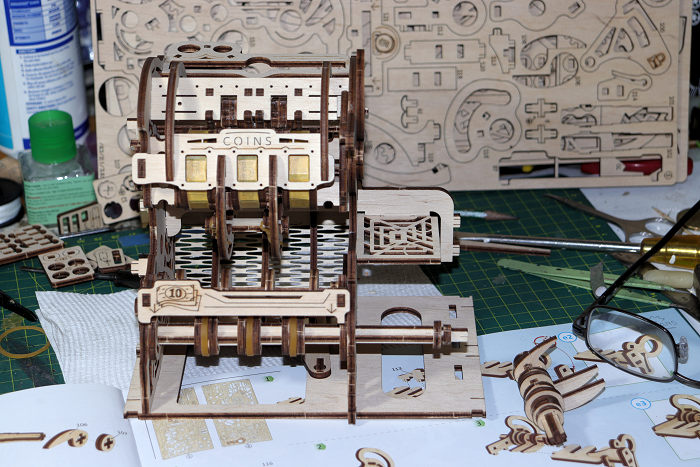 The assembly is straightforward, just follow the
instructions. They show the location on the sheets of the parts needed for each
step. The parts layout is logical, the parts needed for each step are generally
on the one sheet, and the sheets are used in sequence.
The assembly is straightforward, just follow the
instructions. They show the location on the sheets of the parts needed for each
step. The parts layout is logical, the parts needed for each step are generally
on the one sheet, and the sheets are used in sequence.
Break out the parts carefully, as corners, sprocket teeth and fine parts tend to crack. I only had one part which broke completely as I was removing it. Some wood glue, and an overnight rest fixed it easily.
The format of construction is to build a sub-assembly, then join the next assembly. Slowly the kit comes together. I found it helpful to check the operation of the kit as I was going. The rotation of gear trains is critical, and a quick test shows where additional lubrication is needed, or worse, that I'd put something in backwards.
Where the rubber bands are needed, the instructions show which size to use. Some are for temporarily holding things together, others are part of the construction. If I was to build the model for use, I would replace them with springs, as I'm sure the rubber will deteriorate in time.
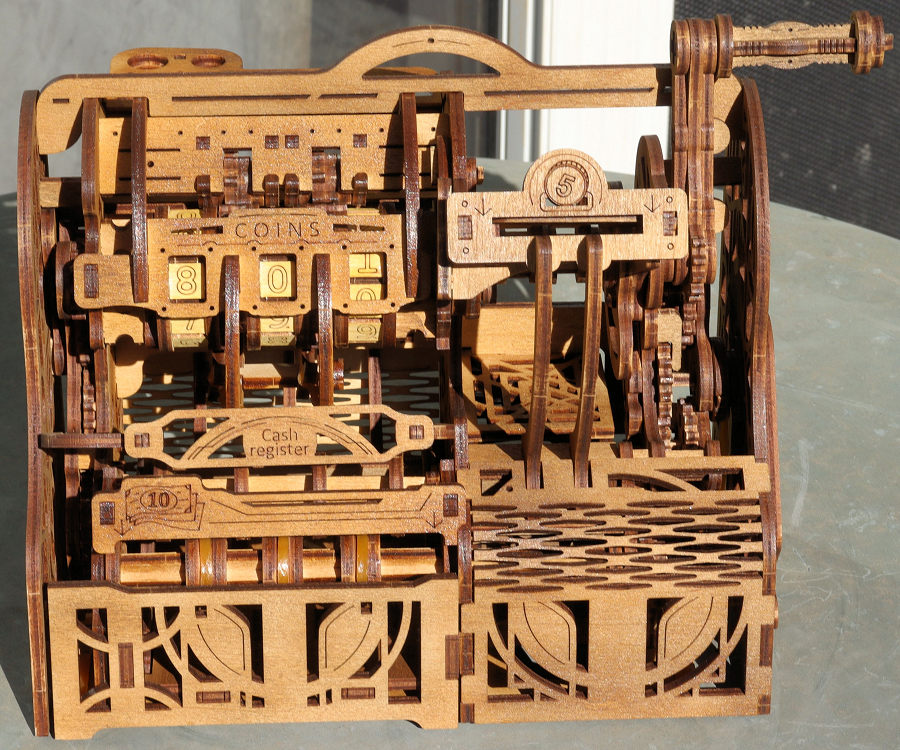
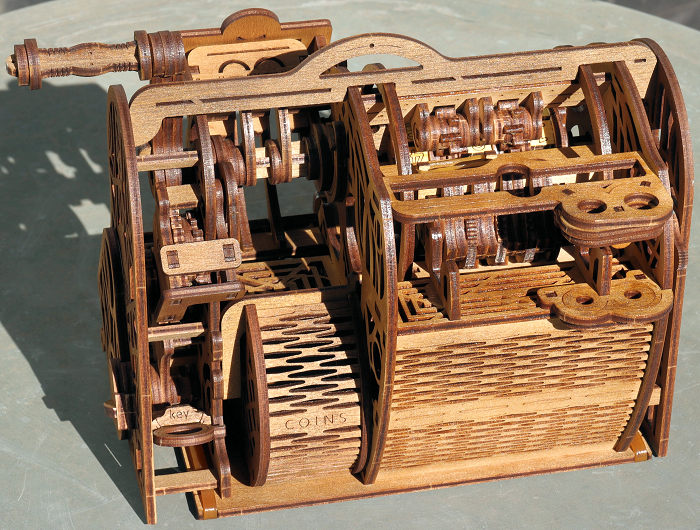
There was five gear trains to assemble with a complicated frame to hold it all together. The whole thing has a complex series of interlocks, with a code selection and a key to unlock and wind out the cash drawers.
I found a couple of minor errors in the instructions, just the call out of which sheet the part was on, was wrong. Nothing that really slowed down construction, just needed a little head scratching.
| COLORS & MARKINGS |
 The first painting I did was the numbers on the
mechanical counter. I used Tamiya X-24 clear yellow, two coats. I then masked
them with 10mm tape, which fitted well. I hoped that I could get at the tape to
remove it when I was done.
The first painting I did was the numbers on the
mechanical counter. I used Tamiya X-24 clear yellow, two coats. I then masked
them with 10mm tape, which fitted well. I hoped that I could get at the tape to
remove it when I was done.
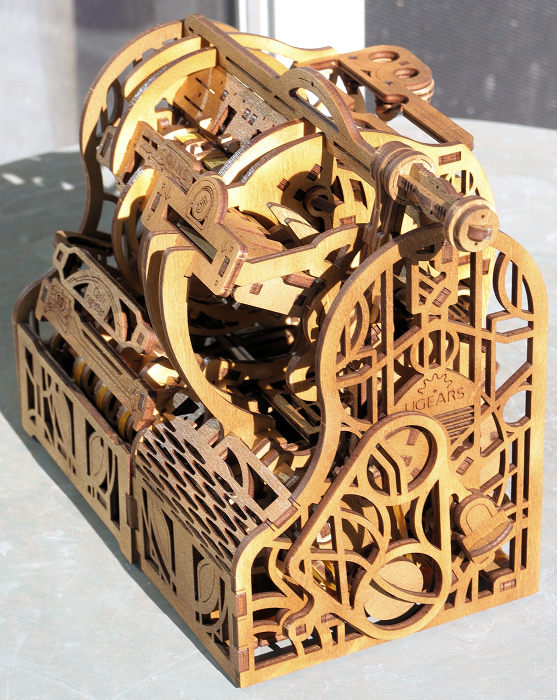
About halfway through construction I thought I'd better add some paint to the kit. I brewed up a mix of Tamiya X-24, X-25 clear green and X-27 clear red, adding one or the other till I was happy with the colour. Thinned a lot with X-20A acrylic thinner, I used my old Paasche HO817 single action airbrush.
It was difficult to get the coat even, with the complicated shape of the model. I missed some areas. I decided to paint the rest of the parts on the sheet. I hadn't made enough of the mix, so did another batch, of course the colour was different. Painting or staining the parts on the sheet was much easier.
When it was all together, I gave it another light coat of the colour, trying to get any of the exposed sanded areas. After all that, a coat of Long Life (Future), acrylic floor polich finished it off.
| CONCLUSIONS |
This was a great fun kit, something totally different from my usual aircraft, ships or occasional car. The website suggests about eight hours construction time. I took twice that, not including painting or head-scratching time.
I'm happy to recommend this kit for anybody. Ugears has a wide variety of kits available, so if cash registers are not your thing, try something else. I'm sorely tempted by their V-8 engine kit, with twice the number of parts.
| REFERENCES |
https://en.wikipedia.org/wiki/Cash_register
https://ugearsaustralia.com.au/ugears-shop/?orderby=price-desc
Peter Burstow
April 2024
Copyright ModelingMadness.com. All rights reserved. No reproduction in part or in whole without express permission from the editor.
If you would like your product reviewed fairly and fairly quickly, please contact the editor or see other details in the Note to Contributors.