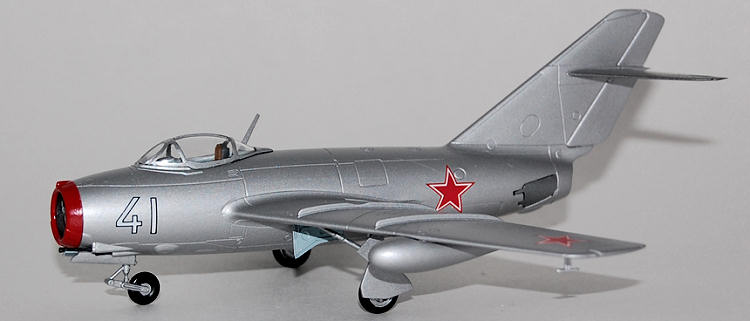
HobbyBoss 1/72 MiG-15bis
| KIT #: | 80263 |
| PRICE: | $9.50 MSRP |
| DECALS: | Two Options |
| REVIEWER: | Shawn Payne |
| NOTES: | My first Hobby Boss kit. |

| HISTORY |
I will forego any fact history on the MiG-15. There has been much written on the plane that does hold a spot in aviation history. And I donít know a lot about Hobby Boss since this is my first kit of theirs, but just to say I will be looking at kits of theirs in the future.
| THE KIT |
Not
having bought and built a Hobby Boss kit yet I did not know what to except when
I got it home. When I opened the
box the first thing I saw was how the model was package.
The fuselage and wings were in a tray and looking almost like a snap kit
in 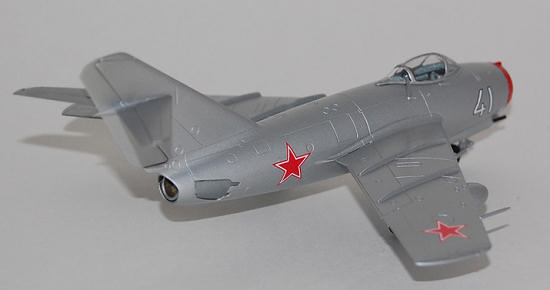 simplicity. But on further
examination I quickly realized that this was not a simple snap kit for the
quality was very nice. Under
the tray were the rest of the parts on a main parts tree and two smaller ones.
The cockpit parts were on one of the smaller trees and the other small
tree was the canopy and two clear rear tail under fuselage parts.
All the parts were of great quality in detail and scale in size.
Free of flash of any kind. I
did notice there were injector pin marks inside the wheel wells and in the
detailed interior of the inside speed brake areas.
There are 54 parts that make up this kit.
The kit gives you the option of two different types of wing mounted fuel
tanks.
The instructions are nice exploded view drawing showing order of assembly and color call out for each part. The back page of the instruction sheet was printed in color. A nice change from what I am use to seeing. The decals look to be of good quality and had a sharp crisp print to the graphics.
| CONSTRUCTION |
As with most aircraft models I started with the cockpit. This consisted of three parts, the tub, ejection seat and instrument panel. The instructions called for the tub to be painted air superiority blue. I used Xtracolor X602 Russian Su 27 flanker light blue as it was the closet color I had to anything in the soviet colors. Once I painted the light blue I went through my spare and left over decals and found instrument decals that would work on the side consoles and main instrument panel. The instrument panel and seat were painted flat black. I painted the seat cushions and head rest Testors military brown. This completed the tub.
 Before
attaching the inside air splitter I painted it silver and on the underside of
the tub was the nose gear well bay.
I painted this the same Lt blue even though the instructions call for
this area to be painted silver. I
thought this would help break up the all natural metal finish of the final
model. Also at this time paint the
inside of the tail exhaust area burnt iron and glue in the tail pipe.
I attach the air splitter to the tub and add the nose weight of lead
fishing sinkers. The two fuselage
halves are just about ready to go together.
Before closing up the fuselage put the main wing into place lined up with
the tabs in the lower part of the fuselage.
Now this is where I liked the way this kit was engineered.
The seams for the fuselage run down the sides of the airframe and the fit
was so tight that there was little to no seam along the airframe and at the wing
roots. I used very little
putty to fill in the seams at both places.
With the kit being engineered this way the tail stabilizer was molded to
the upper part of the fuselage. No
alignment issues here. This also
meant that the major parts of the airframe were completed.
Before
attaching the inside air splitter I painted it silver and on the underside of
the tub was the nose gear well bay.
I painted this the same Lt blue even though the instructions call for
this area to be painted silver. I
thought this would help break up the all natural metal finish of the final
model. Also at this time paint the
inside of the tail exhaust area burnt iron and glue in the tail pipe.
I attach the air splitter to the tub and add the nose weight of lead
fishing sinkers. The two fuselage
halves are just about ready to go together.
Before closing up the fuselage put the main wing into place lined up with
the tabs in the lower part of the fuselage.
Now this is where I liked the way this kit was engineered.
The seams for the fuselage run down the sides of the airframe and the fit
was so tight that there was little to no seam along the airframe and at the wing
roots. I used very little
putty to fill in the seams at both places.
With the kit being engineered this way the tail stabilizer was molded to
the upper part of the fuselage. No
alignment issues here. This also
meant that the major parts of the airframe were completed.
I opted
for the smaller ďearlierĒ versions of the wing fuel tanks and assembled them,
sanded out the seams and glued them to the wings.
Now moving on to the landing gear and gear bay doors.
I painted the landing gear struts silver and the tires flat black.
I again chose to paint the inside of the main gear bays Lt blue and the
insides of all the gear doors Lt blue.
Ready for paint.
| COLORS AND MARKINGS |
 Let me
back up a little here. Before
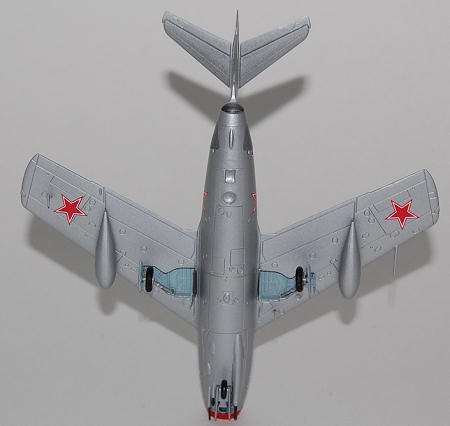
painting I masked off the areas of the tail pipe exhaust and wheel wells with
craft foam. This comes in thin
color sheets you can get in the craft isle of any retail store and there very
inexpensive. Around 20 sheets for a
few dollars. The key to
this is early in the construction take a piece of the foam and press it in to
the opening you want to mask off.
Get a good impression of the area and quickly trace the lines with a pencil
before they disappear. Cut
out along the pencil lines and there you have an exact size piece of foam, no
matter how complex the opening is, to push in to place before painting.
Paint does not seep in to the foam and it gives you a crisp clean edge
once removed.
Once the gloss black base had dried for
a week I sprayed on Alclad Aluminum.
And again set it aside for drying.
Another week and I looked over the results.
Not sure what I was supposed to see here.
The finish looked a little ruff to me.
So I took a cotton cloth and attempted to buff out the paint with light
pressure. This seemed to be making
things worse, so I stopped with that and put the model aside for a few months.
When I picked it back up at a later time it did not seem to look so bad,
time does make things better once in a while.
So I loaded up the airbrush with future floor wax and glossed over the
NMF. Starting to look better.
Once that dried came the decals and my biggest headache. The very first decal, the red and white fuselage numbers that go on the sides up front folded over on me when pulling it back out of the water. Ok no biggie, this has happened before and I have always been able to save the decal, not this time. It stuck to itself and would not come back apart. No matter what I did, re dunking it in the water. Using a brush to unfold it, nothing worked; all I was doing was wrinkling it up even more. I had to throw out a decal for the first time in many years.
Well
needless to say this changed the decaling option I was going for.
So now decision time, set it back on the shelf and hope time fixes this
problem, toss the whole thing in the trash with force and words, that option
sounded like a good release, or press on and make this MiG a generic soviet
fighter with no historical accuracy to my knowledge.
The third option won out after a short cool down time and some more words
that were mostly incoherent.
Isnít this hobby supposed to be relaxing and stress
 relieving?
Anyways enough of that rant.
I chose another set of numbers from the sheet and started over.
Taking great care not to repeat the mishap I place the decals on the MiG.
The decals did fight me all the way through however.
Once they hit the surface they wanted to stay there and not move.
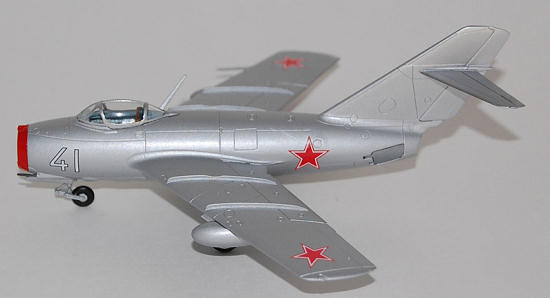
I was just happy that there were only 6 red stars and two sets of ID
numbers and that was it.
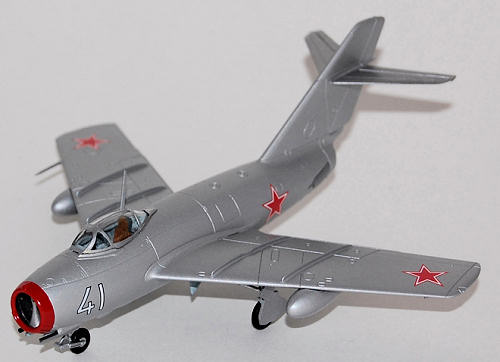
Ok the decals were done. Another shot of future to seal them, however I donít think they had any intention of coming up, ever. Now the model had a nice gloss finish to it. Now I removed the masking and the foam from the wheel wells and started gluing on the landing gear, gear doors and speed brakes. I had painted the speed breaks flaps steel so that I had some breaks in the all aluminum finish. The canopy came next. I hand painted the canopy frame with silver and used white glue to attach it. The last part to go on was the intake ring at the front of the air frame. Now another nice thing here was that the ring was molded separate and this made painting the red easy and when dry it just glues on to the front. We are now doneÖ
| CONCLUSIONS |
Once done the MiG 15 looks very good and well detailed for this scale. I recommend this kit to modelers of all levels. The problems I had were of my own making and this one just wanted to fight with me all the way. But I donít think this was due to any fault of the kit. I have had some good complements from it so all is good now.
February 2010
If you would like your product reviewed fairly and quickly, please contact me or see other details in the Note to Contributors.