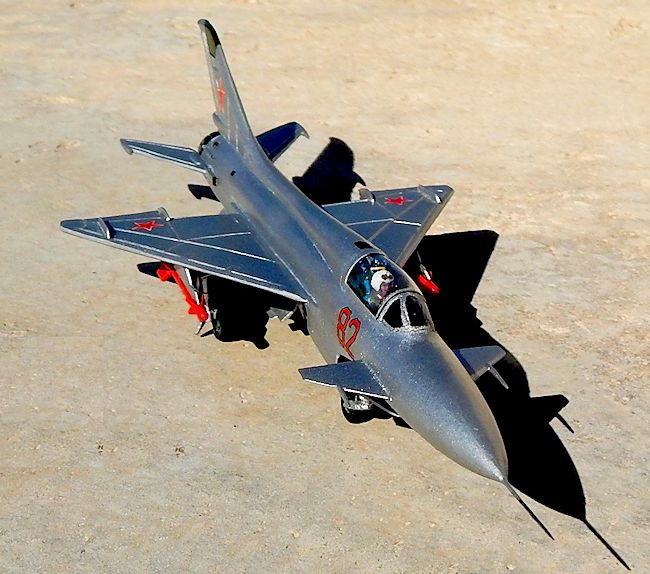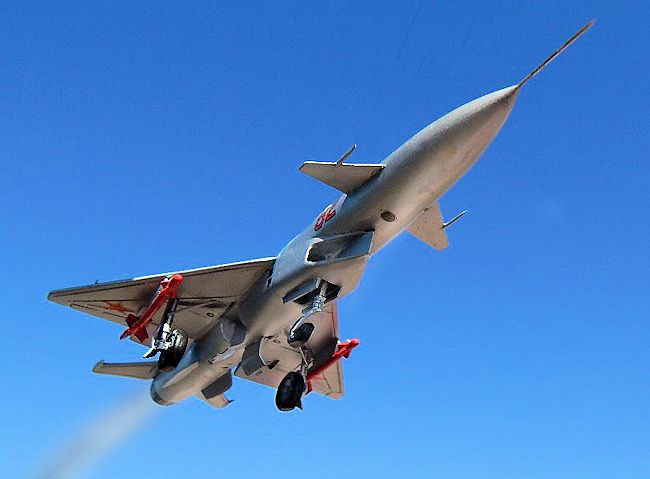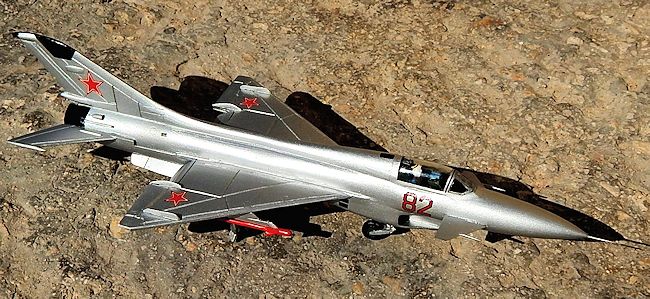
Airmodel 1/72 MiG-21 E8
| KIT #: | |
| PRICE: | |
| DECALS: | None |
| REVIEWER: | Carmel J. Attard |
| NOTES: | Vacuformed kit with resin bits |

| HISTORY |
 There was a time back in early 60s when the Mikoyan OKB attempted to improve the
standard fighter plane of those days, the MiG-21F Fishbed C which was a fast
Mach 2 fighter but with some short comings as weak armament, insufficient
electronic equipment, poor endurance and range.
Little is known as to when and why the E-8 project was discarded and may not be
correct to suppose that technical problems led to the cancellation of the
project. The most likely supposition is that the radical change in design on an
already introduced standard fighter gave rise to delay in the production during
the tense years of the early 60s era.
 It was then decided that the
prototype MiG-21 PF (Fishbed D) was chosen to be the
successor and was produced and introduced into service, where the classical line
of the Mig fighter design remained unaltered.
The E-8 was built as an aerodynamic test aircraft with folding ventral fin, cunards and ventral intakes. The fairly short career of the E-8 could be possibly due to problems related to the R-21 F-300 engine which was known to fail during flight.
| THE KIT |
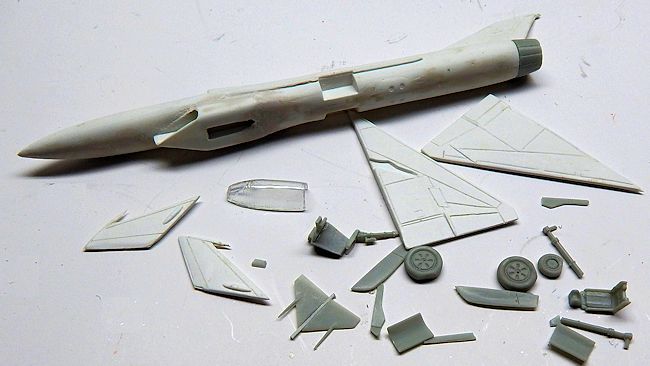
 Airmodel issued the vac-form kit of the E-8
complete with resin detail parts. The major components are the fuselage
parts, wings and tail planes which all come in white vac-form styrene. Other
parts like the landing gear legs, ventral streaks, cunard wings, cockpit seat
and coaming, instrument panel,back plate, wheel doors,
and rear exhaust outlet are all in dark green resin. In addition there is
a single vac form clear canopy . The instruction sheet contains a good three vew
scale plan and
two photos of the
E-8 and E-8A are included
along
with assembly instructions.
Surface detail of the vac parts is good and smooth with inset panel lines.and
underfuselage air brakes are also detailed. No decal sheet included and a red
outlined yellow number is suggested to go on fuselage cockpit side along with
star positions.
| CONSTRUCTION |
 The first stage of construction
is
assembling the cockpit office most of which is resin parts, adding instruments
and effectively paint the interior in light torquois with seat in different grey
, adding crew figure and so on. There are no side consoles but with good
reference one can put some representation athough the cockpit is quite crammed
and little could be observed when the crew figure is added. As for the seat I
preferred to replace it with an injected one from a surplus Tamiya Mig-21
series. I also added lead weight to the rear of cockpit.
Sanding down the fuselage halves should not be overdone or else the cockpit
assembly would be too proud t o go in it. Care should be taken when assembling
the ventral air intake which has a central dividing web. This is the only
practically delicate stage as it is assembled in a sagged configuration as per
side views. The joining surface needed a little filler.
Surface detail on fuselage and wings was mildly scored then masked as a
protection during sanding of excess filler. I also added little detail to wheel
wells which were boxed with plastic card. The gear legs are quite detailed
particularly the nose wheel and the wheel tyres all had a flattened part detail.
I drilled a shallow dowel hole to take the legs. Flaps were cut and fixed
lowered adding actuators to each. Two small rectangular air intake ducts were
also added to rear of fuselage. The rear engine resin part added in the end.
| COLORS & MARKINGS |
 This is the ideal model for those who would like to try some of the specialist
natural metal finishes. I have used a mix of commercial silver mixed with little
clear lacquer and this seemed to give an effective metal finish. Cockpit
interior was light turquoise. Decals came from spares box with suitable red stars
and a red identification nose number.
| CONCLUSIONS |
Obviously this is a model mainly for those with interest in exotic Russian aircraft types. The end result certainly gives the impression of the modern day fighter type in spite that it was being developed circa 1962. Adding two dummy underwing Atoll missiles made it looks all the more formidable.
April 2014
If you would like your product reviewed fairly and fairly quickly, please contact the editor or see other details in the Note to Contributors.