Italeri 1/72 F-84E/G Thunderjet
| KIT #: | 1321 |
| PRICE: | 10 Euros |
| DECALS: | Four options |
| REVIEWER: | Serkan Özgen |
| NOTES: | Rebox of the Academy kit with a Cartograf decal sheet |
| HISTORY |
 Republic F-84 Thunderjet
straight-wing series (versions B, C, E and G) was designed during WW2 in order
to quickly provide the US Air Force a jet fighter that was needed in the combat
arena over Europe. The result was a simple but efficient design by Republic
Aviation Corporation known for its sturdy designs. The emerging design had a
frontal pitot-type air intake and straight wings. The prototype first flew in
August 1946 and although too late for WW2, straight-wing F-84s saw considerable
action in Korea in the fighter-bomber role. Straight-wing F-84s were vital in
providing jet aircraft to the air forces of the newly-formed NATO in the 1950s,
since the aircraft was available in high numbers. France, the Netherlands,
Italy, Belgium, Greece and Turkey were among the nations that received
straight-winged F-84s, mostly the G model.
Republic F-84 Thunderjet
straight-wing series (versions B, C, E and G) was designed during WW2 in order
to quickly provide the US Air Force a jet fighter that was needed in the combat
arena over Europe. The result was a simple but efficient design by Republic
Aviation Corporation known for its sturdy designs. The emerging design had a
frontal pitot-type air intake and straight wings. The prototype first flew in
August 1946 and although too late for WW2, straight-wing F-84s saw considerable
action in Korea in the fighter-bomber role. Straight-wing F-84s were vital in
providing jet aircraft to the air forces of the newly-formed NATO in the 1950s,
since the aircraft was available in high numbers. France, the Netherlands,
Italy, Belgium, Greece and Turkey were among the nations that received
straight-winged F-84s, mostly the G model.
Being a NATO member, Turkey received in total 479 F-84Gs from MAP, ex-ItAF, ex-FAF, ex-BAF and ex-RNethAF sources and operated them between 1952-1966. The aircraft were operated from bases in Balikesir (9. AJÜ), Bandirma (6. AJÜ), Diyarbakir (8. AJÜ) and Eskisehir (1. AJÜ) in at least 12 squadrons. AJÜ – Ana Jet Üssü means Main Jet Base.
| THE KIT |
 The kit depicted is a 2012 Italeri
re-boxing of the Academy kit. There are four light gray sprues and a clear sprue
in the box. The Cartograf decal sheet is the outstanding aspect of the kit,
which contains decals for 4 versions; 1 USAF (E), 1 USAF (G), 1 ItAF (G) and 1
FAF (G). The decals are thin, glossy and are perfectly in register. There is
full stenciling included as well as three separate decals for the white canopy
framing. One may want to buy this kit for the decal sheet alone although the kit
itself is a gem. One last comment about the decals; although they react nicely
to setting solutions, my experience tells Cartograf decals are less robust to
these compared to other brands.
The kit depicted is a 2012 Italeri
re-boxing of the Academy kit. There are four light gray sprues and a clear sprue
in the box. The Cartograf decal sheet is the outstanding aspect of the kit,
which contains decals for 4 versions; 1 USAF (E), 1 USAF (G), 1 ItAF (G) and 1
FAF (G). The decals are thin, glossy and are perfectly in register. There is
full stenciling included as well as three separate decals for the white canopy
framing. One may want to buy this kit for the decal sheet alone although the kit
itself is a gem. One last comment about the decals; although they react nicely
to setting solutions, my experience tells Cartograf decals are less robust to
these compared to other brands.
There are parts and the correct canopy for the E model as well. There are alternative air brake parts (perforated and solid), exhaust nozzles (early and late style) and fuel tanks (with and without the refueling probe). One has to check references for a particular airplane since to my knowledge there is no definite way of deciding which alternatives to use on a particular aircraft. The armament includes 2 bombs, 8 HVAR rockets and 2 JATO bottles, which all have good detail for the scale. The instructions are of typical Italeri style with coloring references given for FS, Model Master and Italeri AcryclicPaint lines.
| CONSTRUCTION |
 The construction steps are
straight-forward and conventional. The cockpit interior detail is pretty high
for the scale. The cockpit tub and the sidewalls are painted green chromate
while the landing gear interiors are painted yellow chromate. I used Model
Master enamels throughout. Before closing the fuselage be sure to add
considerable amount of nose weight if you want to avoid a tailsitter.
Unfortunately, there isn’t too much space at the nose for weights and my model
ended up being one. Next time I build this kit, I will add weights to the wing
fuel tanks too. Actually any weight ahead of the main landing gears should do.
Next steps of the constructions prompt you to choose from two alternative
nozzles, two alternative gun bay doors, two camera ports on the wing leading
edge, two speed brakes and the stores layout. Some options are used only for the
E model, while some others like both nozzle exhausts and the speed brakes can be
used alternatively on the G model. Check your references for the particular
airplane you are building for the correct alternative.
The construction steps are
straight-forward and conventional. The cockpit interior detail is pretty high
for the scale. The cockpit tub and the sidewalls are painted green chromate
while the landing gear interiors are painted yellow chromate. I used Model
Master enamels throughout. Before closing the fuselage be sure to add
considerable amount of nose weight if you want to avoid a tailsitter.
Unfortunately, there isn’t too much space at the nose for weights and my model
ended up being one. Next time I build this kit, I will add weights to the wing
fuel tanks too. Actually any weight ahead of the main landing gears should do.
Next steps of the constructions prompt you to choose from two alternative
nozzles, two alternative gun bay doors, two camera ports on the wing leading
edge, two speed brakes and the stores layout. Some options are used only for the
E model, while some others like both nozzle exhausts and the speed brakes can be
used alternatively on the G model. Check your references for the particular
airplane you are building for the correct alternative.
 The construction went very
smoothly and the fit was generally above average. I needed filler and sanding
only at some places on the lower side of the fuselage and the wing leading
edges.
The construction went very
smoothly and the fit was generally above average. I needed filler and sanding
only at some places on the lower side of the fuselage and the wing leading
edges.
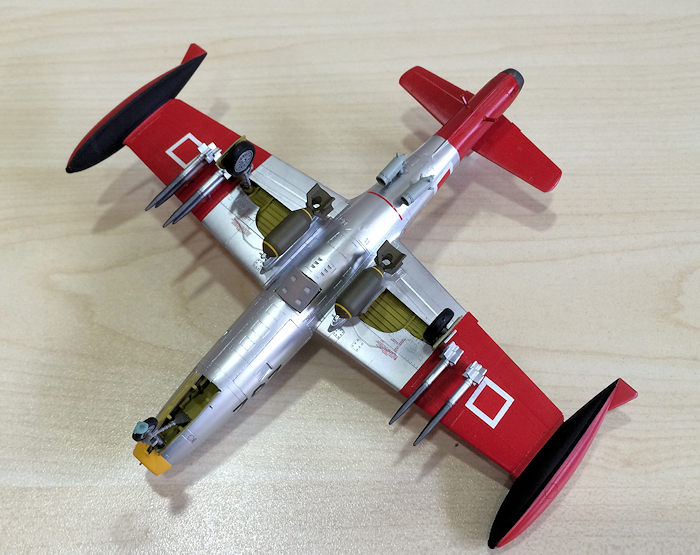
Turkish AF planes are almost never photographed with armament but I came across one photo of a Turkish F-84G with the layout depicted. The kit was completed with 2 bombs on the inner wing stations, 8 HVAR rockets on the outboard stations and 2 JATO bottles on the rear fuselage. The photo was probably taken on an open day event.
The construction proceeded with the attachment of the canopy, which has two parts. Although the instructions do not tell you to do so, I don’t see any reason why the canopy cannot be positioned open. The fit of the canopy was worse than the rest of the kit and it is a bit too bulbous to my taste. Experts will be able to tell better.
The last step of the construction and the whole build was attaching the underwing stores, JATO bottles and other bits.
| COLORS & MARKINGS |
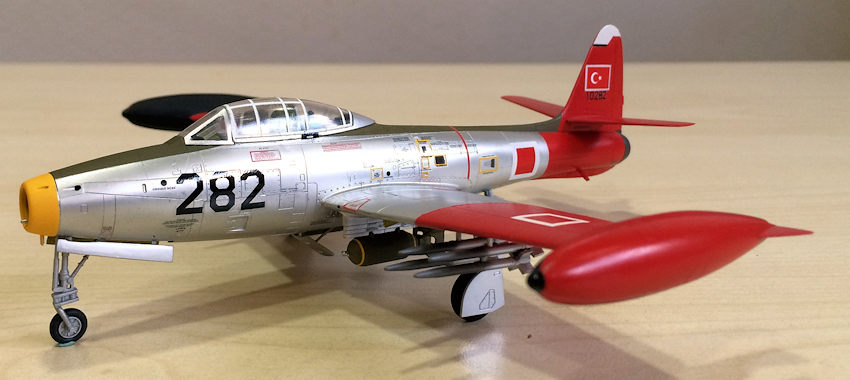
I chose to complete this kit in
Turkish AF colours as I indicated above. The plane depicted (51-10282) served
with the 8. AJÜ in Diyarbakir during the 50s, which was then the jet training
base of the Turkish AF. It was probably one of the airplanes handed over by the
Italian or the French Air Forces after 1956 judging from the serial but I am not
sure. Maybe there are expert readers who may want to enlighten us here. This
aircraft is depicted in a relatively high quality black and white photo while
flying over rough terrain in Turkey. There is no aftermarket decal set for this
particular aircraft (actually there is o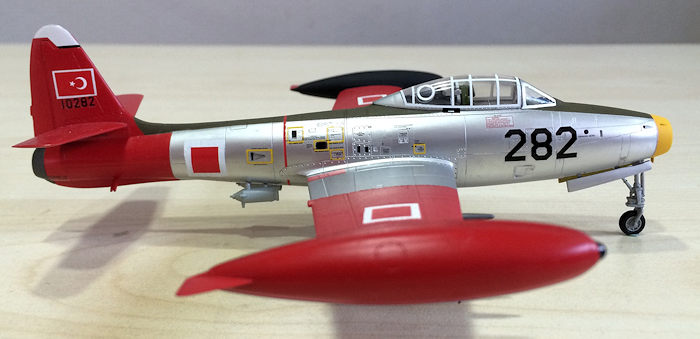 nly one aftermarket set that I know of
that depicts a Turkish F-84) so I used decals from different sources. The
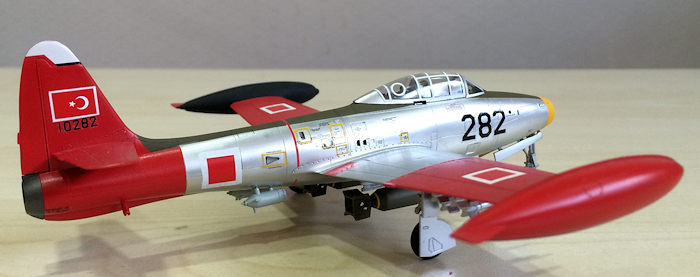
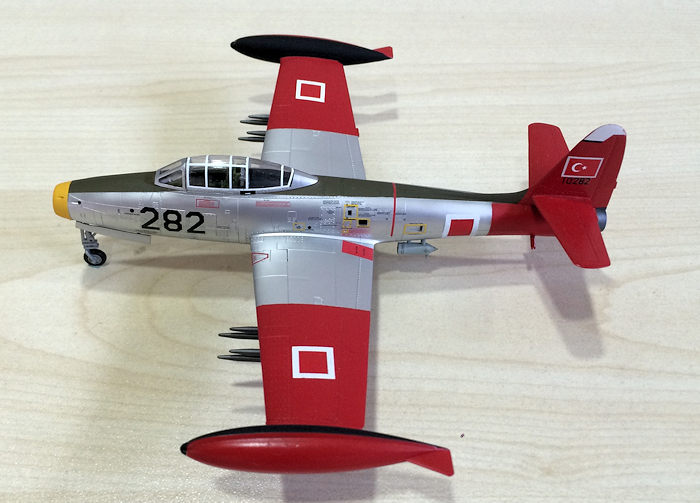
stencils came from the kit, the Turkish flag on the fin and the square insignia
on the fuselage and the wings came from a Turquoise Decals sheet, the numbers 2,
8 and 2 on the nose from a DaCo Decals sheet and finally the serial numbers on
the fin from an archaic PM Models sheet.
nly one aftermarket set that I know of
that depicts a Turkish F-84) so I used decals from different sources. The
stencils came from the kit, the Turkish flag on the fin and the square insignia
on the fuselage and the wings came from a Turquoise Decals sheet, the numbers 2,
8 and 2 on the nose from a DaCo Decals sheet and finally the serial numbers on
the fin from an archaic PM Models sheet.
The red wingtips and the fin betray the training role that this particular aircraft was used for. For these areas, I used Gloss Red (MM1503). The rest of the aircraft was painted MM Aluminum Plate Metalizer, while for the exhaust I used MM Titanium Metalizer. The spine was painted with Olive Drab (MM1711). There are various opinions about the colour of the intake ring, like blue, white and yellow among enthusiasts. After consulting a friend, he was 99% certain that the colour was yellow, although probably not as gaudy as depicted in my build. Nevertheless, the kit in my opinion is eye catching although I needed a lot of masking and planning to get the multi-colour scheme correct. The fact that metalizer paint lifts of with masking tape did not help the situation so I first painted the red and the olive drab, masked them and painted the aluminum. This caused a small step on the wing demarcation lines but this was not too much of a trouble and I left it as is.
After applying the decals, I sprayed MM Dullcote over the olive drab areas, MM Satin Coat over the red areas and MM Sealer for Metalizer over the aluminum areas, again with very careful planning and masking.
| CONCLUSIONS |
I thoroughly enjoyed building this kit. Although the paint scheme I chose required more planning and care than I thought, I think the end result was well worth it. I will definitely build this kit again in the future (I still have one Academy and one Italeri boxing), but then I will probably choose a simpler scheme and will paint the canopy frames instead of using the kit supplied decals. I strongly recommend this kit to modellers of all skill levels, and anyone with basic skills will be able turn this into a nice model. Besides, you can’t go wrong with a price like this.
I build this kit for the Turkish Air Force Museum in Ankara so if you pass by there, you will be able to see it. If you drop me an e-mail before coming, we might even have a drink and chat about models.
| REFERENCES |
1. Turkish Military Aircraft since 1912, Ole Nikolajsen, Scramble Dutch Aviation Society Publications, 2005.
2. F-84 Thunderjet in action, Squadron/Signal Publications, 1983.
17 October 2016 Copyright
ModelingMadness.com If you would like your product reviewed fairly and fairly quickly, please
contact
the editor or see other details in the
Note to
Contributors.