Mach 2 1/72 Bell X-2
| KIT: | Mach 2 1/72 Bell X-2 |
| KIT #: | ? |
| PRICE: | An astounding $37.00 at Squadron |
| DECALS: | One option |
| REVIEWER: | Joel Hamm |
| NOTES: | Get something else. |
| HISTORY |
X planes seem to be an in-thing. Several manufacturers recently issued a rash of 1/72 releases centered on the earliest days of supersonic probing. The Bell X-2, in addition to being resin-poured by Alliance and Anigrand, has been injected by Mach 2, a French semi-short run company of deservedly ill repute; and Golden Age, a new kid on the block belonging to the Olimp consortium.
A long string of difficult US ‘tweener biplane builds had resulted in a case of Yellow (wing) Fever, otherwise known as boredom with the same old subject; so I decided to add a few of these sleek additions to my Experimentals Collection. Unfortunately, the Golden Age kit, though previewed on several modeling sites, was nowhere to be purchased. I had previously struggled with several Mach 2 short runs, still had a few in the stash waiting for better versions, and should have known better. I didn’t; and shelled out an astonishing, for cheapskate me, $70+ for Mach2’s X-2 and Douglas D-558 Skyrocket.
| THE KIT |
 The kit comes boxed in a colorful,
sturdy, stapled, top-opening carton with a corrugated bottom half that serves as
a convenient parts tray.
That’s the
The kit comes boxed in a colorful,
sturdy, stapled, top-opening carton with a corrugated bottom half that serves as
a convenient parts tray.
That’s the
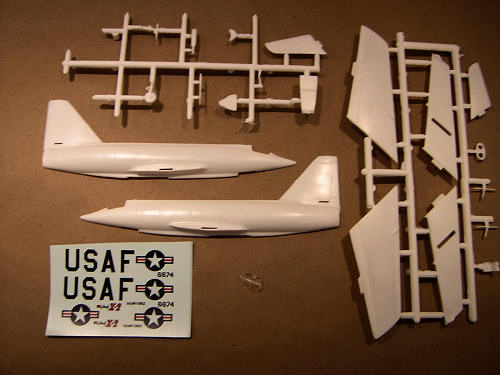
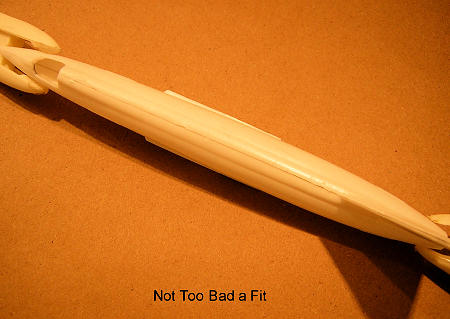
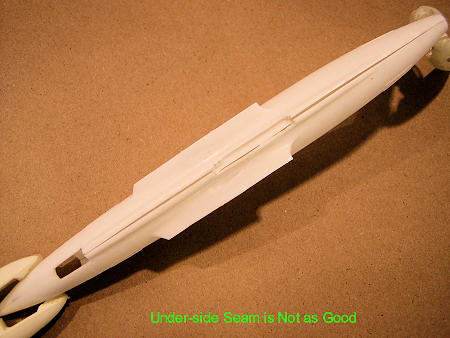
The parts breakdown is very simple. Flash isn’t too great a problem, except on small parts such as landing gear, which are more easily scratch built than cleaned up. Fit of the fuselage and wing halves is acceptable. A few swipes against a sheet of 220 grit and only minimal clamping is needed. Sink holes, flaws, surface roughness – those are other matters; but no issue can overshadow the problems caused by the waxy, low-pressure plastic.
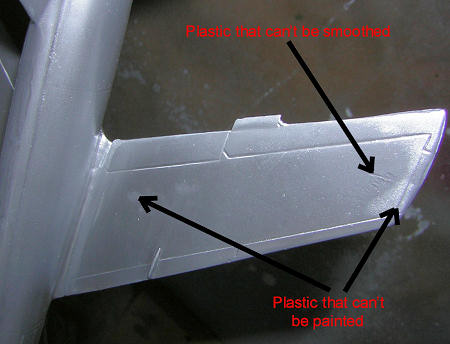
Mach 2 plastic is medium entirely different from any material modelers have ever encountered; even those who dabble in vacu-form and resin. It less resembles styrene than it does a matrix of bees wax and gorgonzola cheese. Neither the mushiness of the stuff, nor its graininess, roughness, and ample surface pits, are its greatest drawbacks. Lack of consistency is. Its homogeneity is entirely hetero. Some areas will crumble when treated to sand paper. Some seem to be imbued with greasy stuff, or else are forever “out-gassing” solvent and refuse to accept paint (see photos on both accounts). The caveats and precautions that must be observed are best stated up front:
DON’T glue it.
DON’T file it.
DON’T fill it.
DON’T sand it.
DON’T scribe it.
DON’T polish it.
DON’T paint it.
DON’T dry it.
Gluing Mach 2 plastic is
similarly touchy. Once the waxy stuff gets into its nostrils a whiff of toluene,
acetone, of methyl-ethyl keytone it transforms itself into a fifth state of
matter, somewhere between liquid and solid; about the consistency I recall to be
the ground back up in Vermont during those early April weeks we un-fondly
referred to as “Mud Season”.
New
For similar reasons of solubility, fillers such as Bondo and Green stuff do not work. Even if the plastic would dry without shrinking, which on either count it will not do, the disparity in hardness would make improbable an invisible, feathered seam.
 Sanding,
filing, grinding, and polishing are also nearly impossible. The stuff seems to
either melt or crumble under the lightest strokes. The best tool for removing
semi hardened ooze from joints is actually a fingernail. Once the grossest and
most offending protuberances are excised, do nothing before coating the airframe
with automotive sandable primer.
Careful with the wetness of the
coat; remember what I said about solvents. Consider the model merely a skeleton
on which to hang primer and paint. Do all the surface prep on those layers,
avoiding abrasion down to the pathetic bedrock.
Sanding,
filing, grinding, and polishing are also nearly impossible. The stuff seems to
either melt or crumble under the lightest strokes. The best tool for removing
semi hardened ooze from joints is actually a fingernail. Once the grossest and
most offending protuberances are excised, do nothing before coating the airframe
with automotive sandable primer.
Careful with the wetness of the
coat; remember what I said about solvents. Consider the model merely a skeleton
on which to hang primer and paint. Do all the surface prep on those layers,
avoiding abrasion down to the pathetic bedrock.
The proscription against
drying refers to heat.
Do not subject
a Mach 2 kit, particularly one that has been treated to solvent glues, to any
source of radiant or conductive thermal energy exceeding the surface temperature
of
| CONSTRUCTION |
 Not much in
this department that hasn’t already been said. Before mating the fuselage halves
put plenty of lead or depleted uranium in the nose. A cockpit floor and rear
bulkhead are provided along with a barely recognizable ejection seat for those
who would like to display the flight deck open. I included the floor only as a
mounting point for the nose wheel,
and a more shapely seat because you can actually see
through those tiny windows and the emptiness would be evident.
Not much in
this department that hasn’t already been said. Before mating the fuselage halves
put plenty of lead or depleted uranium in the nose. A cockpit floor and rear
bulkhead are provided along with a barely recognizable ejection seat for those
who would like to display the flight deck open. I included the floor only as a
mounting point for the nose wheel,
and a more shapely seat because you can actually see
through those tiny windows and the emptiness would be evident.
The cockpit hood is all transparent, or rather translucent, so the windows have to be masked. Mach 2’s clear parts are actually amenable to polishing. I got some improvement by buffing with Johnson’s Scratch Out auto polish. Keep the Dremel tool working slowly and in short bursts to avoid melting.
The wing parts are thankfully and perhaps thoughtfull y
molded with the leading and trailing edges attached to the upper half; but lots
of tweaking is necessary to get a decent airfoil. I replaced the plastic pitot
probe with a quilter’s pin and formed a nosecone transition out of gel acrylate.
y
molded with the leading and trailing edges attached to the upper half; but lots
of tweaking is necessary to get a decent airfoil. I replaced the plastic pitot
probe with a quilter’s pin and formed a nosecone transition out of gel acrylate.
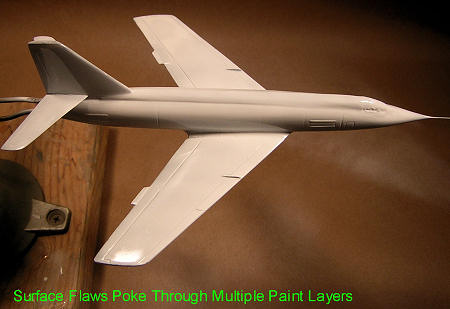
Before learning how difficult it is to get a decent surface, I primed with bright silver to reveal all the faults. I ended up sanding and re-spraying about a half dozen times before giving up and encasing the plane in auto primer.
| COLORS & MARKINGS |
A Mach 2 kit is not the substrate on which to attempt a flawless finish. Good enough has to be good enough. I visually softened all boogers with several heavy coats of Testors square bottle white, diluted only enough to get it through the airbrush tip at high pressure. After several days of drying, those infernal unpaintable areas had bled through all 17 coats and caused wrinkled areas. Sanding and repainting would have accomplished nothing so I just left them.
With so many shortcomings in a
kit, one might hope that at least the decals would be trouble free; but no such
luck. On the sheet
 they
look promising with no hint of a carrier film surround.
That’s because the carrier film
covers the entire sheet and each marking
must be individually trimmed, a
process not worth the effort because they are so thick and otherwise unworkable.
I managed to find reasonable replacements in the spares box
-
but never got the opportunity to
apply them.
they
look promising with no hint of a carrier film surround.
That’s because the carrier film
covers the entire sheet and each marking
must be individually trimmed, a
process not worth the effort because they are so thick and otherwise unworkable.
I managed to find reasonable replacements in the spares box
-
but never got the opportunity to
apply them.
| FINAL DESTRUCTION |
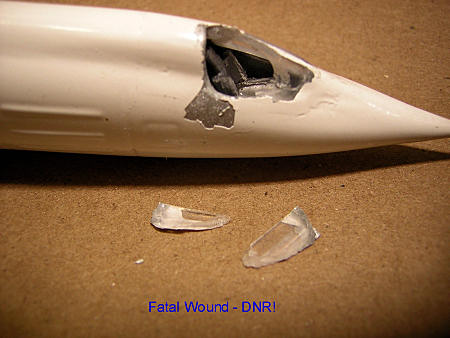
 fairing in with the fuselage. The plastic that I had condemned as soft and waxy
somehow shattered into shards, the likes of which I had not seen since my days
of stuffing firecrackers into just-completed planes.
fairing in with the fuselage. The plastic that I had condemned as soft and waxy
somehow shattered into shards, the likes of which I had not seen since my days
of stuffing firecrackers into just-completed planes.
Notions of heroic revival efforts tumbled through my brain. I could glue the pieces together, form a female mold with Alumite, slosh-cast a replacement hood with clear epoxy or a solid form on which to vac one. Cutting away the old remnants would be touchy; and blending in the repair would take many hours of intricate sanding.
My wife, who over the previous week of dinners had heard my laments about the kit, and who on so many occasions had offered sage but unheeded advice, reminded me of a guiding principle we had learned in EMT class: When the victim’s death is unquestionable – DNR – Do Not Resuscitate!
Clearly it was; so I did not. I therefore end with this…
| CONCLUSIONS |
May 2008
If you would like your product reviewed fairly and quickly, please contact me or see other details in the Note to Contributors.