| KIT: | Academy 1/72 F-86F Sabre |
| KIT #: | 1629 |
| PRICE: | $15.99 MSRP |
| DECALS: | Two options |
| REVIEWER: | Greg Ewald get greg's e-mail |
| NOTES: | Stolen Hobbycraft kit. Sure needs a lot of work |
| HISTORY |
The Sabre was certainly something, a heavier version of the reverse engineered TA-183 German project with a bunch of new ideas tossed in, it became quite the dogfighter in the wars after WW2, and was produced in a number of variants. Other reviews on this site have covered the 86 quite nicely, but I did find out that there were some tests involving a supersonic fighter carrying a small tactical nuclear bomb, and that piqued my interest (see link at bottom of page). If they had ever been used in combat, they would have been extremely effective, but luckily, the military commanders were sane, and the cold war fizzled out.
| THE KIT |
Clunky molds produce clunky kits.
This is one of them, with flash all over, and more ejection pin marks than you
can believe…plan on spending some time with a razor knife, sanding pads, sticks,
and putty if you pick this one up. The detail is actually quite well
 done, with recessed panel
trenches (too big to be lines) that require some filling, but a neat cockpit.
done, with recessed panel
trenches (too big to be lines) that require some filling, but a neat cockpit.
Engineering –wise, it is wonderful, the parts fit together so tightly that you would think you were building a tamigawa, but, that is where the whole thing starts to fall apart…the rather basic instructions give you a little bit of inspiration, but don’t count on locating points or options, just a series of exploded drawings showing you where the piece may or may not go.
The decals are stunning, I’ll say that…a really nice sheet with all the bells and whistles to produce two aircraft that look virtually the same, except the nose art and the actual numbers. I didn’t use them.
The gray styrene is nice and firm, easy to cut and sand…a real pleasure to work with (it had better be, because you’ll be doing a lot of work), but the clear pieces were super thick and extremely brittle…if you don’t have Xuron’s or the like, buy them when you get the kit, and save yourself a lot of headaches !
| CONSTRUCTION |
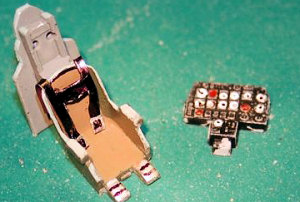
Let’s start with the cockpit, O.K. ?
Once you have separated all of your parts necessary for this bit from the
plastic sprue, take your time to test fit every single piece, and sand down
accordingly. If you can’t figure out exactly where something goes, don’t
worry…I couldn’t either. Only two of the 13 pieces have locating pins, for the
rest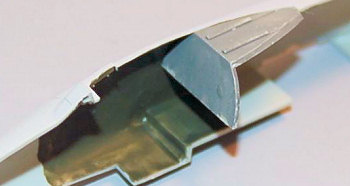 it is up to you to see
what develops, and what looks like the real thing. It would be a good idea to
paint all of these bits on the sprue, and touch up after assembly , so that you
can get all the details of the well molded controls picked out without a
sacrifice to the Carpet Deity.
it is up to you to see
what develops, and what looks like the real thing. It would be a good idea to
paint all of these bits on the sprue, and touch up after assembly , so that you
can get all the details of the well molded controls picked out without a
sacrifice to the Carpet Deity.
The rear portion of the cockpit, part C24, should be glued to the port fuselage half, and not to the seat assembly, wait a bit on this one.
When you go to join the fuselage halves together, don’t glue in the cockpit assembly…leave it free floating. Trust me on this one, or you will be miserable... I also left off the jet exhaust, since it fits nicely in the airframe at a later point.
Wing time: the main wheel wells,
for some odd reason, are molded separately from the bottom wing half, and once
again, zip on the location marks. Take two toothpicks, and put them in the
receiving holes for the landing gear, then glue it in place using c/a or
something strong ( you don’t want your jet to
 squat after a year or two, do
you?) If you are going to use the pylons, drill out the appropriate holes for
them at this time.
squat after a year or two, do
you?) If you are going to use the pylons, drill out the appropriate holes for
them at this time.
Don’t follow the instructions and glue on the upper wing surfaces yet…attach the bottom to the fuselage (once again, a perfect fit) and then test fit the upper wing halves to the lower…my sample took quite a bit of sanding to get to fit correctly, but needed almost no putty.
Now is a good time to attach the nose, and you will see why the cockpit is still rattling around like a loose-spruce-goose in the airframe. If you had glued in the pit, the nose would be off of center (no locating bars or pins)…now, you can adhere the nose, then bring the cockpit up to meet it perfectly! Viola!
Canopy. One of the biggest complaints about this kit that I’ve read online is that the fit of the canopy is atrocious. It is. Once again, test fit, test fit, test fit, and THEN glue in place. I had to shave off a few mm’s of the front HUD just to get the glass on. Most people seem to place the rear canopy in the open position, which is good, because if you put the thing together according to the instructions, you won’t be able to close it.
| COLORS & MARKINGS |
 I like bare-metal-finish, I
really do. I have a ton of respect for those of you who can carry it off
convincingly, but mine always look like they are bald…thank heaven’s for foreign
air powers that camo their jets!
I like bare-metal-finish, I
really do. I have a ton of respect for those of you who can carry it off
convincingly, but mine always look like they are bald…thank heaven’s for foreign
air powers that camo their jets!
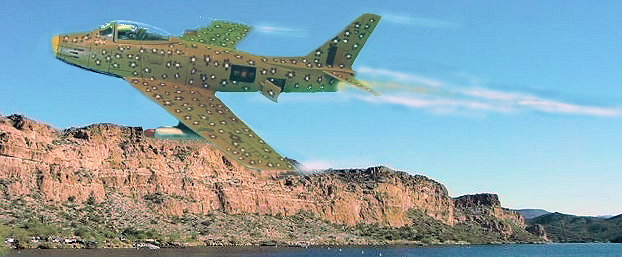
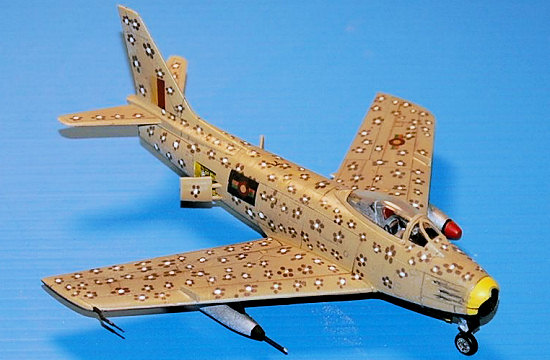
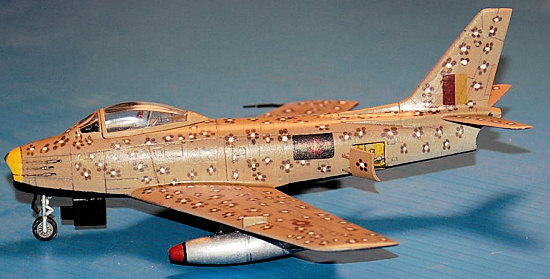
Since I wanted to do a Ceylonese (Sri Lanka to you modernistic folks) 86, I decided that the pattern would have to be something unusual…hey, leopard print? Why not? A few minutes on the graphics and a quick run through on the inkjet resulted in some 1/72nd camouflage decals, which, once dry and sprayed with clear, were applied one by one onto the whole upper surface of the plane, which had been painted desert tan and sealed with Future.
The bottom was painted a satin black, with panel lines picked out in silver pencil…subtle, but effective.
Once the sealer coat went over the decals, it was time to pastel weather the upper bits, seal again, and start applying the parts that easily break off.
| FINAL CONSTRUCTION |
The gear doors are a real trip…for
some odd reason, they put the hinge pins on the WRONG side of the nose gear
door, at least according to every photo I could find for the F model. Cut them
off, and put it on the port side (as the instructions show). The main gear do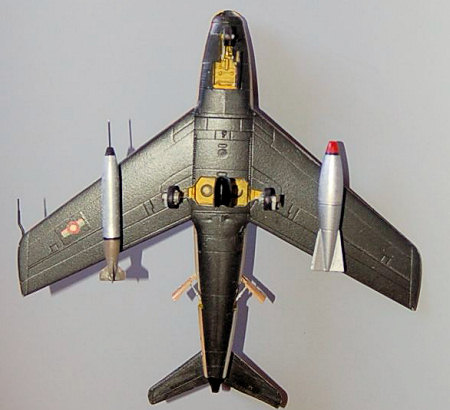 ors
would normally be up, even with the landing gear down, but I wanted this bird to
be ready to take on the British Empire at a moment’s notice, so the were hung
down…thanks for concrete runways!
ors
would normally be up, even with the landing gear down, but I wanted this bird to
be ready to take on the British Empire at a moment’s notice, so the were hung
down…thanks for concrete runways!
The gear was installed, wheels painted and attached, although not an easy process when the molding did not have the central pins to glue the wheels to. Sigh…this one just gets better and better. Hey, at least the side door/brakes went on without a hitch…they have locating pins, but don’t hang correctly. By this time, I was past caring.
I used the kit parts to make the AGB 12 nuke, and a spare for the air-air refueling pod, both were attached to the kit pylons, I set the thing down and breathed a sigh of relief.
| CONCLUSIONS |
O.K. I am not a big fan of most jet aircraft, and the Sabre falls into that category, but this kit was one of the biggest pains I have ever had to work on. HitKits go together with less issues. For Sixteen bucks, you get a dinky little jet, about the size of a P-47, with problems. I don’t know, I didn’t like the experience very much, but I’m sure the other brands may be a bit of fun to put together.
If you like jets.
March 2007
| REFERENCES |
http://www.af.mil/photos/index.asp?galleryID=162&page=3
If you would like your product reviewed fairly and quickly by a site that has over 350,000 visitors a month, please contact me or see other details in the Note to Contributors.