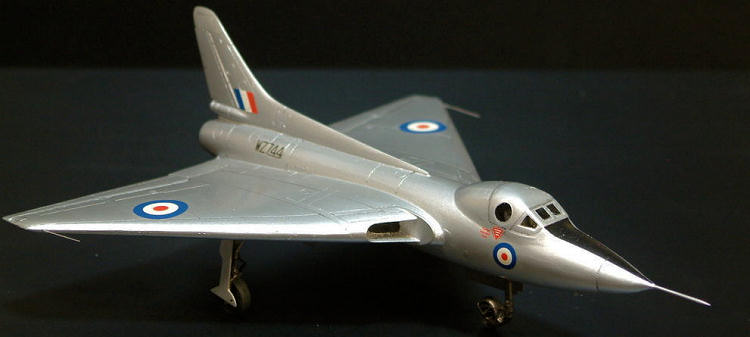
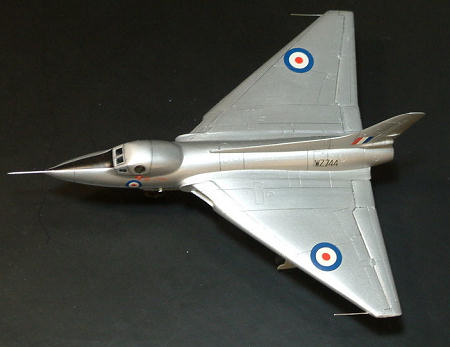
ProResin 1/72 Avro 707C
| KIT #: | R72-029 |
| PRICE: | $ |
| DECALS: | One option |
| REVIEWER: | Martin Pohl |
| NOTES: | Resin kit with vacuformed canopy. |
| HISTORY |
The Avro 707 was a British experimental aircraft built to test the delta wing
design for the Avro 698 jet bomber (later to become the Vulcan), and was
effectively a one-third scaled-down version of that aircraft.
The prototypes were ordered by the Ministry to specification E.15/48. The
aircraft were produced cheaply and quickly using
 components
from other aircraft. Five prototypes were built in the end. Only the first three
produced provided useful information for the Vulcan project, the last two flying
too late to be of much relevance.
components
from other aircraft. Five prototypes were built in the end. Only the first three
produced provided useful information for the Vulcan project, the last two flying
too late to be of much relevance.
The first prototype, the Avro 707, crashed on 30 September 1949.[1] Consequently
the second prototype was converted during building with the pointed nose planned
for the 707A to become the 707B. The B got a top mounted engine intake. The B
would eventually end up as spares for the others. The next one to fly was the
707A, a faithful copy of the Type 698's wingform including engine intakes, and
intended for high speed testing. In 1956 it was transferred to
The Avro 707 made its final public appearance at the Farnborough Air Show; the
four surviving examples of the aircraft flying alongside two Vulcan prototypes.
Two examples of the Avro 707C two-seat variant survive. One is located at the
| THE KIT |
It is an all resin kit and that says it all I think. You get 40 resin parts and two vac formed canopies. It is a typical Pro Resin kit. I’ve done some so far and they are all the same. The detail is very good. The only thing I have to complain about is that the landing gear is resin too. It would be much better if they would do those in white metal as the resin landing gear begins to deform as time goes by.
| CONSTRUCTION |
After removing the flash and separating the parts I put them in a soapy water
for a while. This is my third Pro Resin kit and
 working
on it was quite the same as on the other two. So there is not that much I can
say on the construction side. The instructions are given in five steps and I
just followed them. Sure there were some areas I had to do some filling but as I
some moons back started to use wax as a filler for those resin kits filling and
“sanding” is just easy and quick.
working
on it was quite the same as on the other two. So there is not that much I can
say on the construction side. The instructions are given in five steps and I
just followed them. Sure there were some areas I had to do some filling but as I
some moons back started to use wax as a filler for those resin kits filling and
“sanding” is just easy and quick.
Let me perhaps give some information on wax as a filler.
First: don’t use candle wax, it’s made to be burned and not to fill seams.
Better get this wax your Dentist is using for building up the models of your
third teeth. I found a company here in
The main advantages of wax are: its easy to apply – well you need a wax melting
instrument, but those you can find in the web – and its easy to “sand”; you just
need some dentist instruments or some small chisels to scratch it away. This way
the damage of sanding is very minimized almost zero.
| COLORS & MARKINGS |
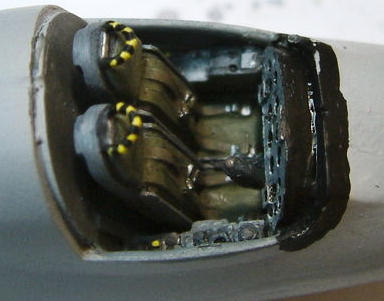
The cockpit was painted mid gray. The ejector seat did get the eject handle in
yellow black and all other details I painted as given
 in the
instructions. Well if you close the canopy like me you could safe time and
material here, cause you hardly see anything inside.
in the
instructions. Well if you close the canopy like me you could safe time and
material here, cause you hardly see anything inside.
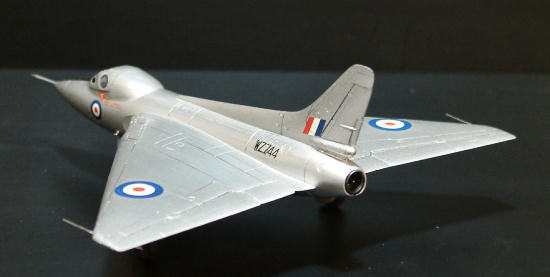
It got a base of Createx Gray Base (this is a mixture made form Createx Black
and White base) and onto this my heat pipe silver was sprayed. I used this
silver on some other birds and I for me found it easier to use than ALCLAD; it
is more forgiven.
The landing gear bays were painted medium gray, as the instruction stated. Some
minor washing was done too, but not that much, as this bird never get very dirty
I guess.
The decals offered by the kit also went on without any complains, so again I
can’t tell that much here.
In the end a coat of satin went on it – and finished.
| CONCLUSIONS |

Well and for the subject, the Avro 707 series are seldom seen birds. So if you
like me in the rare subjects this one is for sure one for you, I now have all
the prototypes of the Vulcan in my shelf and I can hear the Vulcan rumbling in
the stash :)
| REFERENCES |
Internet (Google for Avro 707) and Wikipedia
January 2012
If you would like your product reviewed fairly and fairly quickly, please contact the editor or see other details in the Note to Contributors.