Red Roo Models 1/72 RFD Winged Target
|
KIT #: |
RRK 72001 |
|
PRICE: |
$20.00 |
|
DECALS: |
None provided |
|
REVIEWER: |
Peter
Burstow |
|
NOTES: |
Resin kit |
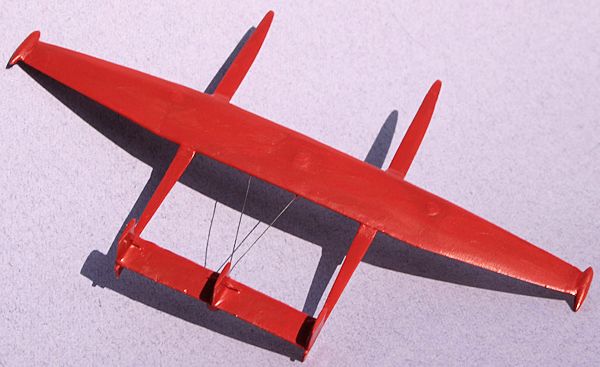
Designed as a high speed towed target, the
winged target was a twin boom aircraft, constructed of resin bonded plywood. It
was able to be towed above 200 knots, so was a more realistic target than the
previously used fabric drogues.
 Developed in Sweden, the winged
target was produced in Britain by Rubberised Fabric Developments, better known
for life jackets and dingies. Ten were supplied to the RAAF in 1952 and
allocated serials A88-1 to 10. They were not much used, and declared surplus in
1954. Just
the thing to put behind a target towing Meteor, Beaufighter, Vampire or other
1950's tow plane.
Developed in Sweden, the winged
target was produced in Britain by Rubberised Fabric Developments, better known
for life jackets and dingies. Ten were supplied to the RAAF in 1952 and
allocated serials A88-1 to 10. They were not much used, and declared surplus in
1954. Just
the thing to put behind a target towing Meteor, Beaufighter, Vampire or other
1950's tow plane.
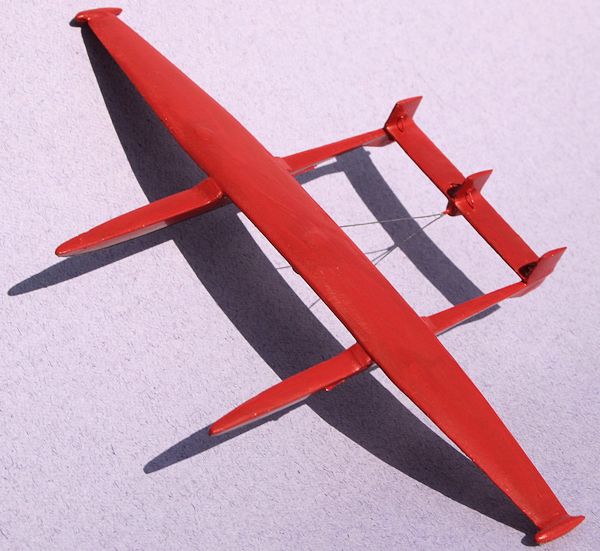
There are eight resin parts to this simple
kit, cast in grey resin, with sharp edges and details. There are visible small
bubbles on the wings, and a large bubble on the trailing edge of the tailplane.
The long parts, the wing, and the two fuselage booms were slightly warped, but
easily fixed with hot water.
Some lengths of wire were included for
rigging. A jig is also supplied to line up the twin booms with the wing and
tailplane.
The instructions are four A4
pages, with photographs, sketches, a three view, extensive assembly notes and a
short history. They are sufficient to build the kit. The parts list differs
significantly from the parts supplied, as it describes separate fins and
tailplane parts, whereas the tail assembly came cast as one part.
 The parts were removed from the
casting blocks, and cleaned of
flash, then all given a wash.
I followed the instruction order and
added the rigging to the tailplane and fin casting first. Having this part
already as one piece made this straightforward. It seemed strange to do rigging
as a first step, but access was easy at this stage, and it was no problem to
hold the part rigid for drilling. I used invisible mending thread instead of the
supplied wire. I filled a gap between the tailplane and one of the fins, and
repaired the large bubble on the trailing edge. The dag ends of the rigging were
trimmed and sanded flat.
The parts were removed from the
casting blocks, and cleaned of
flash, then all given a wash.
I followed the instruction order and
added the rigging to the tailplane and fin casting first. Having this part
already as one piece made this straightforward. It seemed strange to do rigging
as a first step, but access was easy at this stage, and it was no problem to
hold the part rigid for drilling. I used invisible mending thread instead of the
supplied wire. I filled a gap between the tailplane and one of the fins, and
repaired the large bubble on the trailing edge. The dag ends of the rigging were
trimmed and sanded flat.
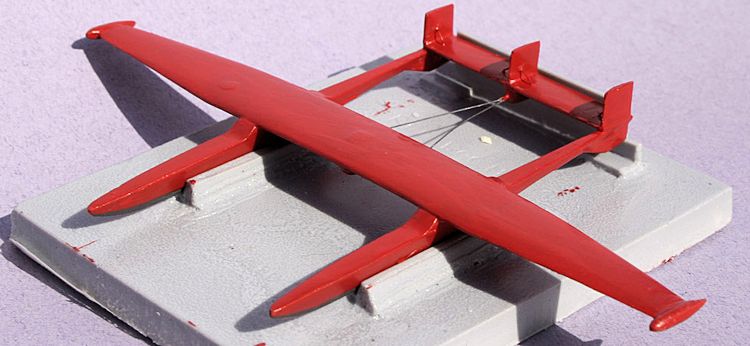
Assembly of the two fuselage booms
and the wing was easy using the jig, which kept everything square. I added a
fillet of superglue to these joints as the fit was not the best. Joined the tail
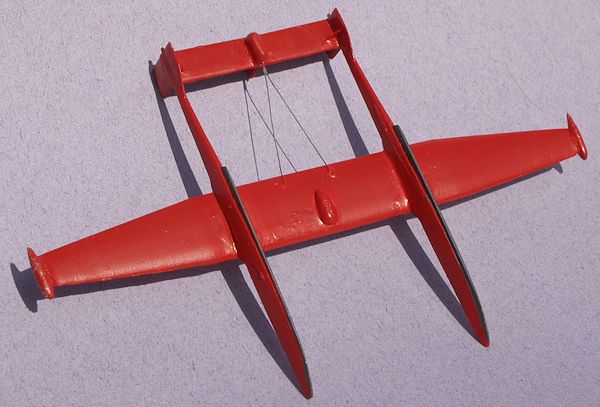
assembly, and finished the rigging. I added the small wing tip skids, parachute
and trigger housings, then added the rigging between the parachute housing and
the mainplane.
I didn't make or add the wire towing
rings and ground trigger which are detailed in the instructions. My eyesight is
just not up to such fine details.
The initial stage of painting was to apply a
coat of Mr Surfacer 1000, to deal with the small bubbles, then a light sand and
wash. The scheme on the instructions was simple, overall flat red, I used Tamiya
PC-2 gloss acrylic as my flat red had gone gritty. Needed a couple of coats as
coverage was not good. When dry I touched up the skids with Mr Metal Colour
Iron. Didn't apply any markings. The jig was useful in holding the kit while
painting.
 A quick and easy build of a
different sort of aircraft. With a wingspan of 26 feet it is larger than you
would expect. A good introduction to resin kits. Recommended for all.
A quick and easy build of a
different sort of aircraft. With a wingspan of 26 feet it is larger than you
would expect. A good introduction to resin kits. Recommended for all.
Ross Gillett, Australia's Military Aircraft, Aerospace, Canberra,
1987.
Peter
Burstow
May 2013
Copyright ModelingMadness.com. All rights reserved. No reproduction in any form without express permission from the editor.
If you would like your product reviewed fairly and fairly quickly, please
contact
the editor or see other details in the
Note to
Contributors.
Back to the Main Page
Back to the Review
Index Page 2025