
| HISTORY |
Gerald Elliot 1/72 Shackleton Mk. II
| KIT #: | ? |
| PRICE: |
£9 |
| DECALS: | None provided |
| REVIEWER: | Carmel J. Attard |
| NOTES: | Vac form kit with white metal undercarriage and propeller blades |

| HISTORY |
 consisted of a detachment of nine aircraft from both 37 and 38 RAF Squadrons
that originally formed at Ramat David conducting several duties over the
Anti smuggling patrols from Hal-Luqa
continued throughout spring 1956. During an exercise a Sea Venom crashed in the
sea while making a simulated attack on a Shackleton and a number of sorties were
flown to look for survivors. The same year President Nasser seized the
 duties by the Shackletons were conducted. 3
Sorties were flown to try and find an Admiral Calamai of the Italian Navy who
fell overboard from his yacht in an area west of
During a search for an F-86 Sabre
pilot the attention of the crew on patrol was attracted by a heliograph flash
and a successful Lindholme drop was made to the survivor in his dinghy. During
1957 there were ten SAR incidents with the Shackleton calling on duty on all of
them. A lot of time was also spent in locating and shadowing the Russian
warships and submarines as they passed through the
There were many other follow-up
missions over the years many of which involving shadowing the Russian fleet
ships as they crossed the central Mediterranean, locating missing servicemen in
the desert, locating a missing Canberra jet aircraft of 39Sq that failed to
return to Hal-Luqa base, locating an Avro Tudor that crashed in Turkey and had
top secret sensitive equipment on board. This was spotted on a mountainside,
which was close to the Russian border. Supplies were dropped and the equipment
was recovered. The Shackleton remained the stalwart on a good number of missions
long time after until its retirement in the form of an Airborne Early Warning
system after aircraft types as the AEW Gannet went out of operational service,
others were replaced by Shackleton Mk3s and eventually by Nimrod jet aircraft.
| THE KIT |
There are two ways that one can
build a Shackleton Mk2 to a scale of 1/72. Either use a Frog/Revell Mk3 merged
with Aeroclub conversion kit for a Mk2; or use a vac form Gerard J Elliot 1987
Kit. I opted for the latter method. The kit comes in a short run type
 of
cardboard box having a side view picture of a Shackleton on the cover. A
two-page spread instruction sheet, printed on one side contains part scale plans
of a Shackleton Mk 3 fuselage and Mk1 plan view. Strangely enough the box I
bought was for a Mk2 and here is where the confusion starts. Eventually I
realised that the box was intended to build any of the three types but in
reality it is not the case, proper parts for the Mk2 were not included and I had
to do a lot of extra work to arrive to the Mk2. Even so the kit contained none
of the clear parts suitable for a Mk1.The fuselage parts given conformed only to
a Mk 3 which had a much deeper nose shape than the Mk2.
of
cardboard box having a side view picture of a Shackleton on the cover. A
two-page spread instruction sheet, printed on one side contains part scale plans
of a Shackleton Mk 3 fuselage and Mk1 plan view. Strangely enough the box I
bought was for a Mk2 and here is where the confusion starts. Eventually I
realised that the box was intended to build any of the three types but in
reality it is not the case, proper parts for the Mk2 were not included and I had
to do a lot of extra work to arrive to the Mk2. Even so the kit contained none
of the clear parts suitable for a Mk1.The fuselage parts given conformed only to
a Mk 3 which had a much deeper nose shape than the Mk2.
Kit is molded in white acetate. No
decals are supplied with the kit and black silhouette sections are given to form
bulkheads at different stations along the fuselage as this is a big vac form kit
and would certainly strengthen the construction when added.
Strangely enough no bucket radome is given in spite that both the Mk2 and
Mk3 use it. So one have to sort out this problem one way or another.
| CONSTRUCTION |
 A standard practise is followed as
appropriate to building a vac form model. The white plastic pieces are scored
and cut with a sharp knife. These are then placed on a medium/fine sand paper on
a flat surface and gently rubbed down on mating edges of the
 moldings to remove
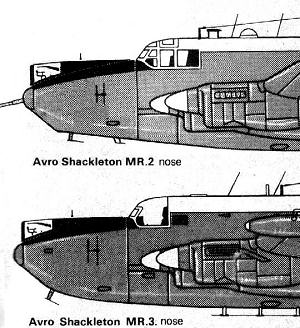
excess plastic. A major surgery was carried out to forward under fuselage area
as this had to be reshaped to the style adopted on the Mk2 which differed from
the Mk3. (See diagrams). This required altering the lower surface of the nose
and adjusting to conform to new shape using plastic card and filler. The four
section formers/bulkheads are cut and glued to one half of the fuselages, Wheel
well boxes are drawn and cut from backing plastic and fixed in lower wing halves
in the inner engine nacelles and aft fuselage where the tail wheel is located.
The round blister and square windows are drilled, then cut and shaped with a
file.
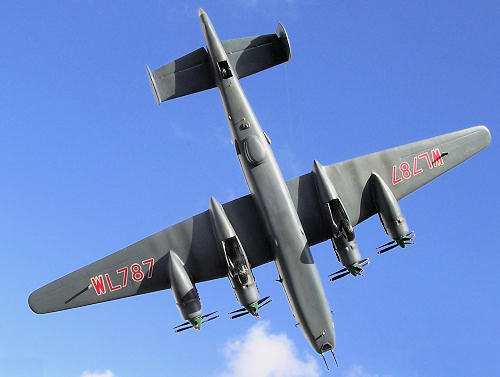 A length of plastic strip forming a beam is positioned through slots in
fuselage wing root section. This will allow the wing parts to be supported when
glued in place. The cockpit office is build out of the scrap backing plastic.
These include coaming, instrument panel, crew seats, central console etc.
Interior painted black and crew seats had seat straps added, instruments painted
and control wheels also inserted. I also added a couple of crew figures, which
gives a degree of scale to the aircraft size. An observer/nose gunner seat was
added to forward fuselage. The fuselage is closed and a radome part that I cast
in aluminium using one from a Frog Mk3 kit, as pattern was super glued to the
underside of rear fuselage.
Wings, engine nacelles, tail planes and fins and
rudders all assembled in a sequence making sure that they are well aligned.
Metal undercarriage is glued in place. Metal separate blades are also assembled
to the spinners using super glue. Care was taken to fix these well as any
miss-alignment of the contra rotating propellers would spoil the overall
appearance of the completed model. A vac form clear cockpit was cut and
carefully masked prior to gluing it to cockpit. Aerials, ECM roof attachment,
and astrodomes were then added. More detail was also added to the wheel well and
oleo legs. Tail wheel doors added and details as air intakes reshape to engines
was done at this stage.
| COLORS & MARKINGS |
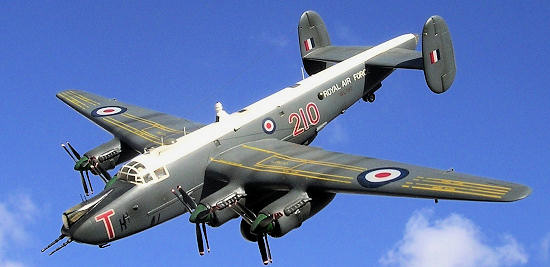 As no decals come with the kit I
had to resort to ‘Controdecal’ set supplied at the time by Peter Sutcliffe.
These were not as good and opaque as I would have wished but they served good in
this circumstance, as they were the only ones on the market to come to the
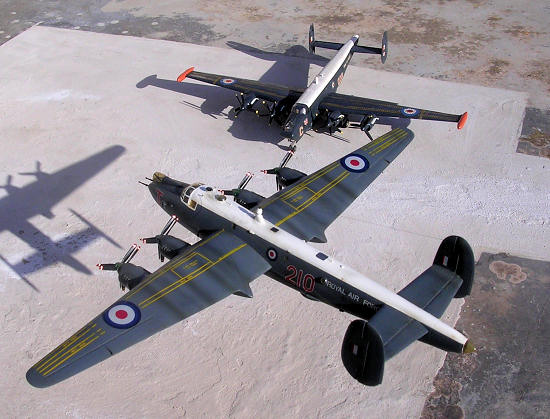
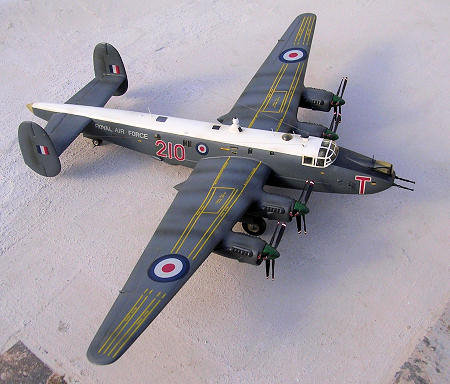
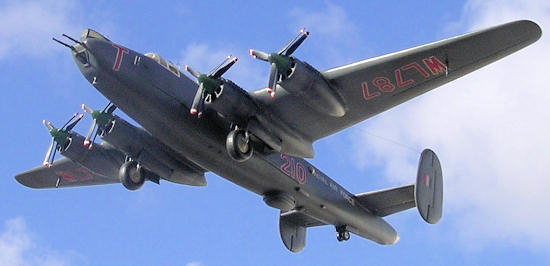
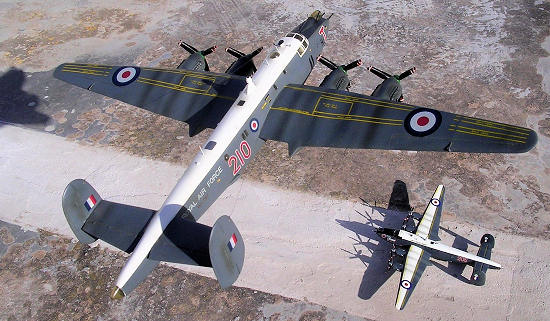
rescue. The model was airbrushed in semi gloss dark sea grey with white anti
glare upper fuselage. Incidentally the white upper finish cooled the inside
temperature of the fuselage by 12 degrees Celsius on the ones based at Hal-Luqa
improving comfort to the air craw inside.
I decided to represent my Shackleton to one that made frequent visits to
| CONCLUSIONS |
| REFERENCES |
History of No 38 Squadron RAF
1916-1963
February 2011
If you would like your product reviewed fairly and quickly, please contact me or see other details in the Note to Contributors.