|
KIT: |
Pro Modeler 1/48 F-84G Thunderjet |
|
KIT # |
5951 |
|
PRICE: |
$20.75 |
|
DECALS: |
See Review |
|
REVIEW & |
|
|
NOTES: |
|
HISTORY |
The Project:
I first read Colonel Robert L. Scott Jr.'s aviation classic, "God Is My Co-Pilot," at age 10. Many years later, when I met him at a American Fighter Aces Association convention where he complimented me on an article I'd written about Chuck Yeager, which he called "the best bit of writing about a fighter pilot I've read." I still consider that the best compliment I've ever received as a writer, and it was nice to tell him that reading his book those many years ago had been part of the inspiration that had propelled my life as a writer.
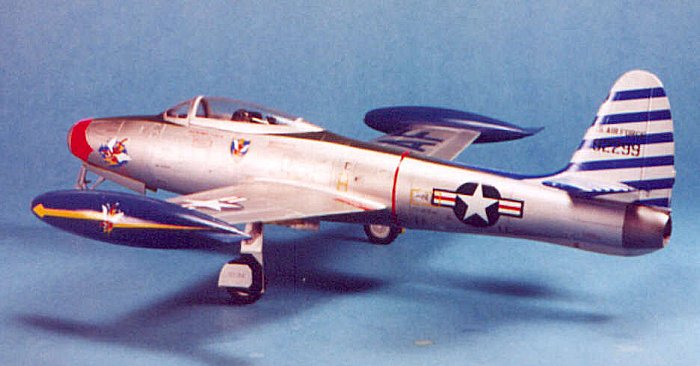
I also read his later book, "Way of the Tiger," which is actually a collection of his short articles and stories published over the years. In it is a story of a flight around Africa he made as commander of the 36th Fighter Bomber Wing in November 1951. This was the first time that U.S. Air Force jet fighters had operated south of Wheelus AFB in Libya, and the two F-84Es with their colorful blue-and-white striped tails caused quite a sensation as they flew into airports in equatorial Africa that had never seen jets before. The story stuck in my mind. Thus, when I saw the Cutting Edge sheet for Scott's Thunderjet, it immediately struck me that I wanted to do the early version, the airplane the way it looked flying over the Congo back in 1951. the big problem was, Scott's airplane was an F-84E, a sub-type of the Thunderjet that is - in its details - different from the F-84G. At the time, the Tamiya kit was the only one available, but there was word that ProModeler was going to release an F-84E; the decals went into the dungeon to await the kit's arrival.
 A year later, the kit
appeared - as an F-84G!! I had one as a review copy, but comparing it to the
Tamiya kit left the Pro Modeler release languishing in the pile of kits unlikely
to see the light of day as models. There were many things wrong with it, from
both accuracy of representing an F-84G to production design of the kit, that
didn't appeal to me.
A year later, the kit
appeared - as an F-84G!! I had one as a review copy, but comparing it to the
Tamiya kit left the Pro Modeler release languishing in the pile of kits unlikely
to see the light of day as models. There were many things wrong with it, from
both accuracy of representing an F-84G to production design of the kit, that
didn't appeal to me.
This past summer, Planes of Fame Air Museum picked up an F-84E fuselage from some boneyard. The carcass was braced on the ground, close to the museum's F-84G. During one of my visits, I glanced at it. And took a second look. All those things that seemed to be wrong on the Pro Modeler kit were there on this fuselage! The different-shaped rudder, the longer ventral fin, etc. Looking at the F-84G I saw those things were not on that airplane. I skedaddled to the gift shop, grabbed a copy of the Squadron-Signal "F-84 Thunderjet In Action" and went through the photos. All of the airplanes identified as D and E models had that rudder and ventral fin.
What had happened was, Pro Modeler had been going to do the F-84E, and that is what they did, except they changed at the last moment and included parts for the forward fuselage with the blow-in doors, to create an F-84G (why, I don't know). I realized that, if I covered over those blow-in doors, got rid of the in-flight boom refueling port, and sanded off the external canopy braces, I would have that early F-84E I wanted. The project was born.
|
THE KIT |
The Pro Modeler F-84 is not a bad kit; it's just not a great kit, and unfortunately its competition - the Tamiya Thunderjet - is an excellent example of the kit maker's art, with a good production design and excellent production quality. The only place the Pro Modeler kit beats the Tamiya kit is in the answer to this question: Do you want to make an F-84E?
|
CONSTRUCTION |
 Construction started with
something I normally don't have to worry about any more with a mainstream kit
manufacturer: I had to clean up a lot of flash. And I had to de-warp the upper
half of the port wing. I dipped it in just-below-boiling water, then taped it on
a piece of glass and ran that under cold water. The warp wasn't completely cured
but it was much better, and I just rolled the part over my knee afterwards till
I made it straight.
Construction started with
something I normally don't have to worry about any more with a mainstream kit
manufacturer: I had to clean up a lot of flash. And I had to de-warp the upper
half of the port wing. I dipped it in just-below-boiling water, then taped it on
a piece of glass and ran that under cold water. The warp wasn't completely cured
but it was much better, and I just rolled the part over my knee afterwards till
I made it straight.
The cockpit is not as detailed as the Tamiya kit, which admittedly is not heavy on detail itself. If I had it, I would use the Cutting Edge resin Thunderjet cockpit; any differences between the F-84E and F-84G in the cockpit are likely not discernible in 1/48 scale, and that cockpit does look better. I modified the seat to the earlier ejection seat as shown in the drawing in the Squadron-Signal book, and then painted the cockpit flat black.
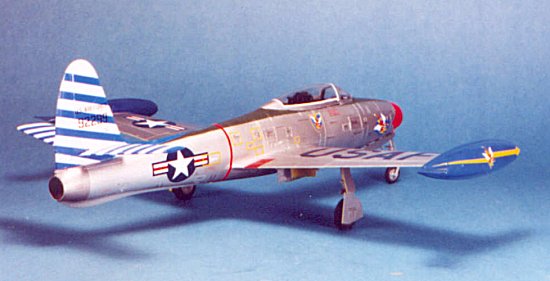
I assembled the rest of the model per the instructions, other than I cut off the nose gear doors, so that they could be attached after the model had been painted and decaled. I decided to assemble the dive brake closed, and the flaps in the raised position, which from photos is the way most Thunderjets sat out on the tarmac.
Having Futured the canopy after sanding it smooth and polishing it, I decided to assemble it in the closed position, since this would cover up the lack of great detail in the cockpit.
|
PAINT & DECALS |
Painting:
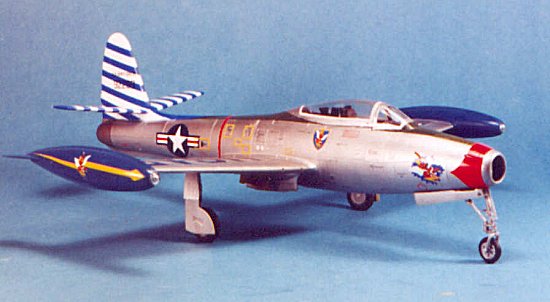
The gear wells and inside of the gear doors were painted with Tamiya yellow zinc chromate (they call it "Yellow Green"). The anti-glare panel was painted with Gunze-Sanyo aircraft Olive Drab. The tail surfaces were painted white. The tip tanks were painted a mixture of Tamiya gloss Blue and Intermediate Blue to get a color close to the blue shade in the decals. These painted areas were then masked off and the rest of the model was painted with SnJ aluminum. When this was dry, areas of the model were masked off and painted with Gunze-Sanyo Mr. Color Aluminum, and various shades of Testor's Model Master Metallizer paints, to give a multi-hued NMF finish. This is easy to do with SnJ as the base coat, since you can mask over it without fear of later pulling up the paint when removing the tape.
I Futured the model and prepared to do the decals.
Decals:
 Despite the fact that the
Cutting Edge decals were designed for the Tamiya kit with its slightly-different
rudder outline, the rudder stripes went on and proved to be large enough to
cover the additional surface of the PM kit. I slathered on Micro-Sol to all
these decals and let them set up overnight. The next day I Futured the tail
surfaces, and when they were dry and I could safely handle the model, I
proceeded with the rest of the decals.
Despite the fact that the
Cutting Edge decals were designed for the Tamiya kit with its slightly-different
rudder outline, the rudder stripes went on and proved to be large enough to
cover the additional surface of the PM kit. I slathered on Micro-Sol to all
these decals and let them set up overnight. The next day I Futured the tail
surfaces, and when they were dry and I could safely handle the model, I
proceeded with the rest of the decals.
Cutting Edge decals are, to me, too thin and delicate. They go on and look great, but if you look at them wrong during the process, they will curl up and die. In my opinion, a decal like you get with MicroScale is just fine: thin enough to go on well, thick enough to stand up to the process.
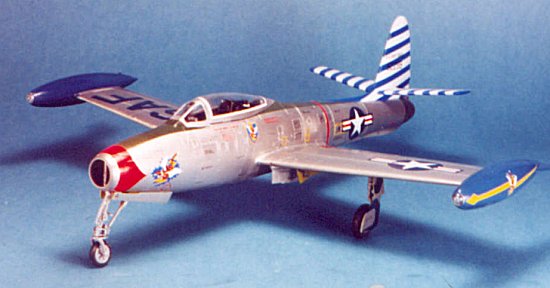
After putting on the national insignia and Scott's personal insignia, let the decals set up, then Futured them. I then put on the Cutting Edge stencils. These may be scale size, but they are so small that it's really impossible to tell if the stencil is "right" in its place. It took longer to do this than to do all the other decals combined.
|
CONCLUSIONS |
The model looks like photos of Scott's airplane. The markings are quite attractive and it looks good sitting next to my other Korean-era jets. If you want to put some effort forth, the Pro Modeler Thunderjet is not as bad as some people have said it is.
If you would like your product reviewed fairly and quickly by a site that has over 1,500 visits a day, please contact me or see other details in the Note to Contributors.