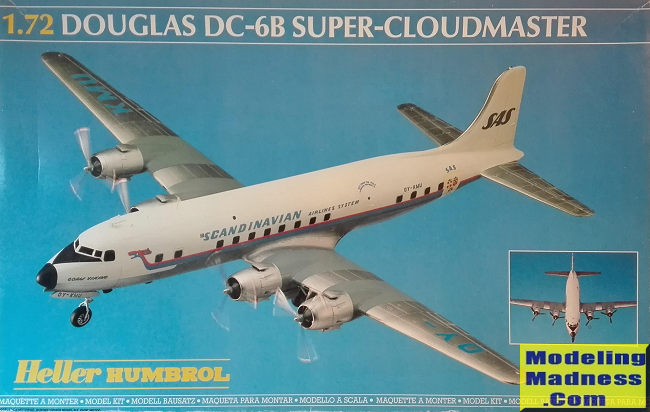
Heller 1/72 DC-6B Cloudmaster
| KIT #: | 80315 |
| PRICE: | €30 in 2005 |
| DECALS: | Two options |
| REVIEWER: | Spiros Pendedekas |
| NOTES: |
| HISTORY |
The Douglas
DC-6 is a piston-powered airliner and cargo aircraft built by the Douglas
Aircraft Company from 1946 to 1958. Originally intended as a military transport
near the end of World War II, it was reworked after the war to compete with the
Lockheed Constellation in the long-range commercial transport market.
It served the
USAF as the C-118 Liftmaster and the USN as the R6D prior to 1962, after which
all U.S. Navy variants were also designated as the C-118. More than 700 units of
all versions were built and many still fly today in cargo, military, and
wildfire control roles.
| THE KIT |
 Heller
introduced this big interesting kit in 1984 and has been regularly reboxing it
ever since, not only as DC-6B, but also as C-118 Liftmaster and (with modified
fuselage halves) as Securité Civile firefighter version. My copy was the 1985
DC-6B rebox under the Heller-Humbrol tag, bought in 2005 from one of my two
beloved Athens hobby shops. It came wrapped in the usual big and very nice
Heller top opening box, with a good looking finished model as a box art.
Heller
introduced this big interesting kit in 1984 and has been regularly reboxing it
ever since, not only as DC-6B, but also as C-118 Liftmaster and (with modified
fuselage halves) as Securité Civile firefighter version. My copy was the 1985
DC-6B rebox under the Heller-Humbrol tag, bought in 2005 from one of my two
beloved Athens hobby shops. It came wrapped in the usual big and very nice
Heller top opening box, with a good looking finished model as a box art.
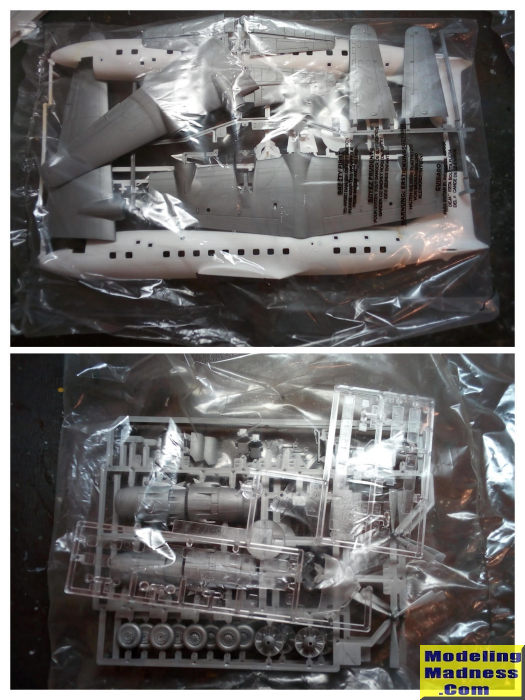
Upon opening
the box, I was greeted with 22 white and 54 silver-gray styrene parts. The white
parts are arranged in one big sprue and contain basically the fuselage halves,
together with some smaller parts (the cockpit tub, its rear bulkhead, the nose
leg and a few antennas).The silver-gray parts are arranged in three sprues: one
big, containing the aerodynamic surfaces halves and two smaller identical ones
which contain everything else (wheels, props, engine faces, cowlings, main legs
and so on). Surprisingly, panel lines are recessed and quite well done. Molding
is good with some flash here and there, with the surfaces exhibiting some slight
pebble-ness that will likely disappear after some light sanding.
Cockpit
includes floor (that doubles as nose wheel bay), rear bulkhead, instrument panel
(onto which a decal is to be affixed), two good looking seats and equally good
looking control columns. Given the not extensive glazing, I believe this average
cockpit detail will look sufficient. No passenger interior is provided
whatsoever, but, again, unless you want to cut-open the entry door, little will
be visible through the small windows.
Engines are
represented as merely faces with some molded on details, leaving quite some room
for improvement there. Cowlings are provided as left/right halves and look good,
as do the one piece props with separate hub covers. Landing gear bits also look
acceptable and the same can be said for the wheels, which feature molded-on
brake calipers at their inner sides - a nice touch. Wheel wells are not fully
boxed and do not feature any detail: again, room for improvement there.
Clear parts
are acceptable, with many of the passenger windows provided as rows, in order to
make the builder’s life easier. Instructions are typical old style Heller,
coming in the form of two big b/w printed A3 sheets stapled together. They
contain a very brief history of the type, with the seemingly uncomplex
construction spread in 10 clear and followable steps, with color callouts given
where needed.
 Two marking
schemes are provided, for a Scandinavian Airlines System (SAS) and a French
Union de Transport Aériens (UTA) bird. The decal sheet is big and looks very
nicely printed, only hoping that time has been kind to it, as it is almost 40
years old! All color callouts are only given in Humbrol codes, so, unless you
are a Humbrol aficionado, you should have your conversion charts handy!
Two marking
schemes are provided, for a Scandinavian Airlines System (SAS) and a French
Union de Transport Aériens (UTA) bird. The decal sheet is big and looks very
nicely printed, only hoping that time has been kind to it, as it is almost 40
years old! All color callouts are only given in Humbrol codes, so, unless you
are a Humbrol aficionado, you should have your conversion charts handy!
Instructions
want you to first assemble the cockpit, then attach the nose landing gear under
it, followed by assembly of the main landing gear and engines with props. Next
is attachment of side window transparencies from the fuselage innards, followed
by joining the fuselage halves with the cockpit trapped in between, together
with some (unspecified) weight at the front.
(Editor's note: This kit will need a LOT of
weight to keep from tail sitting. After adding it, you will find that the nose
gear will be unable to handle it. When I built mine way back when, I had to
reinforce the strut with wire to prevent it from constantly snapping off.)
Assembly and
attachment of wings and tail planes is next, followed by attachment of the main
landing gear, the four engine/prop assemblies and the various doors and
antennas, ending an apparently straightforward build.
| CONCLUSIONS |
This looks to
be a good kit of this important plane with seemingly correct general shape. The
average detailed cockpit and absolute lack of passenger interior are not too
irritating, since little will be visible once the fuselage closes. On the other
hand, the simplified engine faces and plain looking wheel wells will be quite
visible and will definitely benefit from some super detailing. Panel lines are
nicely engraved and the slight surface pebble-ness will not be too difficult to
attend. Molding is good with little flash (at least in my “early” 1985 copy) and
transparencies are also acceptable. Instructions are clear and decals are very
well printed and look in good condition after almost 40 years. This solid and
promising kit is still (as of 2022) the only game in town for a 1/72 Super
Cloudmaster. It is regularly reissued and can be found at reasonable prices.
Happy
modeling!
June 2022
Copyright ModelingMadness.com. All rights reserved. No reproduction in
part or in whole without express permission. If you would like your product reviewed fairly and fairly quickly, please contact the editor or see other details in the
Note to
Contributors.