| KIT #: | A01024 |
| PRICE: | £5 in the UK |
| DECALS: | One civilian option |
| REVIEWER: | Chris Peachment |
| NOTES: |
| HISTORY |
The Tiger Moth has to be the friendliest aircraft ever made. It came about to
fulfil a request from the RAF for an ab initio trainer. They had looked
at the DH 60 Gypsy Moth, but specified that the pilot in the front seat needed
to have a clear exit in case it was parachute time. So De Havilland's response
was to take the Gypsy Moth, move the aircraft's fuel tank on the upper wing
forward, and then sweep back the wings
 slightly to keep the same centre of lift.
This was all achieved in their workshop using a hammer and saw.
At the same time, they strengthened the frame, put fold down doors on
each side of the cockpits, and revised the exhaust.
slightly to keep the same centre of lift.
This was all achieved in their workshop using a hammer and saw.
At the same time, they strengthened the frame, put fold down doors on
each side of the cockpits, and revised the exhaust.
The result was an ideal trainer. Robust, cheap and simple, and, once anti-spin
strakes had been added, vice-free. It had perfect handling for a pupil, being
easy to fly well enough. And it was perfect for the instructor, because it was
harder to fly it very well, requiring skill and concentration, and so he could
weed out those who were too inept to continue. A necessary factor for saving
future lives.
Seventy five of them entered service in 1932, and by the end of WWII, their
numbers had swelled to 500. Many more were pressed into service from civil
operators, and it reached a final production run of over 7,000.
In August 1940, fearing German invasion, 350 Tiger Moths were fitted with bomb
racks to serve as light bombers. There were flight tests done with a "paraslasher,"
a blade intended to cut a parachutist's canopies, which proved feasible though
was never used. And it was even fitted with dispensers of rat poison to be used
against ground tro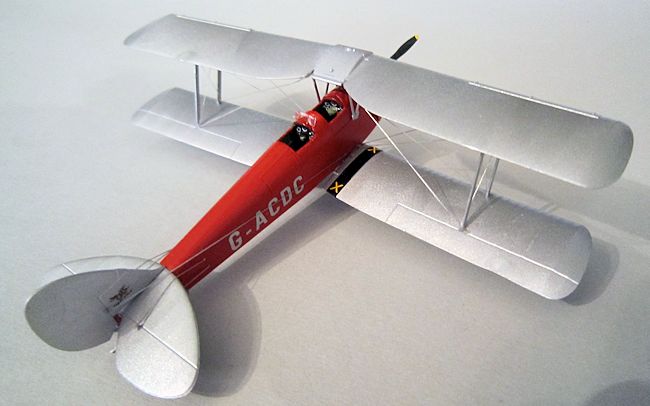 ops. A quaint notion. Thanks to
the outcome of
the Battle of Britain they were never used.
ops. A quaint notion. Thanks to
the outcome of
the Battle of Britain they were never used.
Postwar they continued in private hands and clubs, and as crop dusters and
ambulances. There are at least 500 still in use around the world.
One became the last biplane to land on an aircraft carrier, HMS Eagle, in the
Channel in 1967. Once airborne, its ground speed was actually slower than the
carrier, which had to turn hard to starboard to avoid a collision between the
backward flying Moth and the bridge.
Thousands of pilots must have had their first taste of flying in the Tiger Moth.
Probably more than in any other kind of aircraft. Thanks to my father being in
the RAF, I had my first flight in one at the age of eight. And I have never
forgotten the thrill of looking over the side of the open cockpit and seeing the
ground so far below. Very little since has come close.
| THE KIT |
No
| CONSTRUCTION |
This is one of the few kits that really does fall together with only one or two
problems. Construction began as usual with the interior, which has more than
enough detail for two small open cockpits.
And it is good to report that the fuselage halves closed over the floor
without any need for trimming. Everything got a
 coat of British Interior Green,
with some leather for the seat cushions. And it is best to add the decal
instrument panels at this stage. Getting them in later is tricky.
coat of British Interior Green,
with some leather for the seat cushions. And it is best to add the decal
instrument panels at this stage. Getting them in later is tricky.
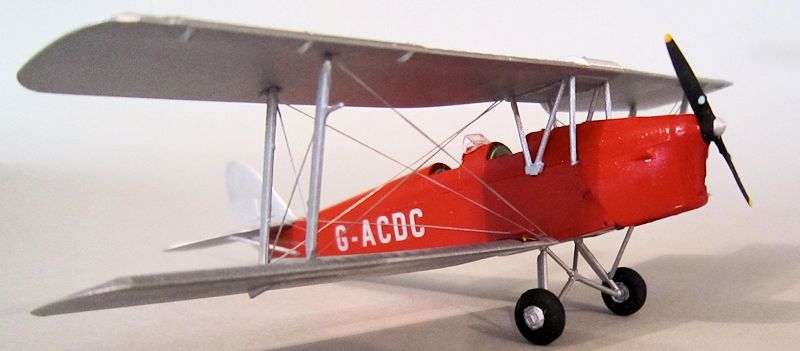
Painting was done at this stage, with the fuselage getting a blast of Ferrari red from Revell, and everything else a coat of silver, Humbrol 11 from a rattle can. Once all dry, construction continued.
I mentioned a couple of problems. I did my usual biplane method of mounting the
upper wing on the cabane struts first, and then offering up the main plane
struts. The main struts proved too short. So I tore off the cabanes and began
again with the main struts. Then offered up the cabanes, and lo, they fitted
perfectly. I cannot explain it. I can only say that it worked that way around.
The second problem is that Airfix supply the main struts with some X-shaped
supports joining them. The idea is to make alignment and mounting much easier,
especially for the younger modeller. I tried this method, and once dried, tried
to cut off the X-struts with a new scalpel blade. Alas, the main struts are very
narrow, and they started to bend. Only by gripping fearlessly with finger and
thumb could I hack the X-struts off.
And then that left two tiny stubs on each strut, which proved impossible
to trim with the same scalpel. So, after cursing a lot, and shutting it away in
its box for a while to teach it a lesson, I started all over again, trimming the
main struts, then aligning them by eye. I would advise this method to one and
all. Otherwise tiny broken struts are going to be flying round the room and
vexing the cat.
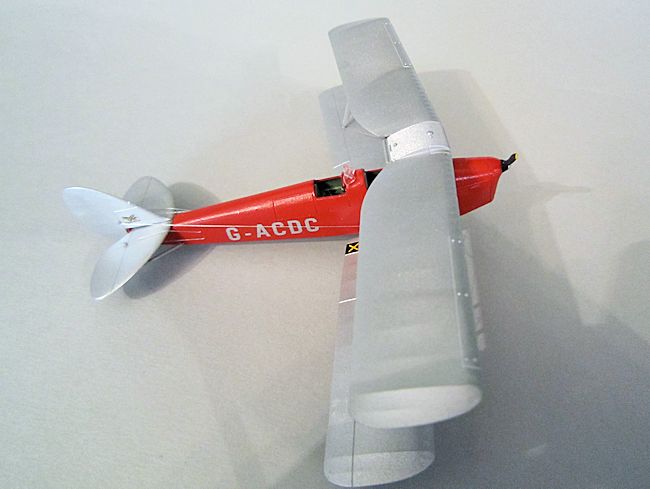 After that it was a milk run. Rigging is easy, with silver coloured elastic
thread secured by tiny drops of superglue gel, applied with a sharpened
toothpick. And there is a good rigging diagram to help you. One final word of
warning here. The chart does indeed show twin rudder lines each side, emerging
from an opening by the front cockpit, and sloping up to the rudder control horn.
If you study the pictures below, you will see that in fact it is a single line
which emerges, which then is connected to a solid Y-shaped yoke, which in turn
allows the double rudder wire. It then returns to a single line near the rudder.
I tried that, and it looked hopelessly over-scale. So contented myself with a
single line each side.
After that it was a milk run. Rigging is easy, with silver coloured elastic
thread secured by tiny drops of superglue gel, applied with a sharpened
toothpick. And there is a good rigging diagram to help you. One final word of
warning here. The chart does indeed show twin rudder lines each side, emerging
from an opening by the front cockpit, and sloping up to the rudder control horn.
If you study the pictures below, you will see that in fact it is a single line
which emerges, which then is connected to a solid Y-shaped yoke, which in turn
allows the double rudder wire. It then returns to a single line near the rudder.
I tried that, and it looked hopelessly over-scale. So contented myself with a
single line each side.
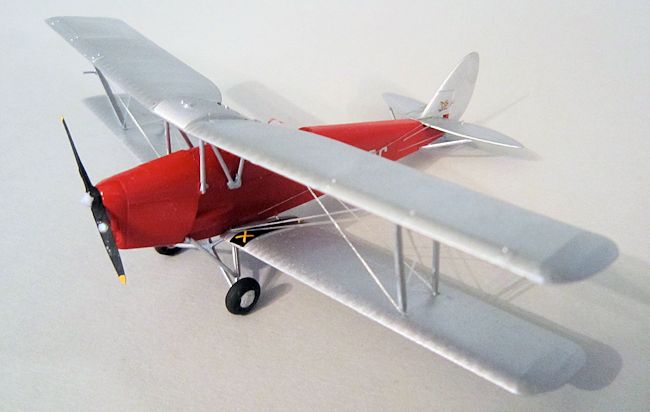
The curious omission from the diagram is the elevator lines. These emerge from
staggered openings at the rear of the fuselage. And if you check the pictures
again, you will see that the line for the upper elevator control horn emerges
considerable lower than the horizontal tailplane. In fact it passes over a tiny
wheel mounted on the leading edge. Again it was too small to replicate, and so I
just have it rubbing over the leading edge. Modellers with the visual acuity of
a sparrow-hawk, fingers the size of a 6 year old, and a vow of abstinence from
espresso, might well do better than my efforts. But I am damned if I will give
up decent coffee just for a model.
| CONCLUSIONS |
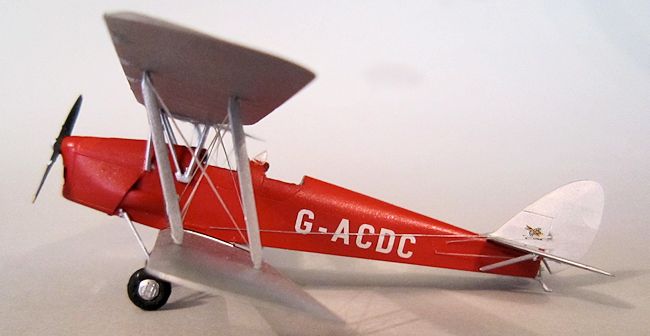
There is something ineffably charming about this little kit. I don't normally
build the same aircraft twice, but I have another in RAF markings which I am
looking forward to greatly sometime. I also have the old Airfix Tige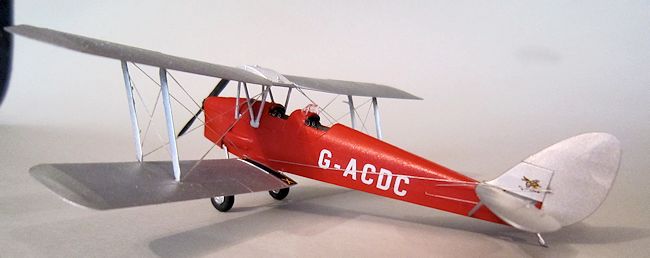 r Moth which
dates from sometime in the mid 1950s. I always looked on it fondly, as a decent
little kit for its age. But I am afraid that it just won't do if posed near this
latest example. So I did the kind thing and relocated it to the upper shelf of
doom, where it can live out its years in decent retirement.
r Moth which
dates from sometime in the mid 1950s. I always looked on it fondly, as a decent
little kit for its age. But I am afraid that it just won't do if posed near this
latest example. So I did the kind thing and relocated it to the upper shelf of
doom, where it can live out its years in decent retirement.
The look and the stance of the Tiger Moth is in fact a complex affair of angled
lines and curves. I see from
various blogs that the 'experten' in their white overalls and their narrow minds
have been all over the kit with their micrometers. And good luck to them. I
don't care what they find by way of several millimeters of inaccuracy.
Actually I don't wish them good luck at all. A plague on them and their
kind. Airfix have got this one just
right.
| REFERENCES |
http://www.airliners.net/photo/De-Havilland-DH-82/1883030/L/
http://commons.wikimedia.org/wiki/File:Dehavilland_DH_82-C_Tiger_Moth_CF-DHQ_01.JPG
http://www.wingsovereurope.com/tiger_moth_dh_82_gal_2.html
July 2014 If you would like your product reviewed fairly and fairly
quickly, please
contact
the editor or see other details in the
Note to
Contributors.