
Heller 1/72 NiD 42 Sesquiplane
| KIT #: | 244 |
| PRICE: | $ |
| DECALS: | |
| REVIEWER: | Chris Peachment |
| NOTES: |
Conversion |
| HISTORY |
| THE KIT |
Scale plans in 1/72 can be found on a couple of sites listed below. I printed
out three copies so that I could cut them out and use as templates.
| CONSTRUCTION |
I dismantled the main parts as best I could, by brute strength and ignorance,
discarding the tailplanes, struts and lower stub wings into the spares box. Old
modeler's maxim: never throw anything away. If you have an old and unwanted kit,
then think of ways of recycling it. The French khaki green paint had to come
off, but alas this was just before Xtracolour brought out their excellent
Purisol pain remover,
which you
just brush on a few coats of, then scrape off, and the old paint comes away with
it. Instead I had to do it the hard way by sanding, which added a good few hours
to the conversion.
The wings received attention first, sanding away the scalloped rear edge and
reducing it to scale size. Also the tips need reshaping, and the trailing edges
made sharper. If you are using the Heller kit, there is a
 trench along the
underside which will need filling. No need if you are using the Azur kit. The
wing roots will then need some cunning sanding and scraping to make them fit at
shoulder level on the fuselage. Constant dry fitting is the secret here.
trench along the
underside which will need filling. No need if you are using the Azur kit. The
wing roots will then need some cunning sanding and scraping to make them fit at
shoulder level on the fuselage. Constant dry fitting is the secret here.
Then you must attend to the nose which is rather thicker and fuller in the
Sesquiplan, to accommodate a larger engine. This was laboriously built up from
layers of filler. If you are handy at making your own by plunge moulding or one
of those old toy vacuum forming machines, which crop up on ebay from time to
time, then that might better. I went 'old school'.
Give the fuselage a good rub down with finer and finer wet and dry paper. The
small headrest fairing was carved from a chunk of old sprue, and a cushion made
from a blob of filler.
Undercarriage struts are easily made from plastic card, and glued in place using
the plans as guide. So too with the lower axle which doubles as a small wing, so
it will need sanding to aerofoil shape.
And also the same for the struts, which attach to the lower axle-wing and
under the main wings. Refer constantly to the plans, which you can find on a
couple of the websites listed below.
| COLORS & MARKINGS |
Once that is all set, the tailplanes are cut from thin plastic card, the control
surfaces delineated by scoring. They were painted Tamiya X-4 Blue and set aside
to dry.
| FINAL CONSTRUCTION |
The large propeller was also from the
spares box, suitable trimmed and sanded, and painted brown with a top coat of
Tamiya Clear Orange, and a small metal boss from an old etched fret.
Then I turned attention to the two odd Lamblin 'lobster pot' radiator barrels
which I fashioned from thick sprue, heavily scored with an new scalpel blade
initially and then an old one to increase the trenches.
The
 tiny mounting plates can be cut from thin plastic card and are an
exercise in micro working. I used two pairs of my usual
reading glasses, both on my nose at once. Plus a bright light and a
steady hand. You soon develop a steady hand when you realise that you will slice
off a finger tip if you don't.
tiny mounting plates can be cut from thin plastic card and are an
exercise in micro working. I used two pairs of my usual
reading glasses, both on my nose at once. Plus a bright light and a
steady hand. You soon develop a steady hand when you realise that you will slice
off a finger tip if you don't.
A couple of them inevitably pinged off the tweezers and were lost to the 'carpet
monster'. Even though I don't have carpets, but varnished bare wood, it still
manages to swallow small kit parts.
I don't know how it does it. Incidentally, if you look on French modeling sites,
you will find that they refer to the beast as 'le carpet-monster'. Which won't
please the Academie Francaise, their
learned body which lays down the law on matters of the French language.
The long tailskid was a length of plastic rod, bevelled at the ground end,
painted a dark brown with no varnish as I reasoned it would soon wear off with
all those high speed landings on rough turf.
Finally the headrest was painted a fetching shade of leather, the old windscreen
re-fixed and...
| CONCLUSIONS |
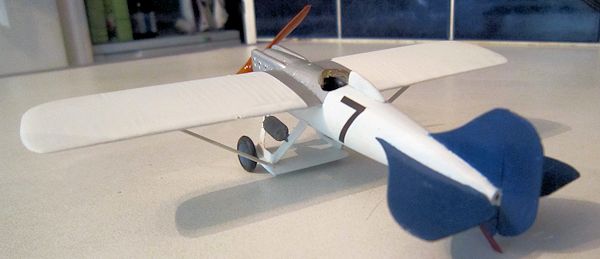
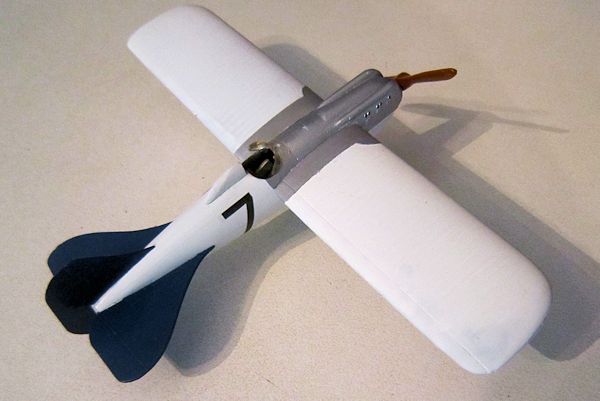
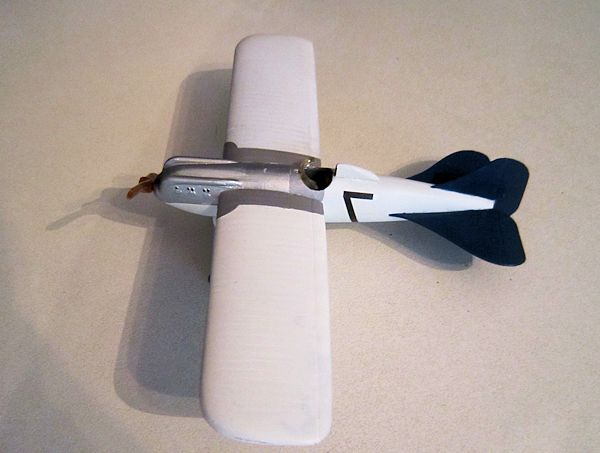
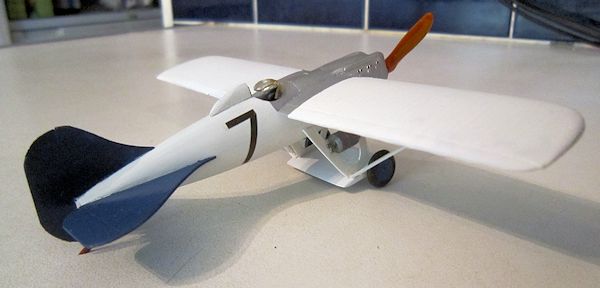
Voila. One elegant 1920s French racer for no money and a bit of elbow grease and ingenuity. My eye has now turned on an old decaying Heller Morane 230, which their chief test pilot turned into his own mount, in a dashing red and black scheme. Onward to that, with Purisol to hand.
| REFERENCES |
http://en.wikipedia.org/wiki/Nieuport-Delage_Sesquiplan
http://www.the-blueprints.com/blueprints/ww2planes/ww2france/46547/view/nieuport-delage_sesquiplan/
http://www.aviafrance.com/nieuport-delage-sesquiplan--aviation-france-697.htm
http://hprints.com/Nieuport_Astra_Aeronautiques_Navales_1929_Sesquiplan_Nieuport_Delage-42791.html
http://greenairdesigns.com/ejcgallery/displayimage.php?album=32&pos=-1131#top_display_media
(You'll have to copy and paste the URLs for the references as I couldn't get any of them to activate on the page. Ed)
September 2013
Thanks to Squadron Products for the preview kit. Get yours today at your local shop or on-line retailer.
If you would like your product reviewed fairly and fairly quickly, please contact the editor or see other details in the Note to Contributors.