| KIT: | Czech Master Resin 1/72 Hughes H-1B |
| KIT #: | 148 |
| PRICE: | Approx $37 |
| DECALS: | One option per aircraft |
| REVIEWER: | Chuck Holte |
| NOTES: | Two complete kits. |
| HISTORY |
 (MM Owner/Editor Scott Van Aken did
an excellent preview of the
CMR H-1B in a recent edition of MM, so I’ll try not to plow the same ground.)
(MM Owner/Editor Scott Van Aken did
an excellent preview of the
CMR H-1B in a recent edition of MM, so I’ll try not to plow the same ground.)
Millionaire Howard Hughes, in his relentless pursuit of speed and aviation excellence, developed and built the H-1B to be the fastest landplane in the world. Hughes, in his original short wing (24 ft 11 in) H-1, set a world speed record of 352.388 on a 3 km course before landing gear-up in a California sugar beet field on Friday,13 September 1935. Hughes then set his sights on a cross-country speed record.
With new, longer wings (32 ft), Hughes and the H-1B set a US transcontinental record from Burbank CA to Newark NJ in 7 hrs, 28 min, 25 sec on 19 January 1937. Average speed for the 2,490 mile flight was 332 miles per hour! The H-1B is currently on display at the Smithsonian National Air and Space Museum (NASM) in Washington DC.
| THE KIT |
This is another of CMRs excellent double kits (alongside the Franklin Gliders). Beautifully cast cream-colored resin parts for both the short and long wing versions of the H-1B packaged in the traditional CMR compartmented plastic bags. This may be the last release in plastic bags. CMR are now using sturdy cardboard outer boxes in addition to the bags, complete with box art, per their recent Meteor F Mk 8/FR Mk 9 and Buccaneer kits.
 Each version consists of
approximately 47 cast resin parts, 26 of which are part of the 1000 Hp Pratt &
Whitney Twin Wasp Junior engine plumbing. Two clear vacform canopies are
included for each kit. Two sets of decals include the large chrome yellow civil
registration numbers for the wings and smaller registration numbers in black for
the rudder, along with two tiny Hamilton Standard decals for the propeller.
Each version consists of
approximately 47 cast resin parts, 26 of which are part of the 1000 Hp Pratt &
Whitney Twin Wasp Junior engine plumbing. Two clear vacform canopies are
included for each kit. Two sets of decals include the large chrome yellow civil
registration numbers for the wings and smaller registration numbers in black for
the rudder, along with two tiny Hamilton Standard decals for the propeller.
The research and construction data provided are exceptionally well done and set a high standard for any other resin and injected plastic manufactures to meet. The instruction packet consists of five 8 ½ x 11 sheets printed front and back (10 pages!) of history, photos of the H-1B on display at NASM, exploded view construction layouts and painting guides for each version.
| CONSTRUCTION |
I planned to build just one H-1B at a time and selected the long wing version to start. My first step was to separate all the parts needed for each version into separate bags. This step is important, as some parts are unique to the particular version. The cockpit parts, engine and cowls are common to both. Fuselage, wings, landing gear and horizontal stabilizers are unique to each version. Watch for the “S” engraved in the pour bars to identify those parts that go with the short wing version.
I started with the cockpit, a very spartan assembly, as is the original. It consists of six parts including a nicely engraved instrument panel, control stick, seat, aft bulkhead, floor and bracing from the seat to the bulkhead. CMR molded nice detail in the fuselage inner surface that complements and completes the cockpit. I didn’t add the stick or seat until one of the last construction stages. I added seat belts prior to installing the seat.
 The vertically separated fuselage
halves fit well after removing the small pour blocks and flat sanding the
edges. Again, a caution here: the fuselage parts are unique to the wing
version you plan to use due to the way the wings fit into the fuselage. Install
the cockpit assembly and superglue the fuselage together. Next I added the
wings which are nicely keyed to give and a strong joint to the fuselage and
symmetrical dihedral.
The vertically separated fuselage
halves fit well after removing the small pour blocks and flat sanding the
edges. Again, a caution here: the fuselage parts are unique to the wing
version you plan to use due to the way the wings fit into the fuselage. Install
the cockpit assembly and superglue the fuselage together. Next I added the
wings which are nicely keyed to give and a strong joint to the fuselage and
symmetrical dihedral.
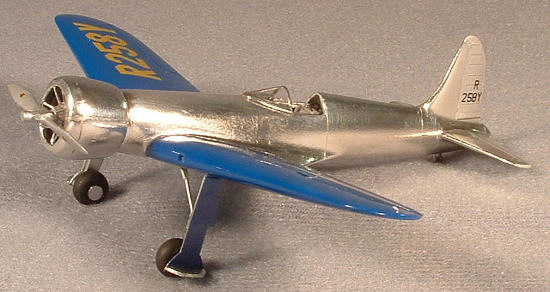
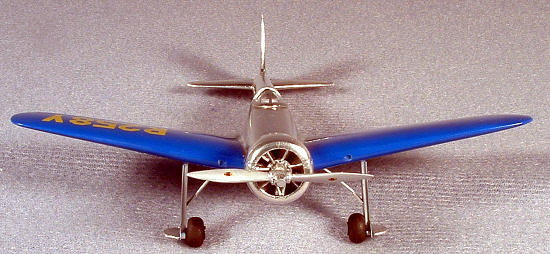
Next I tackled the engine and cowl assemblies. The basic engine bock casting is well detailed and CMR provide tiny intake and exhaust bits for each of the 14 individual cylinders. The engine could be a great little display model in its own right. After looking at the clearance between the rear of the cowling and the forward fuselage, I realized very little, if any, of the plumbing would be visible on the completed model as the cowling overlaps the fuselage slightly. Few of the photos show exhaust detail. So, I deleted the plumbing step entirely.
The only tricky part in the entire kit assembly comes in attaching the engine block, which must first be inserted in the aft cowling, to the fuselage firewall. The aft cowling doesn’t attach to the fuselage, so the engine mount to the main fuselage is critical to how the cowling covers the engine block and aligns with the rest of the fuselage. I drilled a hole in the center of the rear of the engine block and inserted a brass alignment pin. Then I drilled a corresponding hole in the center of the fuselage firewall. I experimented with alignment and fit until I was happy with the way it looked from the side, top and front. Then, before making it final, I painted and detailed the front side of the engine and inside of the cowl. Next, I added the cowl front, making sure the orientation of the integral support rods agreed with the photo references.
Finally, I added the horizontal stabs, and prepared the kit for the Paint Shop. I left the prop, landing gear, cockpit details and canopy until the finishing steps.
| COLORS & MARKINGS |
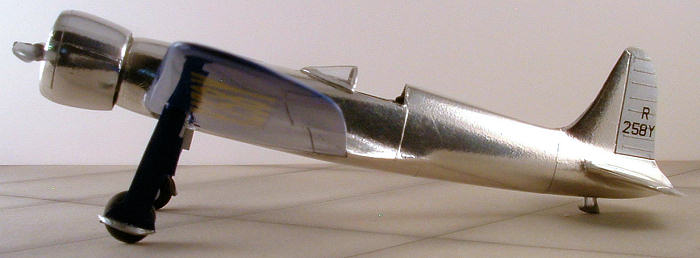
In
building the original racer, Hughes took great care to make the surface of the
aircraft as smooth as possible with countersunk rivets in the polished aluminum
fuselage and a gloss finish on the plywood covered wings. L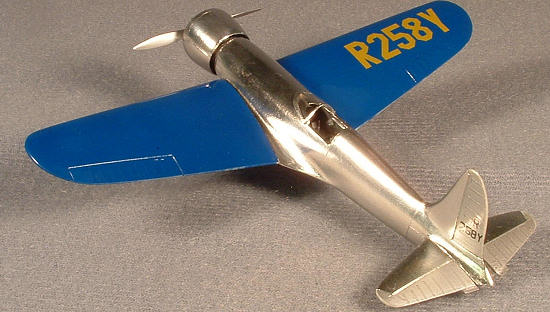 ooking at photos,
there are few visible panel lines or rivets. I wanted that effect. Painting
instructions were a little vague on the color for the wings (“Dark Royal
Blue”). After some experimentation, I settled on Model Master “Ford and GM
Engine Blue” enamel as a good match. I painted the tail control surfaces with
MM aluminum to replicate “doped aluminum” finish/color and then used commercial
Bare Metal Foil for the main fuselage and tail. I’m pleased with the contrast
between the BMF and the flying surfaces and wings.
ooking at photos,
there are few visible panel lines or rivets. I wanted that effect. Painting
instructions were a little vague on the color for the wings (“Dark Royal
Blue”). After some experimentation, I settled on Model Master “Ford and GM
Engine Blue” enamel as a good match. I painted the tail control surfaces with
MM aluminum to replicate “doped aluminum” finish/color and then used commercial
Bare Metal Foil for the main fuselage and tail. I’m pleased with the contrast
between the BMF and the flying surfaces and wings.
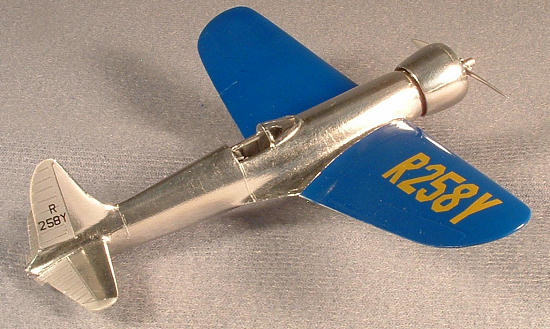
The decals went on well without setting solution. The chrome yellow decals may be a little thin and, when applied over dark blue, are not quite as bright as I would have liked. I thought about using the decals from the short wing version to double decal the yellow, but decided I could live with it as is. I used Future floor wax to seal the decals. Once everything was dry, I added the cockpit details, landing gear and prop.
| FINAL BITS |
After fiddling with the vacform canopy for some time, I was still a bit unhappy with the overall fit and the somewhat indistinct molded framing. The H-1B at NASM has a fully enclosed canopy, but a number of photos show it with only the front windscreen. Apparently, the plexiglass panel covering the seat area was completely removable from the fuselage and the aircraft was flown and photographed in that configuration. So, I cut the windscreen free, applied BMF framing and used Testors Clear Parts Cement to attach it to the fuselage. Done!
| CONCLUSIONS |
 Another
excellent resin kit from CMR! In my opinion, they have a clear lead in 1/72
resin kit quality and diversity of subjects!
Another
excellent resin kit from CMR! In my opinion, they have a clear lead in 1/72
resin kit quality and diversity of subjects!
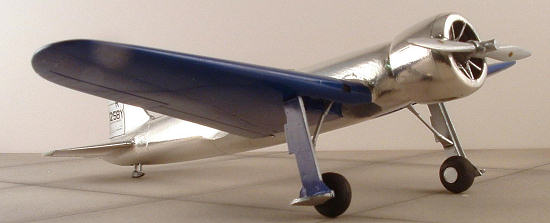
I spent about 15 hours completing the long wing H-1B. With the lessons learned on the first one, I think I can do the short wing in 10 hours or so. The finished Racer looks great and accurately represents Hughes’ record setting speedster. The engine mounting to the fuselage and the canopy may be a bit challenging, but I highly recommend the CMR Hughes Racer to anyone with at least some resin modeling experience. Many thanks to CMR for creating the Hughes Racer kit and kindly providing the review sample.
| REFERENCES |
Frankly, all the references a modeler is likely to need are in the comprehensive instruction/photo/drawing packet included with the kit. I Goggled the internet for Hughes H-1B Racer and came up with a few additional photos of the original H-1B and several stories on the replica H-1B built (and fatally crashed) by Jim Wright of Cottage Grove, Oregon. The Smithsonian AIR and SPACE magazine has a good photo story on Wright and his H-1 replica in the April/May 2003 issue.
September 2006
If you would like your product reviewed fairly and fairly quickly, please contact the editor or see other details in the Note to Contributors.
Back to the Review Index Page 2021