AZ Models 1/72 Mraz M-1D Sokol
| KIT #: | AZCZ 12 |
| PRICE: | 5 euros 'used' |
| DECALS: | Four option |
| REVIEWER: | Johan de Wolf |
| NOTES: | SW |
| HISTORY |
In the
interwar period Benes-Mraz had become a major developer and producer of sports
and small utility aircraft. Popular models where the Be.50/51 series and the
Be.55 Bibi that where mass produced in the 1930’s. After the occupation of
Tsjechoslovakia by the Germans, production of domestic types was halted in
favour of German designs. During the war the Benes-Mraz works produced Fi 156
Storch, Bü 131/181 and Ar 79. However in secret the chief designer, Z. Rubic,
designed a new type based on the Be.55 with elements of the Ar 79. After the war
Storch production continued as the K-65 Cap, but a prototype of Rubics design
was also built under the designation M-1A and first flown in 1946. This was
developed into the M-1B and finally the M-1C of which the prototype first flew
early 1947. This version was named Sokol (Falcon) and put into production. It
was a low wing aircraft, single engined, with retractable main gear and fixed
tail  wheel. It had a wooden frame with plywood skin that was covered with cloth.
The rudders and wing behind the main spar where only covered with cloth to save
weight. The engine cover was metal. Of the M-1C, 183 machines were built before
production switched to the M-1D. The main difference between these versions was
the larger canopy panels for better all round visibility and the larger vertical
tail and rudder to improve directional stability. Of this version 104 examples
were built. The last version was the M-1E, which was a M-1D on floats. Only 2
were built. The M-1 was not only built for the domestic market, quite a few were
also exported to western Europe and places as far away as Australia. During the
60’s most were written off and scrapped because of problems with the glued wood
frames. A few still exist today though , including some airworthy ones. The most
well known example is an M-1D in fictional East German (NVA) markings.
wheel. It had a wooden frame with plywood skin that was covered with cloth.
The rudders and wing behind the main spar where only covered with cloth to save
weight. The engine cover was metal. Of the M-1C, 183 machines were built before
production switched to the M-1D. The main difference between these versions was
the larger canopy panels for better all round visibility and the larger vertical
tail and rudder to improve directional stability. Of this version 104 examples
were built. The last version was the M-1E, which was a M-1D on floats. Only 2
were built. The M-1 was not only built for the domestic market, quite a few were
also exported to western Europe and places as far away as Australia. During the
60’s most were written off and scrapped because of problems with the glued wood
frames. A few still exist today though , including some airworthy ones. The most
well known example is an M-1D in fictional East German (NVA) markings.
Although mainly intended for civil use, it nevertheless found itself in a few air forces as well.
Oddly enough the Czech air force did not use the type, but their border police did. The Hungarian air force also had a few. Another customer was Egypt who lost one to the Israeli’s, that captured an abandoned one in the Sinai. During the fifties an unknown number was gifted to the Chinese communists. Two of these found their way into museums, but one is in a sorry state with, what looks like, a broken main spar.
| THE KIT |
The
original release under the AZ models brand came in two boxings. One for the M-1C
(kitnr AZCZ11) and one for the M-1D (kitnr AZCZ12). The contents of these kits
is basically the same except for the canopy and the decals. They come in a
flimsy end opening box. Inside the box you will find one mid grey sprue with 20
short run injection moulded parts, a resin cowling, a resin prop, a fret with 21
etched parts, a film for the instrument panel, a very clear vacuform canopy
(plus spare), a decal sheet with options for 4 machines and finally an
instruction sheet in the Czech language only. The instructions consist of one
main diagram and 6 detail drawings. This is the same for both versions, b ut it
is clear which parts are needed for each version. Colour call outs are given for
most details, and the main colour schemes for the decal options can be found on
the rear of the box. The mentioned colours are not linked to a specific paint
range or FS, BSc or RAL standard. The injection moulded parts are definitely
short run, without locating tabs and some flash here and there. The plastic is
also relatively soft like the plastic of the new Airfix kits. The few panel
lines are reasonably sharp and consistent. The resin parts are cleanly cast and
without bubbles. The decals are of good quality as well, sharply printed without
offset between the colours. The subjects on offer are a Czechoslovak border
police machine, a Swedish and an Italian privately owned machine and the well
known regular airshow visitor in imaginary East German markings (the NVA never
had this type in their inventory).
ut it
is clear which parts are needed for each version. Colour call outs are given for
most details, and the main colour schemes for the decal options can be found on
the rear of the box. The mentioned colours are not linked to a specific paint
range or FS, BSc or RAL standard. The injection moulded parts are definitely
short run, without locating tabs and some flash here and there. The plastic is
also relatively soft like the plastic of the new Airfix kits. The few panel
lines are reasonably sharp and consistent. The resin parts are cleanly cast and
without bubbles. The decals are of good quality as well, sharply printed without
offset between the colours. The subjects on offer are a Czechoslovak border
police machine, a Swedish and an Italian privately owned machine and the well
known regular airshow visitor in imaginary East German markings (the NVA never
had this type in their inventory).
Both the M-1C and M-1D kits have now been re-released under the Kovozavody Prostejov brand (kitnr KPM0148 and KPM 0156). The original sprue is still there, but a new sprue has been added with 13 injection moulded details for the cowling and cockpit. The etched parts have been deleted, as have the resin parts. The vacuform canopy has been replaced with good quality injection moulded clear parts. The decals sheet for the M1-C is a lot bigger now and contains much more service markings, but only offers 4 Czechoslovak civilian machines. The M-1D kit now has markings for a border police machine, the civilian Sokol in NVA markings, and a machine used by the Soviets after the communistic take over in 1949. The instruction sheet has also been updated and is easier to follow than the original one. It is also dual language, English/Czech. Colours have now been linked to the Humbrol and Agama ranges. If you are uncomfortable with multimedia kits the KP releases are the ones to go for.
| CONSTRUCTION |
I have all 4 issues of this kit but after seeing some pictures on the internet I decided the first to be built would be the AZ Mraz M-1D. I started with rinsing the plastic and resin parts in warm water with a bit of dish washing detergent. I find that short run kits usually have a film of mould release agent on them that paint does not want to stick to very well. After this had dried I removed the main wing and fuselage parts from the sprue. The mating surfaces were given a rub down to get a more positive fit. The trailing edge of the wings were also thinned down. The smaller bits were cleaned up on the sprue as much as possible before taking them out. The casting block on the resin cowling was rather substantial so it took a bit of effort and two broken razor saw blades to remove it.
With the
preparations done construction could start. The main wings where assembled
first. Then, after making sure the cockpit floor could be inserted later, I
glued the fuselage halves together. Once this had dri ed the seams where cleaned
up with a quick swipe with sandpaper. I test fitted the cowling and found it
mated up to the fuselage without issues. As the vacuform canopy comes as one
piece with the rear windows and part of the rear fuselage, I decided it would be
easier to adapt the fuselage rather than to try to cut the rear windows to match
the cut outs in the rear fuselage. This is also suggested by the instructions.
So out came the razor saw again. It is just two straight cuts so after a few
minutes the offending plastic was gone. I now cut out the canopy and carefully
trimmed and sanded it until I had the best fit possible. Satisfied it would not
throw up any major issues the canopy was safely stored in an old film container
for use later in the build. A rear bulkhead is not included in the kit, so I
fashioned one from some plasticard.
ed the seams where cleaned
up with a quick swipe with sandpaper. I test fitted the cowling and found it
mated up to the fuselage without issues. As the vacuform canopy comes as one
piece with the rear windows and part of the rear fuselage, I decided it would be
easier to adapt the fuselage rather than to try to cut the rear windows to match
the cut outs in the rear fuselage. This is also suggested by the instructions.
So out came the razor saw again. It is just two straight cuts so after a few
minutes the offending plastic was gone. I now cut out the canopy and carefully
trimmed and sanded it until I had the best fit possible. Satisfied it would not
throw up any major issues the canopy was safely stored in an old film container
for use later in the build. A rear bulkhead is not included in the kit, so I
fashioned one from some plasticard.
The cockpit interior was next. The kit presents 5 plastic and 13 etched parts for this part of the build. I decided to discard the jump seat. The main seats sit a bit too low in the fuselage if installed per instructions. Judging from pictures of the real thing, the seats look to be mounted on the wing spar(s). I replicated this with two pieces of evergreen strip onto which the seats could be placed. The rudder pedals and mid console were also scratch built. The large vacuform canopy is very clear so anything you add will be visible later. For the seats there is a full harness available in etched parts. Despite being rather fiddly I managed to get them glued to the seats in a natural looking position. The instrument panel consists of a plastic base, a piece of film depicting the instruments, an etched panel and two etched control yokes. The film was pretty much useless as it was under exposed so there wasn’t really any dial detail visible even after painting the back side white. Having no alternative I sandwiched it between the plastic base and the etched instrument panel anyway. Next the control yokes where bent and installed into small holes I drilled into the panel.
 With the
instrument panel completed it was time for some paint. The bare cockpit walls
and floor were painted light grey (Vallejo 70.870/ FS36270). The padded parts on
the cockpit wall and seats received a coat of light buff (model master 213/
light stone). The seats themselves, the floor in front of the seats and the
instrument panel were painted semigloss black. Seat belts were off white with
metal buckles. Rudder pedals and mid console were kept in bare aluminium. The
control jokes were painted in a few layers of thinned woodglue first to give
them a more 3D appearance, and then they received their final white colour.
With the
instrument panel completed it was time for some paint. The bare cockpit walls
and floor were painted light grey (Vallejo 70.870/ FS36270). The padded parts on
the cockpit wall and seats received a coat of light buff (model master 213/
light stone). The seats themselves, the floor in front of the seats and the
instrument panel were painted semigloss black. Seat belts were off white with
metal buckles. Rudder pedals and mid console were kept in bare aluminium. The
control jokes were painted in a few layers of thinned woodglue first to give
them a more 3D appearance, and then they received their final white colour.
A few knobs and buttons on the instrument panel are depicted in red and yellow as per original. The cockpit interior was now set aside.
The resin cowling was tackled next. At the front side I hollowed out the air intakes further. I did the same for area behind the propeller. At the rear I also hollowed out the lower half as this is where the cooling air escapes from the cowling. I removed the moulded on exhaust and drilled a hole in it place. A new exhaust in the form of a piece of injection needle will be inserted later. All hollowed out parts were painted flat black to further enhance the illusion of depth. The cowling was then glued to the fuselage using super gel.
Although
the vertical fin/rudder is correct for most M-1D’s, I found that the machine I
wanted to build had a larger rudder. I modified the kit part to reflect this
correctly. To “liven up” the model I moved the rudder slightly out of neutral.
The fin was then superglued onto the fuselage. All flying surfaces are butt
joined to the fuselage, but on a model this small it is not a problem. After dry
fitting and a bit of fettling the tail wing slotted snugly onto the rear
fuselage. The elevator was given a slight deflection as this was often seen on
parked machines. Next the main wings were fitted, also with superglue. Here a
bit of filler was needed to get a neat join. Many Sokols where fitted with an
aerodynamic spoiler on the wing leading edge. I replicated this with a piece of
stretched sprue. With the major bits completed I turned my attention to the
cockpit again. I cut two 3mm long pieces of sprue and glued them to the back of
the instrument panel. The panel was then glued to the firewall. I find this
works better then to try getting it to stick to the cockpit coaming. Next the
cockpit floor assembly was slid into the fuselage and fixed in place. Now it was
time to fit the canopy. I ‘spot welded” this into place with a few drips of CA
glue and after this had set the remaining gaps were closed with woodglue. At the
rear I needed some filler to blend the canopy into the fuselage. I think part
PE12 is dep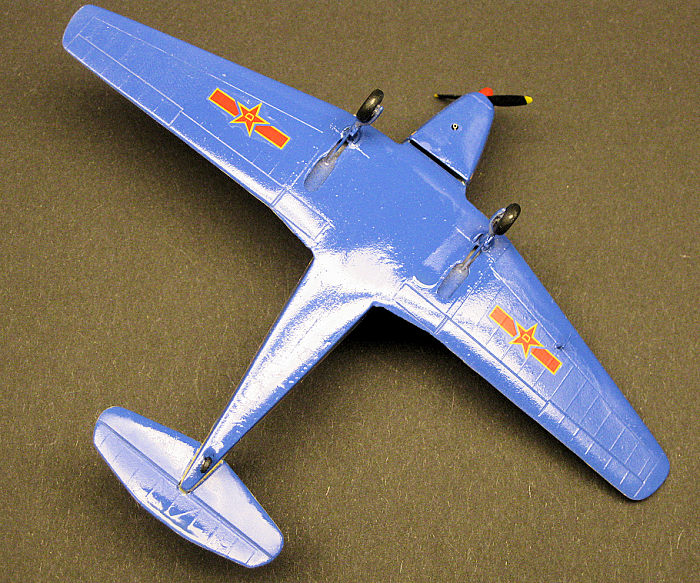 icted in the wrong place in the instructions. I could not find
photographic proof of a similar shape in the spot indicated in the instructions.
However I think it could be the aero dynamic cover for the hinge, and in that
case it should be mounted on the front left lower corner of the canopy. While
cutting it of the fret my part went on a trajectory into nowheretobefound. So I
had to scratch a new one.
icted in the wrong place in the instructions. I could not find
photographic proof of a similar shape in the spot indicated in the instructions.
However I think it could be the aero dynamic cover for the hinge, and in that
case it should be mounted on the front left lower corner of the canopy. While
cutting it of the fret my part went on a trajectory into nowheretobefound. So I
had to scratch a new one.
The instructions show a pitot tube on the wing leading edge. This is correct for most M-1’s , but later M-1D’s had this replaced by an L-shaped pitot under the left wing. I scratch built this. The main gear legs where fitted next together with the tiny etched torque links. The tail wheel was the last item to be added before it was off to the paint shop. Using Tamiya masking tape I masked the canopy. This was then sprayed with the same grey I used inside the cockpit. Once this had dried I sprayed the entire model with grey Vallejo primer from a rattle can. I like this stuff a lot as it is very easy to work with and even a beginner like me manages to cover a model with a thin and even layer.
| COLORS & MARKINGS |
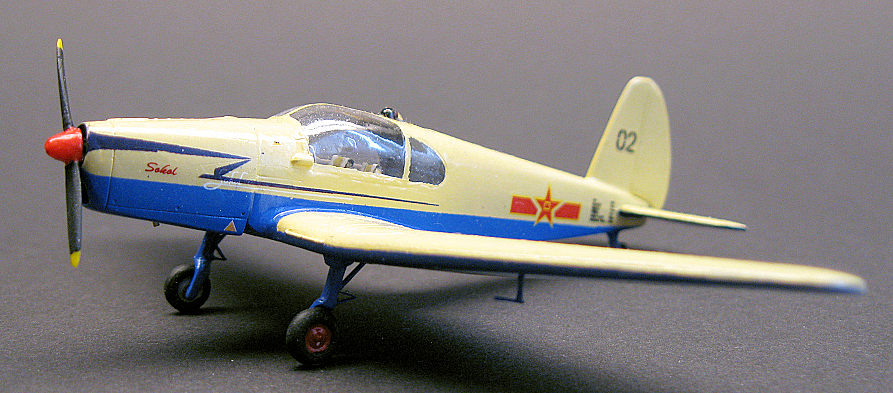
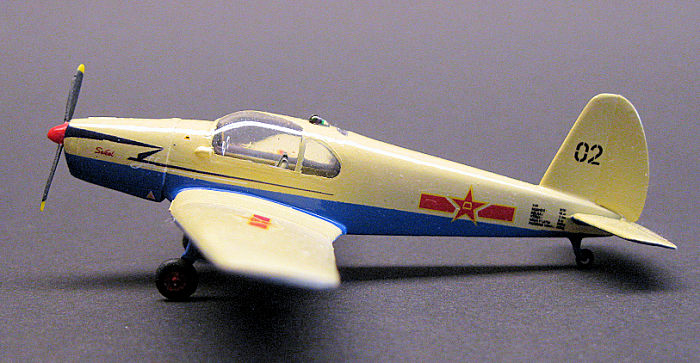
Before starting construction I had decided I would build a Chinese machine. Even after consulting my Czech contacts, I did not find any information or period photos of Chinese M-1’s. So I would have to rely on pictures of the two museum exhibits. One is painted in bright light blue over light grey with white and black trim. However I am unsure it ever flew in these colours. The other one is painted in cream over light blue with light blue and black trim. As it is devoid of any further markings I presume this has been over painted before it was displayed as well. This colour scheme is very similar to a known factory scheme though. I decided I would use this factory scheme to depict the machine as it might have looked when it was presented to the Chinese. I used Vallejo 70.917 beige for the cream colour. I sprayed this freehand over the upper surfaces of the model and needed several coats to get an even colour.
I then
masked the upper fuselage and topside of the wings. For the lower colour I used
Vallejo 70.962 blue. This is darker than the hue on the museum machine, but it
is a good match for the factory colour. Two coats was enough for a nice even
finish. After this had dried all the masking was removed. Some paint had crept
under the masking tape onto the canopy, and this was carefully removed with a
moist tooth pick. In preparation for the decals I decided I would give the model
a coat of gloss varnish from a Vallejo rattle can. I expec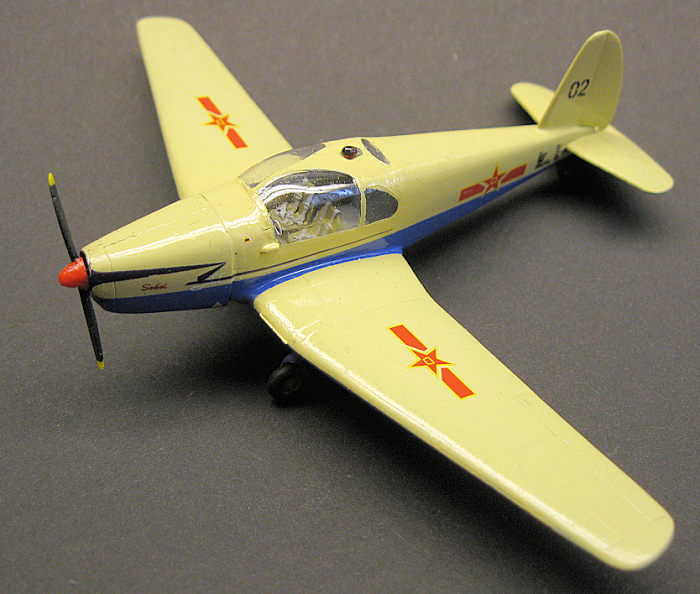 ted the same ease of
use as with the primer. I was badly mistaken. Instead of a fine mist as with the
primer, the model was greeted by a very heavy spray. The model was dripping with
paint. I managed to carefully wipe most excess away but it is still visible in
some places. I left it to dry for several days.
ted the same ease of
use as with the primer. I was badly mistaken. Instead of a fine mist as with the
primer, the model was greeted by a very heavy spray. The model was dripping with
paint. I managed to carefully wipe most excess away but it is still visible in
some places. I left it to dry for several days.
For the factory scheme I would need the black trim however the kit only includes red trim. Luckily the KP kit includes 2 sets of black trim. I carefully slid the first decal onto the model, but when trying to get it to the right position it broke apart. So I had to raid the KP kit for a second time. This time I covered the decals with Microscale superfilm first. This did the trick and I had no further problems with the decals. I used the service markings from the AZ kit, which I had also coated with superfilm just to be safe. The tail code came from my spares box, and the Chinese roundels were taken from HDL sheet 72-024 (Su-27). Only a few bits remained to complete the model. The wheels where painted and added first. I decided to use the resin prop as it is a bit finer than the injected one, but the blades were still a bit clunky. So I sanded these down to a more scale appearance. Because I had hollowed out the area behind the prop as per original, I had to install a longer axle. It was then painted and fitted to the model. The last part had to be scratch built. This is the three colour navigation light on top of the canopy. I shaped this out of a piece of clear sprue and painted it with Tamiya clear green and clear red.
| CONCLUSIONS |
Even though it is a short run kit it should not present any surprises if you have built a few Frog or old Airfix/Revell kits. I enjoyed putting it together, and total build time did not exceed 20 hours. This was my first attempt at spray painting a model, and it shows. I still need to practice more and improve my skills, but I definitely see the advantages of spray painting. Nevertheless I am pleased with the result, and I will definitely build another one. Note that the original AZ releases of the M-1 have already pretty much sold out and are becoming hard to find, so grab the KP release if you like the subject.
| REFERENCES |
https://padders.smugmug.com/Aviation/AirSpaceMuseum-Beijing-200118/
http://www.ruudleeuw.com/datangshan-gate.htm
Johan de
Wolf Copyright ModelingMadness.com Thanks to If you would like your product reviewed fairly and
fairly quickly, please
contact
the editor or see other details in the
Note to
Contributors.