|
KIT: |
Ceji/Revell 1/144 Super Guppy |
|
KIT # |
4743 |
|
PRICE: |
$? |
|
DECALS: |
One aircraft |
|
REVIEW & |
|
|
NOTES: |
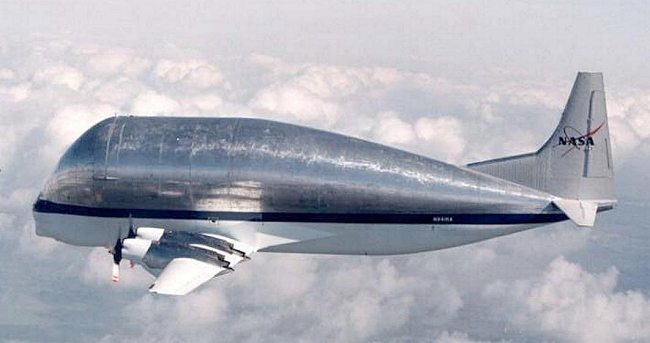
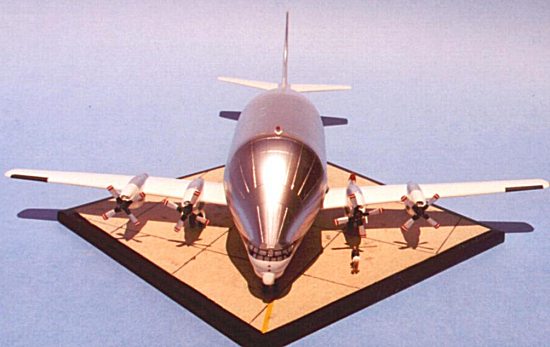
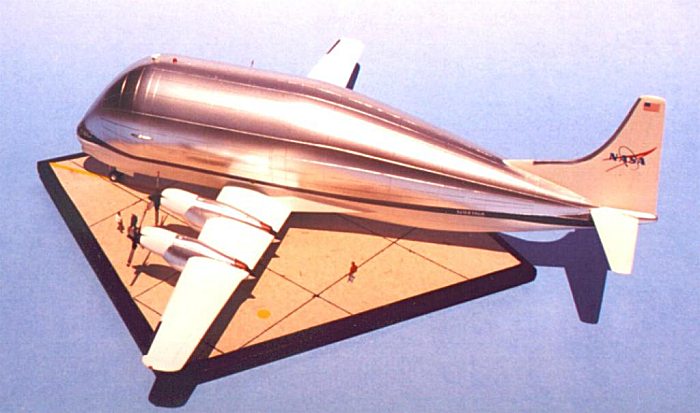
Photo courtesy of NASA |
|
HISTORY |
A familiar axiom states "form follows function." That’s certainly the case with the ungainly looking flying machine called the Super Guppy.
When NASA needed to haul large rocket and spacecraft components in the early 1960s, the agency contracted with Aero Spacelines for several specially configured transport aircraft. Each of the planes was converted from a Boeing 377/KC-97 airframe, and featured a distinctive bulbous upper fuselage. Throughout the 60s and early 70s, various types of Guppy aircraft in Aero Spacelines livery transported oversize loads for the Gemini, Apollo and Skylab programs. In 1979, NASA acquired its own Super Guppy (NASA 940) to carry space shuttle components. It differed somewhat from four other Super Guppy 201 aircraft produced for Airbus, having a true "double bubble" fuselage cross-section and Pratt and Whitney turboprops instead of Allison engines. NASA retired the aircraft in 1990.
When the International Space Station (ISS) program started bending metal, NASA needed a way to haul the manufactured components by air to Kennedy Space Center for checkout and launch. The space agency acquired a standard Super Guppy 201 transport from the European Space Agency (ESA) under an ISS barter agreement. The Europeans supplied the aircraft to offset NASA’s cost of carrying ESA equipment to the station on two shuttle missions. In December 1998, NASA’s latest Super Guppy -- NASA 941 -- was decorated in a gleaming new scheme of polished aluminum, white, blue and light gray. It flies in that livery today.
|
THE KIT |
The Ceji/Revell 1/144 Super Guppy kit features nicely done recessed panel lines, doors and control surfaces, and is quite accurate in outline. The engine exhaust pipes are slightly longer than those on the actual aircraft, but that’s a nitpick. The main and nose gears are simplified, and the gear wells lack bulkheads or detail -- not uncommon for prop planes in this scale. The large fuselage is split into right and left halves. The wings are the typical top-bottom arrangement, with large tabs that slide into openings in the fuselage. The horizontal stabilizers are single pieces. The four engine nacelles are split vertically, and are designed to slide over the wingtips into delicately scribed positions after assembly. The main gear doors are molded open as part of the nacelles.
 The propellers are the only
major defect in the kit. The rounded spinners and uncuffed, round-tipped blades
are unlike anything mounted on a 201 type Super Guppy. The actual NASA plane has
props with the square-tipped blades and pointed spinners found on a P-3 Orion.
The only clear part is an insert for the cockpit windows.
The propellers are the only
major defect in the kit. The rounded spinners and uncuffed, round-tipped blades
are unlike anything mounted on a 201 type Super Guppy. The actual NASA plane has
props with the square-tipped blades and pointed spinners found on a P-3 Orion.
The only clear part is an insert for the cockpit windows.
The decals supplied with the kit are for an overall natural metal Airbus Skylink aircraft that carried large Airbus components. They include the carrier logos, a large "4" and the red/orange/blue striping that runs along the lower fuselage. The decal stripe looks like it could be a real bear to prod around the model’s nose...but I had other ideas, anyway.
The Super Guppy had languished in my Hall of Shame (i.e., kit stash) for more than four years. The kit was actually my second; I’d botched a previous attempt to convert another Revell Guppy’s Allison nacelles to the Pratt & Whitney versions found on NASA 940. I knew that NASA had gotten another Super Guppy to use in the space station program, but the early pictures I’d seen showed a rather uninspiring natural metal aircraft with only the Airbus Skylink stripes and a NASA "whoosh" logo on the tail.
Then one day, Voila! I ran across a photo of NASA 941 on the Johnson Space Center web in its dazzling new colors. It was lust at first sight! I shelved the Minicraft Stratocruiser I’d been hacking at for weeks and put aside my 1/72 Revell CH-3E with its half-finished scratchbuilt cockpit. I just had to build that NASA Super Guppy -- now!
|
CONSTRUCTION |
Like many 1/144 airliner kits, the Ceji/Revell Super Guppy doesn’t have all that many parts. Glue together the fuselage, wings and horizontal stabilizers and it’s 80 percent done. Unfortunately, the other 20 percent needed to get a good-looking model isn’t quite that simple.
The big fuselage halves were slightly warped, so I had to cement them together inch by inch while trying to keep the parts aligned vertically and horizontally. Despite my best efforts, there was a step between the pieces in several places, which required a significant amount of filling with CA glue and sanding. The fuselage joint is an actual panel line on the top of the real airplane, but I found the filler just wouldn’t scribe well enough for my tastes; I rescribed the line offset slightly from the center. I encountered no problems in rescribing the bottom of the fuselage, but there is an annoying square hole -- originally for a stand, perhaps -- that had to be filled and sanded.
 There was a noticeable
mismatch between the wing roots and the assembled wings on my kit. I attempted
to correct it by enlarging the slot for the wing tabs, but it really didn’t
solve the problem. I strongly recommend that you glue the upper and lower wing
halves to the fuselage separately for the best possible fit, and then worry
about filling and sanding any gaps in the leading and trailing edges. The
overhang of the big bubble-shaped fuselage makes it impossible to work on the
upper wing-to-fuselage joint without damaging detail. I left the small gap
unfilled, and it isn’t all that obvious on the finished model. The stabilizers
fit perfectly, and the joint needed only light sanding.
There was a noticeable
mismatch between the wing roots and the assembled wings on my kit. I attempted
to correct it by enlarging the slot for the wing tabs, but it really didn’t
solve the problem. I strongly recommend that you glue the upper and lower wing
halves to the fuselage separately for the best possible fit, and then worry
about filling and sanding any gaps in the leading and trailing edges. The
overhang of the big bubble-shaped fuselage makes it impossible to work on the
upper wing-to-fuselage joint without damaging detail. I left the small gap
unfilled, and it isn’t all that obvious on the finished model. The stabilizers
fit perfectly, and the joint needed only light sanding.
The nacelle halves went together reasonably well, but rescribing them was a challenge. All the surfaces are highly curved, and my scribing guide of choice -- plastic label tape -- simply wouldn’t conform to the parts no matter how narrow I cut the strips. I eventually used good ol’ Mk. I black electrical tape cut into thin ribbons. They provided enough heft to keep the scriber on track while easily fitting around sharp curves. Keep all four inner and outer nacelle assemblies separate, because each fits only its intended location on the port or starboard wing.
I left the landing gear and wheels off until after painting. The nose gear and door fit fine, but both main gear assemblies ended up canted outboard, possibly due to imprecise positioning of the inboard nacelles on my part. I filed away a bit of the gear well openings and the struts went on vertically.
Several small detail parts finished assembly. A kit-supplied crescent-shaped antenna mounts to the forward top of the fuselage. I scratchbuilt a small blade antenna located near the starboard horizontal stabilizer, as well as a small red warning beacon that mounts just aft of the crescent antenna. (The beacon may be optional. It’s clearly visible in some photos but not in others.) I scrounged accurate props from an LS 1/144 P-3 Orion, squaring off the tips to duplicate those on the actual Guppy. After painting, I mounted them to the nacelles with plastic rod.
|
PAINT & DECALS |
The first step was an overall coat of Wal-Mart flat white enamel, airbrushed after being sprayed from the can into a paper cup and thinned slightly with Floquil thinner. I wasn’t worried about having ultra-smooth plastic on the bulged upper fuselage, because I’d decided to reproduce the buffed aluminum finish with Testors Model Master (MM) Chrome Silver rather than a metalized lacquer.
 I wasn’t sure at first
what color the Guppy’s tail and horizontal stabilizers should be. The official
NASA drawings specify that only the rudder and elevators be painted light gray.
But in most photos, it appears the entire surface of the tail and stabilizers is
painted that way. I chose the latter scheme, and airbrushed Testors MM Light
Gray. When the white and gray coats were dry, I airbrushed several coats of
Future thinned with denatured alcohol over the entire model to give it a glossy
surface.
I wasn’t sure at first
what color the Guppy’s tail and horizontal stabilizers should be. The official
NASA drawings specify that only the rudder and elevators be painted light gray.
But in most photos, it appears the entire surface of the tail and stabilizers is
painted that way. I chose the latter scheme, and airbrushed Testors MM Light
Gray. When the white and gray coats were dry, I airbrushed several coats of
Future thinned with denatured alcohol over the entire model to give it a glossy
surface.
The "astro blue" fuselage stripe was next. Masking the top border was no problem -- it runs along a panel line most of the way down the fuselage -- but the bottom border runs across the top of the angular wing root fairing. It also was very difficult to mask where the stripe passes over the wing; there just isn’t much space to get fingers and tape in there! Once the masking was in place, I airbrushed a custom mix of Testors Blue (the small bottle) and Testors MM Aircraft Interior Black. (If you try to replicate this scheme, make sure your masking material is sealed super-tightly against the surface. Mine wasn’t, and the thinned blue paint bled into many of the panel lines. D’oh!)
Before painting the fuselage bubble and nacelle tops, I applied the few decals needed for the NASA scheme. The tail "whoosh" logo and the white registration numbers and letters came from an IPMS decal sheet. The American flags on the tail are from ATP. The door outlines came from various kits. I used dark gray outlines -- the only type I had -- on the lower starboard fuselage doors. But in some photos, it appears they may actually be red. After the decals were settled in place, I airbrushed a couple coats of Testors Semi-Gloss over the entire aircraft to cut the toy-like shine of the Future.
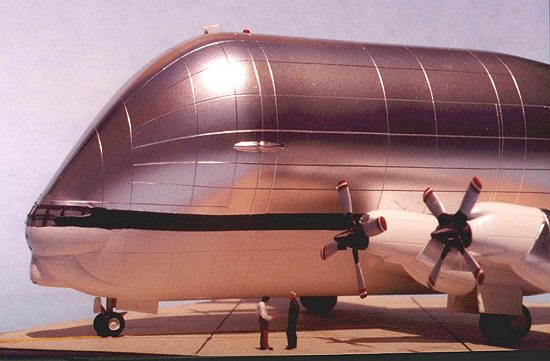
When masking for the chrome silver coat, I placed pieces of yellow Post-It Notes over the decals to make sure they wouldn’t lift, then applied masking and electrical tape. Study photos carefully to verify which parts of the nacelles should be aluminum. It appears there were minor changes made after NASA took possession of the Guppy in its new colors. Airbrushing several light coats of silver produced a good representation of the polished aluminum on the real thing.
Detail painting wrapped up the project. I airbrushed the gear assemblies and wheel hubs the same light gray as the tail (the wheel wells and door interiors remain white). I then painted the crescent antenna white and fuselage beacon gloss red, and added them atop the fuselage. The props were hand painted with Model Master paints: black spinners and cuffs, dull aluminum blades and red tips. I added strips of white decal to complete the red/white/red scheme of the tips. Finally, I painted the inside of the clear cockpit window MM Dark Gull Gray and the framing blue to match the fuselage stripe. The kit is missing two windows that sit above the main flight deck; I replicated these with small pieces of decal painted Dark Gull Gray and overcoated with Future.
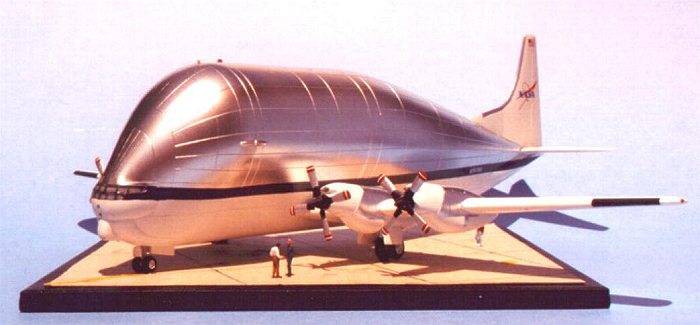
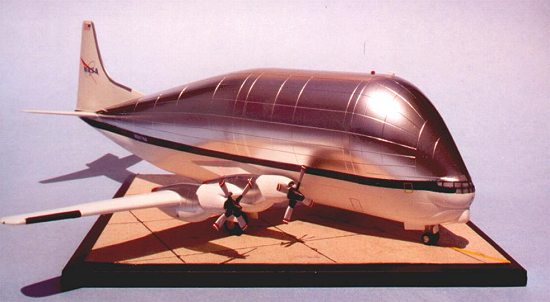
Because airplanes are normally operated by people, I create a mini-diorama for my finished models whenever possible. The black base is a painted ceramic tile. The concrete surface is a piece of cardboard with black ink tar lines and yellow label tape striping. The figures are from a hard-to-find 1/144 Preiser NATO pilots and ground crew set.
|
CONCLUSIONS |
This is a quality kit of a unique subject. I didn’t measure the model’s dimensions, but it sure looks like pictures of Super Guppies available on the web. The kit is quite suitable for modelers who have already built a couple 1/144 airliners -- a qualification due mainly to the need to replace the props and the difficulty of getting a good fit on the fuselage halves.
Special thanks to Carl F. Coontz, Super Guppy Project Manager at NASA’s Johnson Space Center, for photos and diagrams that were especially useful in completing the model.
|
REFERENCES |
All About Guppys, www.allaboutguppys.com
NASA Spacelink, http://spaceflight.nasa.gov/station/assembly/superguppy/index.html
JSC Aircraft Operations, http://jsc-aircraft-ops.jsc.nasa.gov/gupindex.htm
If you would like your product reviewed fairly and quickly by a site that averages over 2,500 visits a day, please contact me or see other details in the Note to Contributors.